
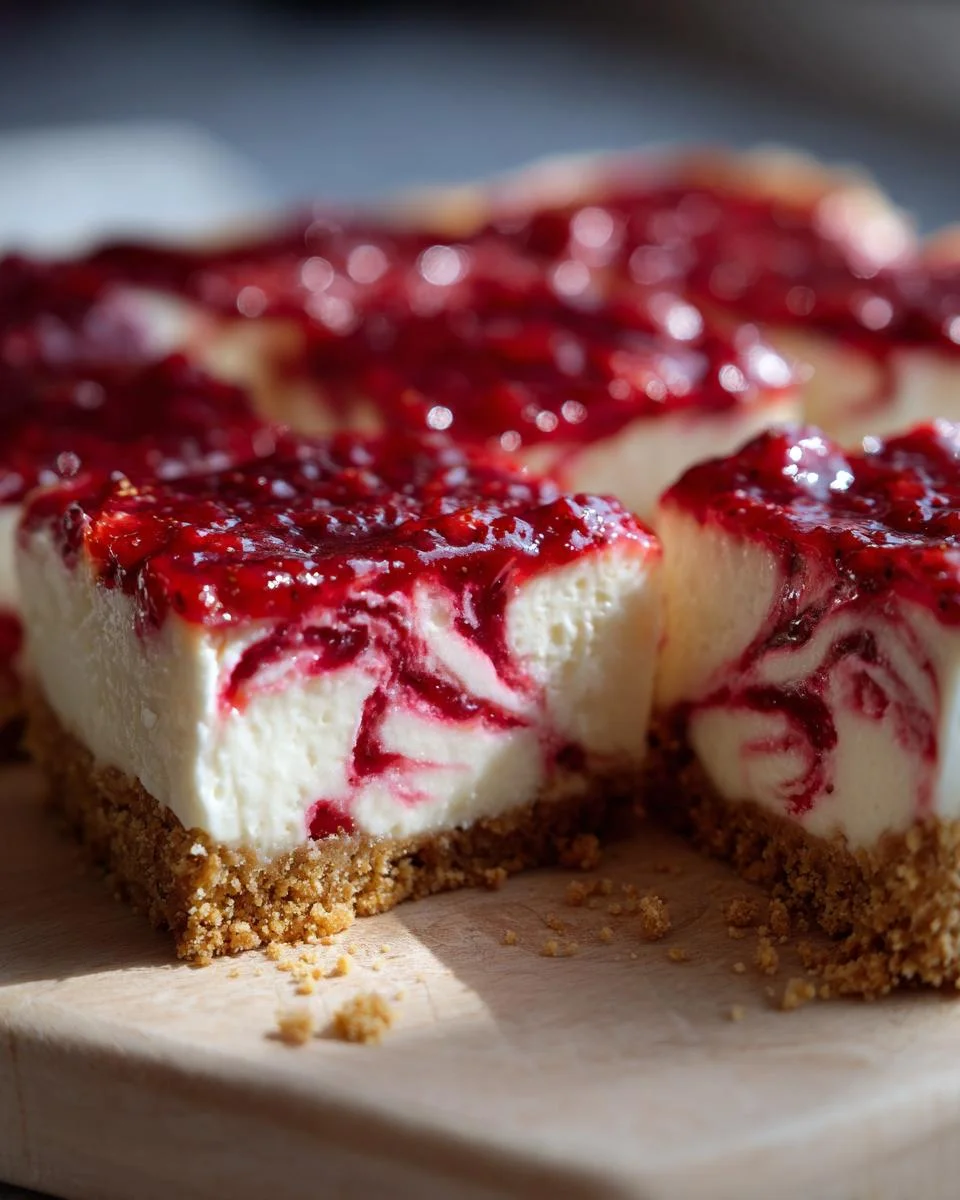
Oh, homemade desserts! They have this magical ability to fill your home with warmth, love, and the sweetest aromas that waft through the air. One of my absolute favorites has to be these delightful Strawberry Cheesecake Bars. Picture this: a buttery graham cracker crust, a creamy cheesecake filling, and a luscious strawberry topping that sings with flavor. It’s like summer on a plate!
This recipe is special to me because it brings back memories of family gatherings and sunny picnics. Whenever I make these bars, I can almost hear the laughter of loved ones and feel the joy of sharing something so delicious. Plus, they’re incredibly easy to whip up! Trust me, once you try these Strawberry Cheesecake Bars, you’ll be hooked – they’re perfect for any occasion, whether it’s a casual weeknight treat or a festive celebration. Let’s dive into this sweet adventure together!
Ingredients List
Gathering the right ingredients is the first step to creating these scrumptious Strawberry Cheesecake Bars. Here’s what you’ll need:
- 12 graham crackers: These will form the base of our delicious bars. They add that perfect crunch and sweetness!
- 1/4 cup sugar: This will sweeten our crust and give it that lovely caramelized flavor when baked.
- 1/2 cup butter, melted: Melted butter binds everything together and adds richness to the crust.
- 16 oz. plain cream cheese, room temperature: Make sure it’s at room temperature for the smoothest cheesecake layer. Trust me, it makes a world of difference!
- 1/4 cup Greek yogurt: This adds a lovely tangy flavor and creaminess to the filling.
- 1 egg: The egg helps set the cheesecake, giving it that perfect texture.
- 3 tbsp sugar: Just a little more sugar for our cheesecake filling to balance the flavors.
- 1 1/2 tsp vanilla extract: Vanilla enhances all the sweet flavors and adds a warm, aromatic touch.
- 1 cup strawberries, chopped: Fresh strawberries are the star of the show! They add sweetness and a pop of color.
- 1 tbsp sugar: This is for macerating the strawberries, helping to bring out their natural juices.
- 1 tbsp lemon juice: A splash of lemon juice brightens the flavor of the strawberries beautifully!
How to Prepare Strawberry Cheesecake Bars
Preparing these Strawberry Cheesecake Bars is a delightful journey that blends flavors and textures in each layer. The process is simple, and I’m here to guide you through every step, ensuring you create a dessert that will impress everyone!
Preparing the Crust
First things first, let’s talk about that crust. Preheat your oven to 350°F (175°C) and line an 8×8 baking dish with parchment paper. This will save you from the dreaded stuck bars later on! Now, grab 12 graham crackers and break them into smaller pieces before tossing them into your food processor. Add in 1/4 cup of sugar, and pulse everything together for about 20 seconds. You want those crackers to turn into fine crumbs.
Next, pour in 1/2 cup of melted butter through the top while pulsing until everything is well combined. It should look like wet sand! Now, take that mixture and press it firmly into the bottom of your prepared baking dish. Use your hands to really pack it down; this will help form a nice sturdy base for our cheesecake layer.
Making the Strawberry Topping
Now, onto the star of the show – the strawberry topping! In a small saucepan, combine 1 cup of chopped strawberries, 1 tablespoon of sugar, and 1 tablespoon of lemon juice. Turn the heat to medium-high and bring it to a boil. As the mixture heats up, you’ll notice the strawberries start to release their juices. Stir gently!
Once it’s boiling, reduce the heat to a simmer and let it cook for about 5-10 minutes. This will help break down the strawberries into a beautiful compote. Keep stirring with a wooden spoon, and don’t be afraid to mash a few strawberries to really enhance that luscious texture. Once it’s thickened, set it aside to cool while we work on the cheesecake layer.
Creating the Cheesecake Layer
For the cheesecake layer, grab a large mixing bowl and add in 16 oz. of plain cream cheese (make sure it’s at room temperature for a smooth blend), 1/4 cup of Greek yogurt, 1 egg, 3 tablespoons of sugar, and 1 1/2 teaspoons of vanilla extract. Using a hand or stand mixer, mix everything together until it’s creamy and smooth. You’ll want to scrape down the sides of the bowl a couple of times to make sure everything is well incorporated.
This step is crucial because you want a velvety filling that will complement the crust and topping perfectly!
Assembling and Baking
Now that we have our crust, strawberry topping, and cheesecake layer ready, it’s time to assemble! Scoop the cheesecake mixture out onto the graham cracker crust, spreading it evenly with a spatula. Here comes the fun part: take half of that cooled strawberry compote and dollop it over the cheesecake layer. Use a small spoon to gently swirl it around – this creates those beautiful marbled effects!
Pop the pan into the oven and bake for about 30 minutes. When the time’s up, remove them from the oven and let the bars sit for 15 minutes at room temperature. Then, transfer the pan to the refrigerator and let those bars cool completely for at least 1 hour. Once they’re chilled, slice them into squares, and get ready to enjoy the sweet, creamy goodness of your Strawberry Cheesecake Bars!
Nutritional Information
Before we dive into the deliciousness of these Strawberry Cheesecake Bars, let’s talk about the nutrition. Keep in mind that the nutritional values can vary based on the specific ingredients and brands you choose, so these numbers are just estimates.
Here’s the typical nutritional information for one bar:
- Calories: 228
- Sugar: 10g
- Sodium: 209mg
- Fat: 17g
- Saturated Fat: 10g
- Unsaturated Fat: 5g
- Trans Fat: 0.2g
- Carbohydrates: 17g
- Fiber: 1g
- Protein: 3g
- Cholesterol: 54mg
Enjoy these bars knowing they’re a delightful treat, but remember that moderation is key when it comes to indulging in sweet desserts!
Why You’ll Love This Recipe
- Quick to Prepare: With just 20 minutes of prep time, you can whip up these Strawberry Cheesecake Bars without breaking a sweat!
- Deliciously Flavorful: The combination of creamy cheesecake and sweet strawberries creates a flavor explosion that will have everyone asking for seconds.
- Crowd-Pleaser: Whether it’s a family gathering or a casual get-together, these bars are always a hit. They disappear fast!
- Beautiful Presentation: The marbled strawberry compote on top makes these bars as visually stunning as they are tasty – perfect for impressing guests!
- Customizable: You can easily switch out the strawberries for other fruits if you’re in the mood for a twist on this classic treat.
Tips for Success
Making the perfect Strawberry Cheesecake Bars is all about a few key details. Here are my top tips to ensure you achieve a delicious result every time!
- Use Room Temperature Ingredients: Always remember to bring your cream cheese and Greek yogurt to room temperature before mixing. This helps create that smooth, creamy filling without any lumps – trust me, it makes all the difference!
- Don’t Overmix: When blending your cheesecake ingredients, mix just until smooth. Overmixing can introduce too much air into the batter, which may cause the cheesecake to crack during baking. A little caution goes a long way!
- Check for Doneness: Keep an eye on your bars while they bake. They’re done when the edges are set but the center still has a slight jiggle. It will continue to firm up as it cools, so don’t overbake!
- Cool Completely Before Slicing: Patience is key here! Allow the bars to cool for at least one hour in the refrigerator before slicing. This helps them set up better and makes for cleaner cuts.
- Experiment with Toppings: Feel free to get creative! Try adding a drizzle of chocolate, crushed nuts, or even a sprinkle of graham cracker crumbs on top for added texture and flavor.
With these tips in mind, you’re well on your way to mastering these delightful Strawberry Cheesecake Bars. Happy baking!
Variations
The beauty of these Strawberry Cheesecake Bars lies in their versatility! Once you get the hang of the basic recipe, feel free to get creative and make it your own. Here are some fun variations you can try:
- Fruit Swaps: While strawberries are a showstopper, you can swap them out for other fruits! Blueberries, raspberries, or even diced peaches work wonderfully. Just remember to adjust the sugar based on the sweetness of the fruit you choose.
- Chocolate Lovers: If you’re a chocolate fan, try adding chocolate chips to the cheesecake layer or mixing cocoa powder into the crust for a delicious twist. You could even top the bars with a chocolate ganache for an extra indulgent treat!
- Nutty Crust: Instead of the classic graham cracker crust, experiment with a nut-based crust. Ground almonds or walnuts mixed with melted butter and a touch of sugar make for a deliciously rich alternative. Just make sure to adjust the quantities to match the graham cracker amount!
- Cheesecake Flavor Variations: Want a different flavor profile? Add a splash of almond extract or lemon zest to the cheesecake mixture for a refreshing twist. You could also mix in some pumpkin puree for a fall-inspired version!
- No-Bake Option: If you’re looking for a no-bake version, you can skip the oven entirely! Just prepare the crust and filling as usual, but instead of baking, let them set in the fridge for a few hours until firm. Perfect for hot summer days!
These variations are just a starting point! Feel free to mix and match to create your perfect Strawberry Cheesecake Bars. Remember, it’s all about having fun in the kitchen and making something you love!
Storage & Reheating Instructions
Once you’ve made these delicious Strawberry Cheesecake Bars, you’ll want to store them properly to keep them fresh and tasty! Here’s how to do it:
First, make sure to let the bars cool completely in the refrigerator for at least an hour after baking. Once they’re chilled, you can cut them into squares. I recommend storing them in an airtight container to prevent any unwanted drying out or absorbing odors from the fridge. They’ll stay fresh for about 4-5 days, but trust me, they probably won’t last that long!
If you want to keep them longer, you can freeze the bars! Just wrap each square individually in plastic wrap, then place them in a freezer-safe bag or container. They’ll hold up well in the freezer for up to three months. When you’re ready to enjoy them, simply remove the desired number of bars and let them thaw in the fridge overnight. You can also pop them in the microwave for about 15-20 seconds if you prefer them a bit warm!
Reheating is super simple, but keep in mind that you want to avoid overheating them. Just a gentle warm-up in the microwave will do the trick, leaving you with that creamy, dreamy texture. Enjoy your Strawberry Cheesecake Bars any time you crave a sweet treat!
FAQ Section
Q1: Can I use frozen strawberries instead of fresh ones?
Absolutely! Frozen strawberries can work well in this recipe. Just remember to thaw them first and drain any excess liquid to avoid making your topping too watery. You might even want to adjust the sugar since frozen strawberries can sometimes be sweeter.
Q2: How can I tell when my Strawberry Cheesecake Bars are done baking?
Great question! They’re done when the edges look set, but the center should still have a slight jiggle. Once cooled, it will firm up nicely. Keep an eye on them to avoid overbaking, which can lead to a dry texture.
Q3: Can I make these bars ahead of time?
Yes! These Strawberry Cheesecake Bars can be made a day in advance. Just cool them completely and store them in the refrigerator. They actually taste even better after a day in the fridge as the flavors have time to meld!
Q4: What if I don’t have Greek yogurt?
No worries! If you don’t have Greek yogurt, you can substitute it with sour cream or even regular yogurt. Just make sure whatever you use is similar in consistency to keep the cheesecake filling creamy and delicious.
Q5: How do I prevent my cheesecake layer from cracking?
To minimize the chances of cracking, make sure your cream cheese is at room temperature before mixing. Also, avoid overmixing the batter. Finally, let the bars cool gradually in the oven with the door slightly ajar after baking, which helps prevent sudden temperature changes that can cause cracks.
For more recipes follow me in page Pinterest.
Print
Strawberry Cheesecake Bars: 5 Irresistible Layers of Joy
- Total Time: 1 hour 50 minutes
- Yield: 16 bars 1x
- Diet: Vegetarian
Description
Delicious Strawberry Cheesecake Bars with a graham cracker crust and creamy filling.
Ingredients
- 12 graham crackers
- 1/4 cup sugar
- 1/2 cup butter, melted
- 16 oz. plain cream cheese, room temperature
- 1/4 cup Greek yogurt
- 1 egg
- 3 tbsp sugar
- 1 1/2 tsp vanilla extract
- 1 cup strawberries, chopped
- 1 tbsp sugar
- 1 tbsp lemon juice
Instructions
- Preheat oven to 350° and line an 8×8 baking dish with parchment paper; set aside.
- For the crust: Add graham crackers and sugar to your food processor and pulse for 20 seconds. Then, add the melted butter in through the top and continue pulsing until combined. Transfer the mixture to the prepared baking pan and use your hands to press the crust down into the pan.
- For the strawberry topping: Add the strawberries, sugar and lemon juice to a small saucepan and bring them to a boil. Then, reduce heat to a simmer and simmer for 5-10 minutes, using a wooden spoon to help break down the strawberries; set aside to cool a bit.
- For the cheesecake layer: Add the cream cheese, yogurt, egg, sugar, and vanilla to a large bowl and mix with a hand or stand mixer until smooth.
- Scoop the cheesecake mixture out onto the graham cracker crust and smooth it out. Then, use a small spoon to dollop HALF of the strawberry compote overtop and swirl it around.
- Place the pan in the oven and bake the bars for 30 minutes. Remove them from the oven and wait 15 minutes before transferring them to the refrigerator for at least 1 hour to allow them to cool completely. Slice and enjoy!
Notes
- Calories are per bar and are an estimation
- Prep Time: 20 minutes
- Cook Time: 30 minutes
- Category: Dessert
- Method: Baking
- Cuisine: American
Nutrition
- Serving Size: 1 bar
- Calories: 228
- Sugar: 10g
- Sodium: 209mg
- Fat: 17g
- Saturated Fat: 10g
- Unsaturated Fat: 5g
- Trans Fat: 0.2g
- Carbohydrates: 17g
- Fiber: 1g
- Protein: 3g
- Cholesterol: 54mg
Keywords: Strawberry Cheesecake Bars