
As a busy mom, I know how challenging it can be to whip up something delicious and satisfying in a hurry. That’s where Spicy Tuna Onigiri comes in! These delightful Japanese rice balls are not only quick to make but also packed with flavor. Whether you’re looking for a quick snack or a meal that will impress your loved ones, this recipe is a perfect solution. With just a few simple ingredients, you can create a tasty treat that everyone will love. Trust me, once you try these, they’ll become a staple in your kitchen!
Print
Spicy Tuna Onigiri: A Delicious Must-Try Recipe!
- Total Time: 45 minutes
- Yield: 4 servings 1x
- Diet: Gluten Free
Description
Spicy Tuna Onigiri is a flavorful Japanese rice ball filled with a spicy tuna mixture, perfect for a quick snack or meal.
Ingredients
- 2 cups sushi rice
- 2 1/2 cups water
- 1 can (5 oz) tuna, drained
- 2 tablespoons mayonnaise
- 1 tablespoon sriracha sauce
- 1 teaspoon soy sauce
- 1/2 teaspoon sesame oil
- Salt, to taste
- Nori sheets, cut into strips
Instructions
- Rinse the sushi rice under cold water until the water runs clear.
- Combine the rinsed rice and water in a rice cooker and cook according to the manufacturer’s instructions.
- In a bowl, mix the drained tuna, mayonnaise, sriracha, soy sauce, sesame oil, and salt until well combined.
- Once the rice is cooked, let it cool slightly until it’s manageable.
- Wet your hands and take a small amount of rice, flatten it in your palm.
- Add a spoonful of the spicy tuna mixture in the center of the rice.
- Carefully mold the rice around the filling to form a triangle shape.
- Wrap a strip of nori around the onigiri for added flavor and presentation.
- Repeat the process until all ingredients are used.
- Serve immediately or store in an airtight container in the refrigerator.
Notes
- Adjust the spiciness by adding more or less sriracha.
- For a vegetarian option, substitute tuna with mashed avocado or a vegetable filling.
- Onigiri can be made ahead of time and stored in the fridge for a quick snack.
- Prep Time: 15 minutes
- Cook Time: 30 minutes
- Category: Snack
- Method: No-cook, Cooking
- Cuisine: Japanese
Nutrition
- Serving Size: 1 onigiri
- Calories: 200
- Sugar: 1g
- Sodium: 300mg
- Fat: 10g
- Saturated Fat: 1g
- Unsaturated Fat: 8g
- Trans Fat: 0g
- Carbohydrates: 24g
- Fiber: 1g
- Protein: 8g
- Cholesterol: 20mg
Keywords: Spicy Tuna Onigiri, Japanese rice balls, sushi rice, tuna recipe
Table of Contents
Why You’ll Love This Spicy Tuna Onigiri
What’s not to love about Spicy Tuna Onigiri? They’re incredibly easy to make, taking just 45 minutes from start to finish. Perfect for busy days, these rice balls are a delightful blend of flavors that will tantalize your taste buds. Plus, they’re versatile! You can customize the spice level to suit your family’s preferences. Trust me, once you make these, they’ll quickly become a go-to recipe in your home!
Ingredients for Spicy Tuna Onigiri
Gathering the right ingredients is key to making delicious Spicy Tuna Onigiri. Here’s what you’ll need:
- Sushi Rice: This short-grain rice is sticky and perfect for molding into onigiri. It gives the rice balls their signature texture.
- Water: Essential for cooking the sushi rice to the right consistency. The right water-to-rice ratio is crucial for fluffy rice.
- Tuna: Canned tuna is a convenient protein source. Make sure to drain it well for the best flavor and texture.
- Mayonnaise: Adds creaminess to the tuna mixture. You can use regular or light mayo based on your preference.
- Sriracha Sauce: This spicy sauce brings the heat! Adjust the amount to suit your taste, or swap it for a milder sauce if needed.
- Soy Sauce: A splash of soy sauce enhances the umami flavor of the tuna. Opt for low-sodium if you’re watching your salt intake.
- Sesame Oil: Just a hint of this oil adds a nutty flavor that complements the other ingredients beautifully.
- Salt: A pinch of salt helps to balance the flavors. Adjust to your liking.
- Nori Sheets: These seaweed sheets are perfect for wrapping your onigiri. They add flavor and make for a lovely presentation.
For exact quantities, check the bottom of the article where you can find a printable version of the recipe. Feel free to get creative with your ingredients! You can substitute tuna with mashed avocado for a vegetarian option or add chopped veggies for extra crunch. The possibilities are endless!
How to Make Spicy Tuna Onigiri
Making Spicy Tuna Onigiri is a fun and rewarding process. Follow these simple steps to create your own delicious rice balls. Trust me, it’s easier than you think!
Step 1: Rinse the Sushi Rice
Start by rinsing the sushi rice under cold water. This step is crucial! Rinsing removes excess starch, which can make the rice gummy. You want your rice to be sticky but not overly so. Rinse until the water runs clear, and then you’re ready for the next step.
Step 2: Cook the Rice
Next, combine the rinsed rice and water in your rice cooker. Follow the manufacturer’s instructions for cooking. If you don’t have a rice cooker, you can use a pot on the stove. Just bring the water to a boil, then reduce the heat and cover. Cook until the water is absorbed. Perfect sushi rice should be fluffy and slightly sticky.
Step 3: Prepare the Spicy Tuna Mixture
While the rice is cooking, it’s time to prepare the spicy tuna mixture. In a bowl, combine the drained tuna, mayonnaise, sriracha, soy sauce, sesame oil, and a pinch of salt. Mix everything until well combined. Taste it! Adjust the sriracha if you want more heat. This mixture is the heart of your onigiri.
Step 4: Shape the Onigiri
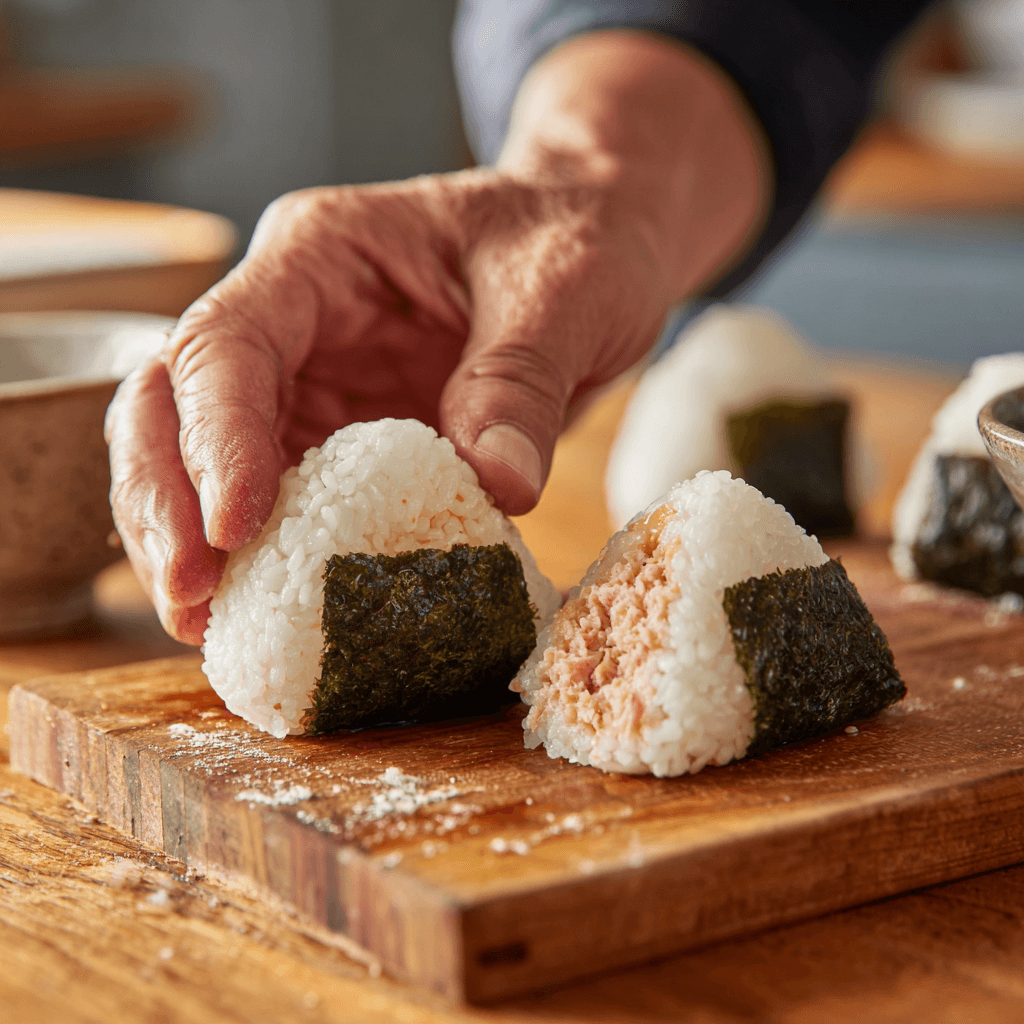
Once the rice has cooled slightly, it’s time to shape your onigiri. Wet your hands to prevent sticking. Take a small amount of rice and flatten it in your palm. Add a spoonful of the spicy tuna mixture in the center. Carefully mold the rice around the filling to form a triangle shape. It’s like giving your rice a cozy little hug!
Step 5: Wrap with Nori
Now for the finishing touch! Take a strip of nori and wrap it around your onigiri. This not only adds flavor but also makes it easy to hold. Plus, it looks beautiful! If you’re feeling creative, you can cut the nori into fun shapes.
Step 6: Serve or Store
Your Spicy Tuna Onigiri is ready to enjoy! Serve them immediately for the best taste. If you have leftovers, store them in an airtight container in the fridge. They make a great snack for later. Just remember, they’re best eaten fresh!
Tips for Success
- Always rinse your sushi rice thoroughly for the best texture.
- Let the rice cool slightly before shaping to avoid burns.
- Use wet hands when handling rice to prevent sticking.
- Adjust the spice level of the tuna mixture to suit your family’s taste.
- Wrap onigiri in nori just before serving for maximum crispness.
Equipment Needed
- Rice Cooker: Ideal for perfectly cooked sushi rice. A pot works too!
- Mixing Bowl: For combining the spicy tuna mixture. Any bowl will do.
- Measuring Cups: Helpful for precise ingredient amounts, but you can eyeball it!
- Plastic Wrap: Useful for shaping onigiri if you prefer a cleaner method.
Variations of Spicy Tuna Onigiri
- Vegetarian Onigiri: Swap the tuna for mashed avocado or a mix of diced cucumbers and carrots for a fresh, crunchy filling.
- Spicy Salmon Onigiri: Use canned salmon instead of tuna, and mix it with the same spicy ingredients for a different flavor profile.
- Quinoa Onigiri: Substitute sushi rice with cooked quinoa for a protein-packed, gluten-free option.
- Herbed Onigiri: Add fresh herbs like cilantro or green onions to the rice for an aromatic twist.
- Cheesy Onigiri: Incorporate a small cube of cheese in the center of the rice ball for a creamy surprise!
Serving Suggestions for Spicy Tuna Onigiri
- Fresh Salad: Pair your onigiri with a light cucumber salad for a refreshing contrast.
- Green Tea: Enjoy with a warm cup of green tea to enhance the flavors.
- Pickled Vegetables: Serve with pickled radishes or ginger for a tangy bite.
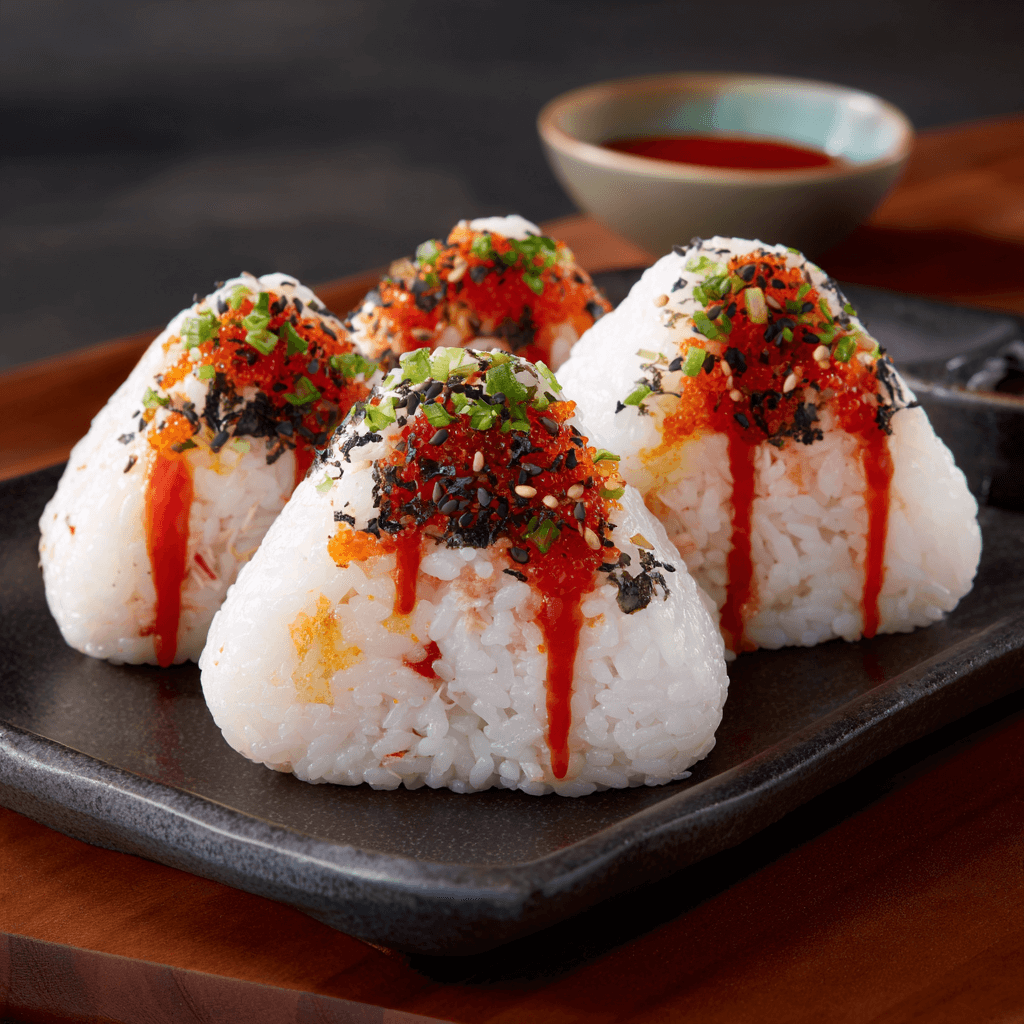
- Presentation: Arrange on a colorful plate and garnish with sesame seeds for a beautiful display.
For more recipes follow me in page Facebook and Pinterest
FAQs about Spicy Tuna Onigiri
Can I make Spicy Tuna Onigiri ahead of time?
Absolutely! You can prepare the onigiri in advance and store them in an airtight container in the fridge. They’re perfect for quick snacks or lunches throughout the week. Just remember to wrap them in nori just before serving for the best texture.
What can I use instead of tuna?
If tuna isn’t your thing, no worries! You can substitute it with mashed avocado for a creamy vegetarian option. Alternatively, try using canned salmon or a mix of diced vegetables for a fresh twist.
How do I adjust the spice level?
Adjusting the spice level is easy! Simply add more or less sriracha to the tuna mixture based on your family’s preferences. You can also use a milder sauce if you want to tone down the heat.
Is Spicy Tuna Onigiri gluten-free?
Yes! This recipe is gluten-free as long as you use gluten-free soy sauce. Always check the labels to ensure your ingredients meet your dietary needs.
Can I freeze Spicy Tuna Onigiri?
While it’s best to enjoy them fresh, you can freeze the onigiri. Just wrap them tightly in plastic wrap and store in a freezer-safe container. Thaw in the fridge before serving, but keep in mind that the texture may change slightly.
Final Thoughts
Making Spicy Tuna Onigiri is more than just cooking; it’s about creating moments of joy in the kitchen. Each rice ball is a little bundle of flavor that brings smiles to my family’s faces. Whether it’s a quick lunch or a fun snack, these onigiri are versatile and satisfying. Plus, they’re a fantastic way to involve your kids in the kitchen! I love how simple ingredients can come together to create something so delightful. So, roll up your sleeves and give this recipe a try. You might just find a new family favorite!