
There’s something utterly delightful about whipping up a batch of No-Bake Oreo Cheesecake Cups. Seriously, it’s one of those desserts that always brings a smile to my face, and I can’t help but share it with friends and family! The beauty of this recipe lies in its simplicity and the fact that you don’t need to turn on the oven. Just think about it: creamy cheesecake, crunchy Oreo goodness, and you can have it all ready in a snap!
Every time I make these cups, I’m transported back to summer BBQs and get-togethers where everyone would eagerly dig in. The layers of crushed Oreos and the sweet, velvety cheesecake filling create a perfect balance that is simply irresistible. Plus, they’re customizable! You can throw in your favorite flavors or toppings, making each batch uniquely yours. It’s a dessert that caters to all ages and occasions, and trust me, no one can resist them! So, let’s dive into this easy-peasy recipe that’s sure to impress everyone at your next gathering.
Ingredients List
You’ll love how simple and straightforward the ingredients are for these No-Bake Oreo Cheesecake Cups! Here’s what you’ll need:
- 1 8 oz block of cream cheese, softened
- 1 8 oz container of Cool Whip or whipped topping
- 2/3 cup powdered sugar
- 1 teaspoon vanilla extract
- 24-26 Oreo cookies, plus more for topping if desired
These ingredients come together to create a creamy, dreamy dessert that’s sure to please. Keep them handy, and let’s get ready to whip up something delicious!
How to Prepare No-Bake Oreo Cheesecake Cups
Preparing these No-Bake Oreo Cheesecake Cups is a breeze, and I’m excited to guide you through each step! Trust me, once you get the hang of it, you’ll be whipping these up for every occasion. Let’s get started!
Step-by-Step Instructions
First things first, we need to crush those Oreos. Grab a sturdy plastic bag and toss in about 24-26 Oreo cookies. Seal it up tight, then take a rolling pin and crush them into fine crumbs. You want a nice, crumbly texture that will form a delicious base for our cheesecake cups. This should only take a few minutes.
Next, take your dessert dishes (I love using small mason jars or cute little cups for this) and spoon about 1 1/2 to 2 tablespoons of those crushed Oreos into the bottom of each dish. Press them down gently to create a solid base. This is super important because it helps hold everything together when you’re digging in!
Now, let’s make that creamy cheesecake filling! In a mixing bowl, add your softened cream cheese and powdered sugar. Using a mixer, whip them together until it’s smooth and creamy. You want to make sure there are no lumps here, so take your time with this step. Once it’s nice and fluffy, add in the vanilla extract and mix until combined.
Here comes the fun part—folding in the Cool Whip! Gently add your whipped topping into the cream cheese mixture. Use a spatula to fold it in; this keeps the mixture light and airy. Be careful not to over-mix, as we want that lightness to stay!
Now, it’s time to add in the remaining crushed Oreos. Just fold those in as well, and oh boy, the flavor is going to be incredible!
Once your filling is ready, divide it evenly across the dessert dishes. Press it down gently onto the Oreo base to ensure a good mix of flavors. Now, this is a crucial step: cover your cups with plastic wrap and pop them in the fridge for at least one hour. This chilling time allows the flavors to meld beautifully and helps the cheesecake set up nicely.
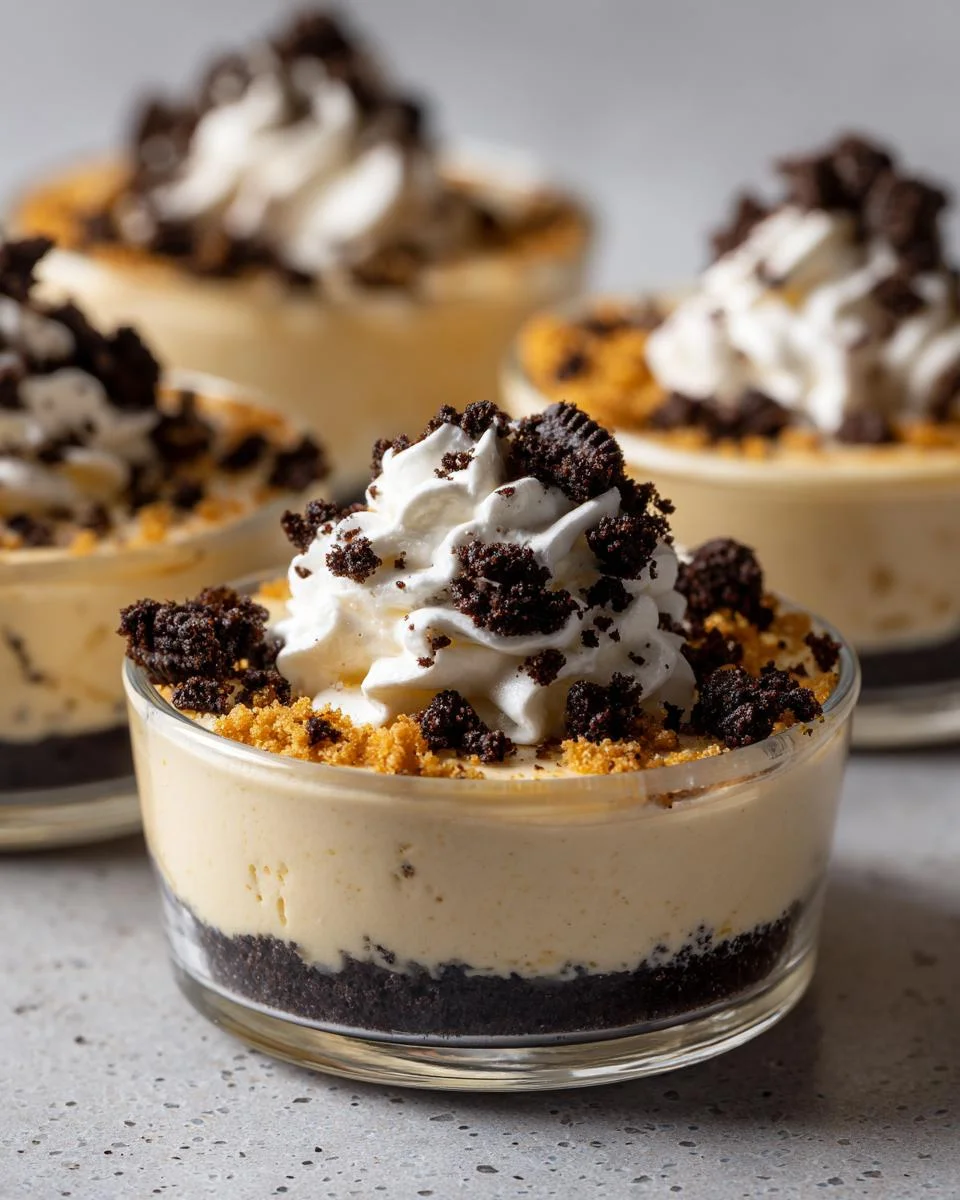
When you’re ready to serve, take them out and add a dollop of whipped cream on top, maybe sprinkle on some more crushed Oreos for that extra crunch. These little cups of joy are now ready to be devoured, and I guarantee they’ll be a hit! Enjoy!
Why You’ll Love This Recipe
If you’re looking for reasons to fall head over heels for these No-Bake Oreo Cheesecake Cups, I’ve got a few that will certainly have you convinced:
- Quick Preparation: You can whip these up in just 20 minutes! With no baking involved, you’ll spend less time in the kitchen and more time enjoying the company of your loved ones.
- No-Bake Method: No need to worry about turning on the oven or timing it just right. Just mix, layer, and chill—easy peasy!
- Versatility: Whether it’s a birthday party, a family gathering, or just a cozy night in, you can customize these cups with different Oreo flavors or delightful toppings to match any occasion.
- Make-Ahead Delight: These cups can be prepared a day in advance, making them a perfect stress-free dessert option. Just chill and serve when you’re ready!
- Fun for Everyone: Kids and adults alike can’t resist the combination of creamy cheesecake and crunchy Oreos. They’re a surefire hit at any gathering!
Honestly, once you make these, you’ll be hooked. They’re just that good! Plus, the joy of seeing everyone’s faces light up when they take that first bite? Priceless!
Tips for Success
To ensure your No-Bake Oreo Cheesecake Cups turn out absolutely perfect, I’ve gathered some of my best tips that have served me well over the years. Trust me, these little nuggets of wisdom will make a world of difference!
- Use Room Temperature Cream Cheese: This is a game changer! Make sure your cream cheese is softened to room temperature before mixing. It blends smoothly with the powdered sugar, eliminating lumps and creating that luscious texture we all crave.
- Gentle Folding Technique: When it comes to folding in the Cool Whip and crushed Oreos, be gentle! You want to preserve that light, airy texture. Use a spatula and lift the mixture from the bottom to the top, turning it over rather than stirring vigorously. This keeps your filling fluffy!
- Chill Time is Key: Don’t rush the chilling process! Allow at least one hour in the fridge for the flavors to meld and the cheesecake to set. If you can, let them chill longer—overnight is even better for the ultimate flavor explosion!
- Customize Your Oreos: Feel free to experiment with different Oreo flavors! Mint Oreos, peanut butter Oreos, or even the seasonal pumpkin spice ones can add a fun twist and make your cheesecake cups extra special.
- Presentation Matters: Serve your cheesecake cups in fun dishes or jars for a charming touch. Layering them parfait-style with visible Oreo and cheesecake layers makes for a stunning presentation that’s sure to impress!
By keeping these tips in mind, you’ll elevate your No-Bake Oreo Cheesecake Cups to a whole new level. I can’t wait for you to taste the delightful results!
Variations of No-Bake Oreo Cheesecake Cups
One of the things I absolutely love about these No-Bake Oreo Cheesecake Cups is how versatile they are! You can easily switch things up to suit your taste or the occasion. Here are some fun variations to inspire your creativity in the kitchen:
- Different Oreo Flavors: Don’t limit yourself to the classic! Try using mint Oreos for a refreshing twist or peanut butter Oreos for a rich, nutty flavor. The seasonal flavors like pumpkin spice or red velvet are also fantastic options that can bring a fun seasonal flair to your dessert table!
- Layered Parfait Style: Instead of just a bottom layer, you can create a stunning parfait by layering crushed Oreos, cheesecake filling, and whipped cream. This not only looks gorgeous but also gives everyone a delicious mix of textures in every spoonful!
- Fruit Additions: Add some fresh fruit for a burst of flavor! Sliced strawberries, raspberries, or even banana slices can complement the rich cheesecake perfectly. Just sprinkle them in between layers for a delightful surprise.
- Chocolate Drizzle: For those chocolate lovers out there, a drizzle of chocolate sauce over the top before serving is simply divine! It adds an extra layer of indulgence that elevates the entire dessert.
- Nutty Crunch: Toss in some chopped nuts, like walnuts or pecans, into the layers for a satisfying crunch. It’s a great way to add some texture and flavor that balances beautifully with the creamy filling.
Feel free to mix and match these ideas to create your perfect No-Bake Oreo Cheesecake Cups! The possibilities are endless, and I can’t wait for you to try some of these delicious variations. It’s all about making it your own and having fun in the process!
Nutritional Information
Here’s the estimated nutritional breakdown for each serving of these delightful No-Bake Oreo Cheesecake Cups. Keep in mind that these values are approximate and can vary based on the specific ingredients you use:
- Calories: 408
- Fat: 22g
- Saturated Fat: 11g
- Cholesterol: 48mg
- Sodium: 314mg
- Carbohydrates: 50g
- Fiber: 1g
- Sugar: 35g
- Protein: 5g
This indulgent dessert serves up a satisfying treat, and while it’s rich, it’s perfect for those special occasions where you want to indulge just a little! Enjoy every creamy, dreamy bite!
Serving Suggestions
When it comes to serving up these No-Bake Oreo Cheesecake Cups, the options are as delightful as the dessert itself! Here are some ideas to enhance your cheesecake experience and impress your guests:
- Fresh Berries: A side of fresh strawberries, raspberries, or blueberries adds a burst of color and a juicy contrast to the richness of the cheesecake. They’re not just pretty; they also bring a refreshing tartness that balances the sweetness perfectly!
- Chocolate-Dipped Fruit: Elevate your dessert table with some chocolate-dipped strawberries or bananas. The chocolate pairs beautifully with the creamy texture of the cheesecake and adds a touch of elegance!
- Coffee or Espresso: Serve your cheesecake cups alongside a rich cup of coffee or a shot of espresso. The deep flavors of coffee complement the sweetness of the cheesecake and make for a delightful after-dinner treat!
- Ice Cream: For an indulgent twist, offer a scoop of vanilla or cookies and cream ice cream on the side. The cold, creamy ice cream is a fantastic pairing that brings a new level of decadence to each bite!
- Homemade Whipped Cream: While you’ll already have some whipped cream on top of the cups, serving extra on the side invites your guests to add their desired amount. Who doesn’t love a little extra fluffiness?
- Nutty Toppings: Set out a small bowl of chopped nuts, like pecans or walnuts, for guests to sprinkle on their cups. The crunch adds a lovely texture that contrasts wonderfully with the creaminess.
These serving suggestions not only enhance the flavors of the No-Bake Oreo Cheesecake Cups but also create a fun and interactive dessert experience for your guests. Enjoy the smiles as everyone indulges in this delightful treat!
FAQ Section
Got questions about making these scrumptious No-Bake Oreo Cheesecake Cups? I’ve got you covered! Here are some common queries I hear, along with my answers to help you whip up the perfect dessert.
Q1: Can I make these No-Bake Oreo Cheesecake Cups ahead of time?
Absolutely! In fact, making them a day in advance is a fantastic idea. Just prepare your cups, cover them tightly with plastic wrap, and let them chill in the fridge overnight. This extra time really allows the flavors to meld beautifully, and you’ll have a delicious dessert ready to go for your next gathering!
Q2: What if I don’t have Cool Whip? Can I use homemade whipped cream instead?
Yes, you can definitely use homemade whipped cream! Just whip up some heavy cream until stiff peaks form and gently fold it into your cream cheese mixture. Keep in mind that homemade whipped cream may be a tad less stable than Cool Whip, so it’s best to serve them soon after assembling.
Q3: Can I use different flavors of Oreos for this recipe?
Absolutely! One of the best things about these No-Bake Oreo Cheesecake Cups is their versatility. Feel free to experiment with any Oreo flavor you love—mint, peanut butter, or even the seasonal varieties like pumpkin spice! Each will give your cheesecake a unique twist that’s sure to impress!
Q4: How should I store leftovers?
If you happen to have any leftovers (which is rare!), simply cover them with plastic wrap or transfer them to an airtight container and store them in the fridge. They should stay fresh for about 3-4 days. Just be sure to enjoy them quickly because they’re best served within a few days!
Q5: Can I freeze these No-Bake Oreo Cheesecake Cups?
Yes, you can freeze them! Just make sure they’re well-covered to prevent freezer burn. When you’re ready to enjoy, let them thaw in the fridge for a few hours before serving. The texture might change slightly, but they’ll still be delicious!
I hope these answers help you feel more confident in making your No-Bake Oreo Cheesecake Cups! For more recipes follow me in page Pinterest!
Print
No-Bake Oreo Cheesecake Cups: 5 Irresistible Layers to Delight
- Total Time: 1 hour 20 minutes
- Yield: 6 servings 1x
- Diet: Vegetarian
Description
Delicious and easy No-Bake Oreo Cheesecake Cups.
Ingredients
- 1 8 oz block of cream cheese, softened
- 1 8 oz. Cool Whip or whipped topping
- 2/3 c powdered sugar
- 1 tsp vanilla
- 24–26 Oreo cookies, more as desired
Instructions
- Place the Oreos in a plastic bag and seal. Crush the Oreos using a rolling pin.
- Spoon 1 1/2 – 2 tablespoons of crushed Oreos into the bottom of 6 small dessert dishes.
- Using a mixer, whip cream cheese and powdered sugar until creamy.
- Add vanilla and mix in.
- Gently fold in the Cool Whip.
- Fold in remaining crushed Oreos.
- Divide the filling evenly across the dishes and press onto the crushed Oreos.
- Chill for about 1 hour or until ready to serve.
- Top with whipped cream and more crushed Oreos before serving.
Notes
- You can layer this dessert for a parfait style.
- Any Oreo flavor works.
- Add peppermint extract and mint Oreos for a minty treat.
- Prep Time: 20 minutes
- Cook Time: 0 minutes
- Category: Dessert
- Method: No-Bake
- Cuisine: American
Nutrition
- Serving Size: 1 cup
- Calories: 408
- Sugar: 35g
- Sodium: 314mg
- Fat: 22g
- Saturated Fat: 11g
- Unsaturated Fat: N/A
- Trans Fat: N/A
- Carbohydrates: 50g
- Fiber: 1g
- Protein: 5g
- Cholesterol: 48mg
Keywords: No-Bake Oreo Cheesecake Cups