
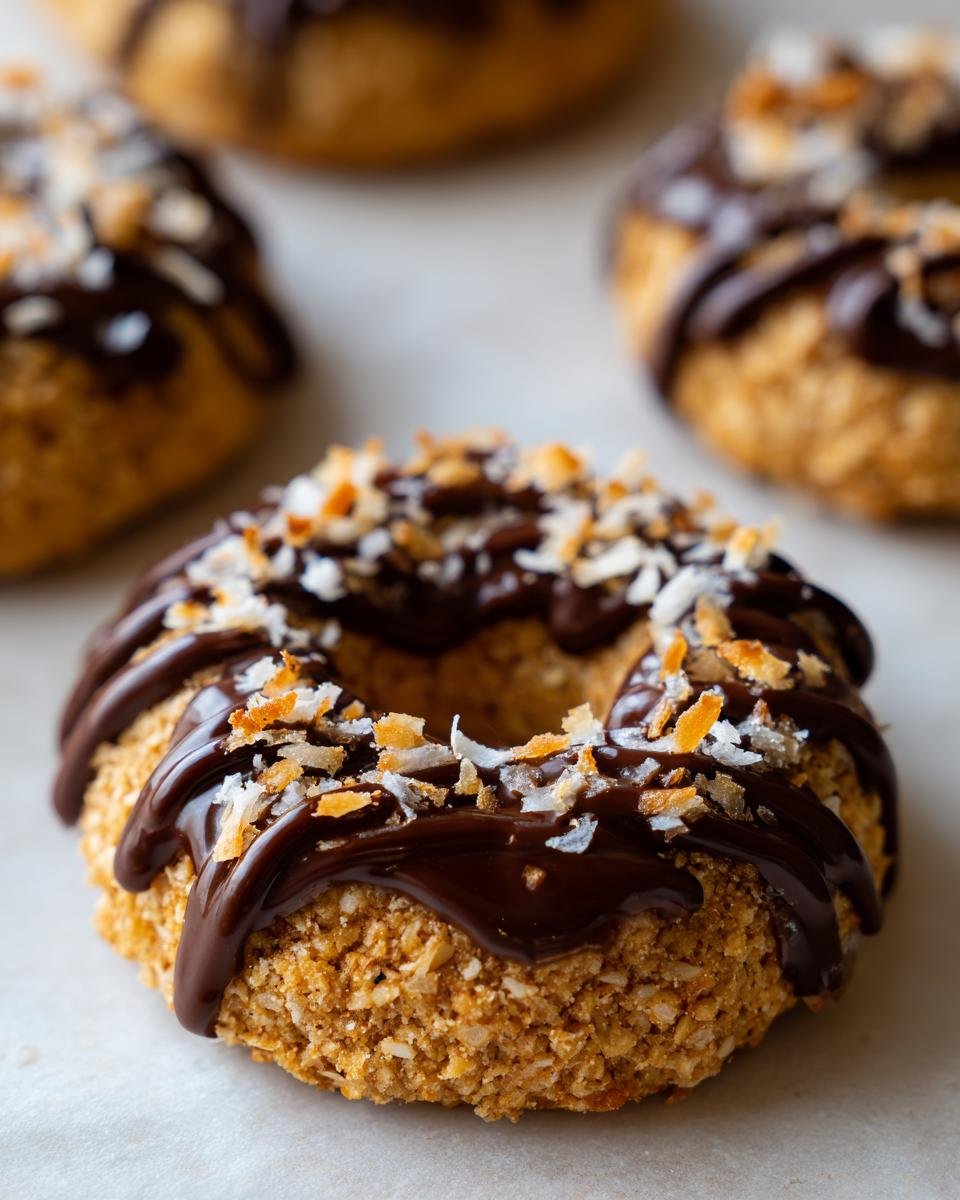
Oh my goodness, let me tell you about these Homemade Samoas Cookies! They’ve become a cherished treat in my house, and I just can’t get enough of them. The best part? They’re vegan and made with wholesome ingredients like Medjool dates and unsweetened coconut! Seriously, you won’t believe how simple they are to whip up, and yet they taste like a gourmet dessert. Each bite is a delightful combination of chewy sweetness from the dates, a nutty crunch from the toasted coconut, and a rich, decadent chocolate coating. It’s like a little piece of heaven that you can feel good about indulging in. Plus, they’re naturally sweetened, so you can enjoy them without the guilt. Whether it’s for an afternoon snack, a party, or just to satisfy a cookie craving, these Samoas cookies are sure to impress. Trust me, once you try them, they’ll be on repeat in your kitchen!
Ingredients List
- 1 cup pitted Medjool dates (about 10 dates)
- 1 cup unsweetened shredded coconut
- ⅓ cup dark chocolate (I love using Lily’s chocolate chips for a low-sugar option)
- ½ teaspoon coconut oil
How to Prepare Homemade Samoas Cookies
Preheat and Toast
First things first, let’s get that oven preheating to 400°F (200°C). This step is super important because it helps bring out the flavor of the coconut! While that’s heating up, grab a baking sheet and spread your shredded coconut evenly across it. We’re going to toast it for about 3–5 minutes. But careful! This part can go from golden brown to burnt in the blink of an eye, so keep a close eye on it. You’ll want it just lightly toasted and fragrant, which will add that irresistible crunch to your cookies.
Prepare the Dough
Once your coconut is toasty and your oven is ready, it’s time to mix our dough! Toss the pitted Medjool dates and that gorgeous toasted coconut into a food processor. Pulse it all together until you get a sticky dough ball. It should come together nicely, but if it’s a bit crumbly, don’t worry. Just pulse it a little longer until it forms that perfect sticky consistency. This dough is the heart of your cookies, so give it some love!
Shape the Cookies
Now comes the fun part—shaping your cookies! Take about a tablespoon of dough and roll it into a ball between your palms. I like to make them nice and round, but feel free to adjust the size to your liking. Once you have your dough balls, grab a straw or chopstick and gently press down in the center to create a little hole. This is key for that classic Samoas look! Just make sure you don’t press too hard; we want them to hold their shape while baking.
Chill the Cookies
After shaping, it’s time to chill! Place your cookies on a parchment-lined baking sheet and pop them in the freezer for about 5 minutes. This step helps them firm up a bit, making it easier to coat them in chocolate later on. Trust me, it’s worth the wait!
Melt the Chocolate
While the cookies are chilling, let’s get our chocolate ready! In a microwave-safe bowl, combine the dark chocolate and coconut oil. Microwave it in 20–30 second intervals, stirring in between, until it’s smooth and glossy. You want it to be pourable but not too thick. If it feels a bit too stiff, you can add a tiny touch more coconut oil to help it along.
Coat the Cookies
Now for the best part—coating your cookies! Take each chilled cookie and dip the bottom into the melted chocolate. Let the excess drip off for a moment before placing them back on the parchment. Then, with the remaining chocolate, drizzle it over the tops of your cookies for that delicious finishing touch. It’s all about that artistic flair, right?
Final Chill
Once all your cookies are coated, it’s time for one last chill! Pop them back in the freezer or fridge for about 10–15 minutes to let the chocolate harden. This is the moment you’ve been waiting for! Once the chocolate is set, they’re ready to enjoy. But seriously, try to wait just a little longer before digging in; the anticipation makes them taste even better!
Why You’ll Love This Recipe
- Delicious Flavor: Each bite is a heavenly combination of chewy dates, crunchy toasted coconut, and rich chocolate that will satisfy your sweet tooth.
- Wholesome Ingredients: Made with natural ingredients like Medjool dates and unsweetened coconut, these cookies are a guilt-free indulgence!
- Vegan-Friendly: Perfect for those following a vegan lifestyle, these cookies deliver on taste without any animal products.
- Easy to Make: With just a few simple steps, you can whip up a batch of these cookies in under 30 minutes. No complicated techniques required!
- Perfect for Any Occasion: Whether it’s a snack, a party treat, or a dessert to impress your friends, these cookies are versatile and always a hit.
- Customizable: Feel free to adapt the recipe by adding in your favorite ingredients or flavors, making each batch uniquely yours!
Tips for Success
To make sure your Homemade Samoas Cookies turn out absolutely perfect, I’ve got a few tried-and-true tips that will set you up for success!
Choose High-Quality Medjool Dates
When it comes to dates, go for the Medjool variety! They’re naturally sweet, soft, and sticky—perfect for binding the cookies together. If your dates are a bit hard or dry, just soak them in warm water for about 10–15 minutes before using. This little trick will help them blend smoothly into that delicious dough.
Don’t Skip the Toasting Step
Toasting the coconut is a game-changer! It enhances the flavor and gives your cookies that delightful crunch. Just remember to keep an eye on it while it’s toasting, as it can go from perfect to burnt in no time. I usually set a timer and check every minute to make sure it doesn’t get too dark.
Consistent Cookie Size
For even baking, try to make your cookie balls the same size. I like to use a tablespoon for measuring, but feel free to use a cookie scoop if you have one! This will ensure that all your cookies bake evenly and look beautiful on the platter.
Let the Chocolate Cool Slightly
When melting your chocolate, let it cool for a minute before dipping the cookies. If it’s too hot, it can make your cookies mushy. You want that perfect balance of melted chocolate that coats beautifully without compromising the cookie’s shape.
Don’t Rush the Chilling Process
Patience is key! Chilling the cookies before and after coating them in chocolate helps everything set properly. If you skip this step, your cookies might fall apart when you try to coat them. Trust me, the wait is worth it for that perfectly hardened chocolate layer!
By keeping these tips in mind, you’ll have a batch of Homemade Samoas Cookies that are sure to impress! Happy baking!
Variations
Now that you’ve mastered the classic Homemade Samoas Cookies, let’s have some fun with variations! There are so many delicious ways to customize this recipe, and I can’t wait to share a few of my favorites with you.
Add Different Nuts or Seeds
If you’re feeling adventurous, try mixing in some chopped nuts or seeds for added crunch and flavor! Toasted almonds or pecans pair beautifully with the coconut and chocolate. Just be sure to chop them finely so they blend in nicely with the dough.
Experiment with Flavors
Want to switch things up? Feel free to add a splash of flavor! A teaspoon of almond extract or vanilla extract can elevate the taste and give your cookies a whole new vibe. You could even experiment with a hint of orange or lemon zest for a refreshing twist!
Change Up the Chocolate
While dark chocolate is my go-to, you can use milk chocolate or white chocolate if that’s more your style. Each type brings its own flavor, and you can even mix different chocolates for a fun marbled effect. Just keep an eye on the sweetness level, as some chocolates can be sweeter than others.
Try Different Sweeteners
If you’re looking for a different sweetness profile, you can substitute honey or maple syrup for the dates in the dough. Just remember that this will change the texture a bit, so you might need to adjust the amount of shredded coconut to get the right consistency.
Add Superfoods for a Nutritional Boost
Want to make these cookies even healthier? Toss in some chia seeds, flaxseeds, or even a scoop of your favorite protein powder into the dough! This adds extra nutrients and makes them a bit more filling. Just be mindful of the moisture content—adjust the other ingredients as needed to keep that perfect dough consistency.
These variations are just the tip of the iceberg! Feel free to get creative and make these Homemade Samoas Cookies uniquely yours. Each batch is a chance to explore new flavors and combinations. Happy experimenting!
Storage & Reheating Instructions
Now that you’ve made your delicious Homemade Samoas Cookies, you’ll want to keep them fresh and tasty for as long as possible! Here’s how to store them properly:
Storing Your Cookies
First off, make sure your cookies are completely cooled before storing them. If you try to store them while they’re still warm, they might become mushy, and nobody wants that! Once they’re cool, place them in an airtight container. I like to separate layers with parchment paper to keep them from sticking together. You can store them in the fridge for up to one week, which helps maintain that yummy chocolate coating and chewy texture.
If you want to keep them for even longer, you can freeze your cookies! Just pop them in a freezer-safe bag or container, separating layers with parchment paper as before. They’ll stay fresh for up to three months. When you’re ready to enjoy them again, just take them out and let them thaw at room temperature for a while. This way, you’ll have a sweet treat on hand whenever the craving strikes!
Reheating Instructions
If you prefer your cookies warm or slightly melty, you can gently reheat them. Just pop one in the microwave for about 10-15 seconds—enough to warm it up without making it too soft. You can also place them in a preheated oven at 350°F (175°C) for about 5 minutes. This will refresh the chocolate and make those delicious flavors pop! Just keep an eye on them to prevent overbaking.
By following these storage and reheating tips, your Homemade Samoas Cookies will stay fresh, chewy, and utterly delightful every time you reach for one! Enjoy!
Nutritional Information Disclaimer
While I’ve shared some nutritional information for these Homemade Samoas Cookies, it’s important to remember that the values can vary based on the specific ingredients you use. Things like the brand of chocolate or the size of your Medjool dates can change the overall nutrition profile.
If you’re keeping an eye on your dietary needs, I encourage you to check the nutritional data for your own ingredients. This way, you can get a more accurate picture of what you’re enjoying. After all, it’s all about finding that perfect balance that works for you!
FAQ Section
Q1. Can I use other types of dates besides Medjool?
While Medjool dates are my personal favorite for their sweetness and texture, you can use other varieties like Deglet Noor. Just keep in mind that they might not be as soft, so you might need to soak them longer to get that perfect consistency.
Q2. How do I know when the toasted coconut is done?
Great question! The coconut should be a lovely light golden brown, and you’ll notice a nutty aroma filling your kitchen. I usually set a timer for 3 minutes and then check every minute after that to avoid burning. It can go from perfect to burnt pretty quickly!
Q3. Can I make these cookies ahead of time?
Absolutely! These cookies are great for meal prep. You can make them a few days in advance or even freeze them for later. Just remember to store them in an airtight container to keep them fresh!
Q4. What can I use instead of coconut oil?
If you’re out of coconut oil, you can substitute it with another neutral oil, like vegetable or grapeseed oil. Just keep in mind that it may slightly change the flavor, but they’ll still be delicious!
Q5. How can I make these cookies less sweet?
If you’d like to tone down the sweetness, try reducing the amount of chocolate you use for coating or opt for a dark chocolate with a higher cocoa content. You can also adjust the amount of dates in the dough to suit your taste!
For more recipes follow me in page Pinterest.
Print
Homemade Samoas Cookies: 5 Steps to Delightful Indulgence
- Total Time: 25 minutes
- Yield: 12 cookies 1x
- Diet: Vegan
Description
Homemade Samoas Cookies are a delicious treat made with dates, coconut, and chocolate.
Ingredients
- 1 cup pitted Medjool dates (about 10 dates)
- 1 cup unsweetened shredded coconut
- ⅓ cup dark chocolate (Lily’s chocolate chips for low sugar)
- ½ teaspoon coconut oil
Instructions
- Preheat oven to 400°F (200°C). Spread shredded coconut on a baking sheet and toast for 3–5 minutes until light golden brown. Watch closely to prevent burning.
- Add the dates and toasted coconut to a food processor. Pulse until the mixture forms a sticky dough ball.
- Remove from the processor. Roll dough into 1 Tablespoon-sized balls and shape into rounds. Use a straw or chopstick to punch a hole in the center, adjusting as needed.
- Place cookies on a parchment-lined sheet and freeze for about 5 minutes to firm up.
- Melt chocolate and coconut oil in a shallow microwave-safe bowl in 20–30 second intervals until smooth.
- Dip the bottom of each cookie in melted chocolate and drizzle remaining chocolate over the top.
- Return cookies to the freezer or fridge for 10–15 minutes to harden the chocolate.
- Enjoy immediately or store in a sealed container in the fridge for up to one week.
Notes
- Hard or dry dates: Soak in warm water for 10–15 minutes, then drain well.
- Coconut oil: Thins melted chocolate and helps it harden in the freezer. Can be skipped, but chocolate will be thicker.
- Add protein powder: For protein Samoas, add 1 scoop of vanilla protein powder with 1–4 Tablespoons of water in the processor with dates and coconut. Adjust water as needed depending on the type of protein powder.
- Prep Time: 20 minutes
- Cook Time: 5 minutes
- Category: Dessert
- Method: Baking
- Cuisine: American
Nutrition
- Serving Size: 1 cookie
- Calories: 124 kcal
- Sugar: 15 g
- Sodium: 3 mg
- Fat: 6 g
- Saturated Fat: 5 g
- Carbohydrates: 20 g
- Fiber: 4 g
- Protein: 1 g
- Cholesterol: 1 mg
Keywords: Homemade Samoas Cookies, coconut cookies, chocolate cookies, vegan cookies