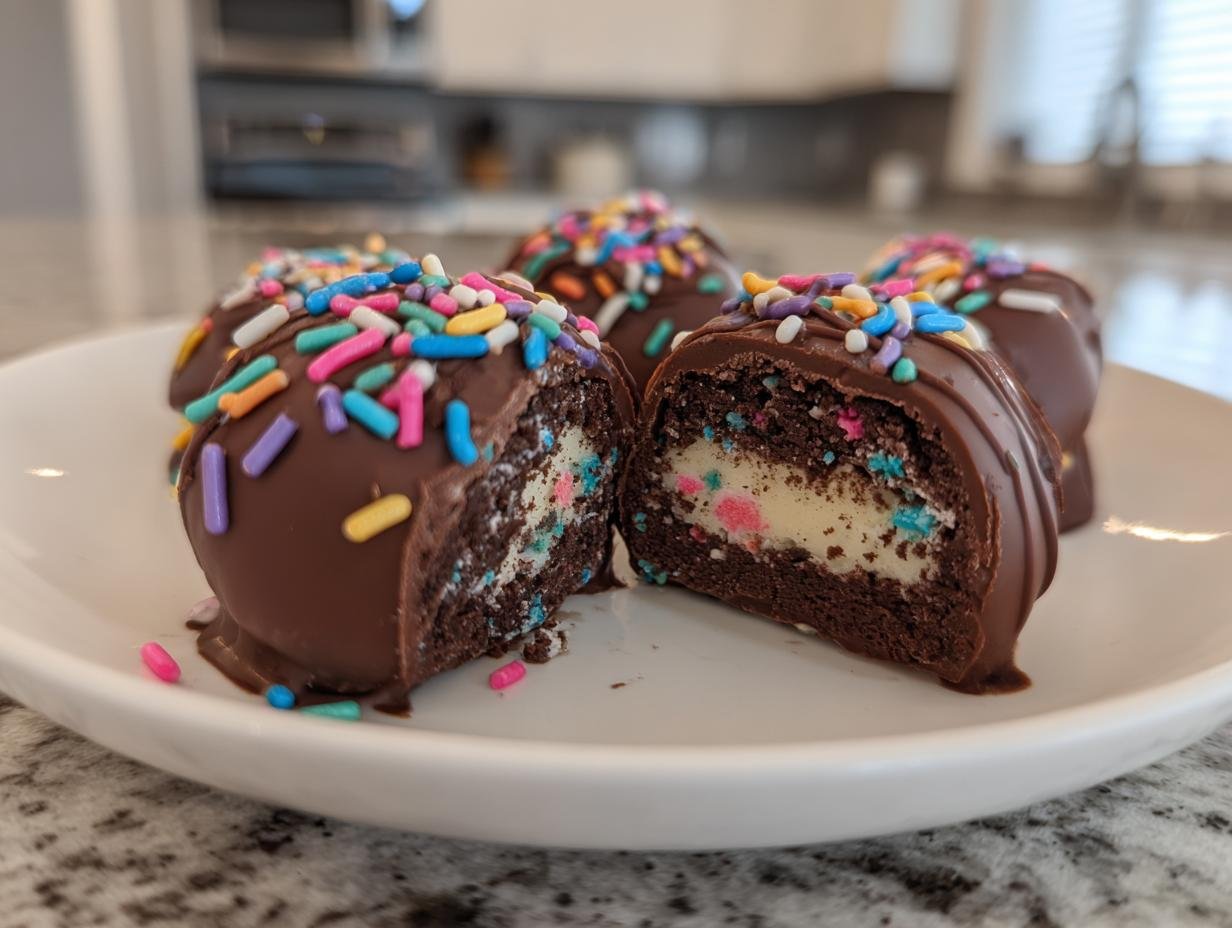
There’s something magical about whipping up no-bake treats during the holiday season. It’s like a sweet little gift you can give to yourself while making memories with loved ones. Trust me, Holiday Oreo Balls are the ultimate crowd-pleaser – they’re quick, delightful, and always disappear in a flash! I remember the first time I made them for our family Christmas party. I was a bit frazzled, trying to get everything ready, but these little gems saved the day. My kids helped crush the Oreos, and we laughed as we got chocolate everywhere – even on the dog! The joy of rolling those chocolate-covered balls and then decorating them with sprinkles was such a fun activity. Plus, when everyone took a bite and their eyes lit up, I knew I had found a winner. Now, every holiday season, these Holiday Oreo Balls are a must-have on our dessert table, bringing smiles and deliciousness to our gatherings. If you’re looking for a treat that’s simple yet so satisfying, you’ve come to the right place!
Ingredients for Holiday Oreo Balls
- 1 package Oreo cookies (36 cookies) – the classic chocolate sandwich cookies that bring rich flavor.
- 8 oz cream cheese, softened – this adds a creamy texture and rich taste that binds everything together.
- 2 cups white chocolate chips – for dipping and creating that sweet, smooth coating.
- Sprinkles for decoration – the fun and festive touch to make your Oreo balls pop!
How to Prepare Holiday Oreo Balls
Making Holiday Oreo Balls is as simple as it is satisfying. Trust me, you’ll love how easy it is to whip these up! Just follow these straightforward steps, and you’ll have delicious treats ready to impress your family and friends in no time.
Step-by-Step Instructions
- Crush the Oreo cookies: Start by grabbing your food processor and tossing in the entire package of Oreo cookies. Pulse them until they’re finely crushed into a sandy texture. If you don’t have a food processor, you can put the cookies in a resealable plastic bag and crush them with a rolling pin—just make sure to get them nice and fine!
- Mix with cream cheese: In a large bowl, combine the crushed Oreos with the softened cream cheese. Use a spatula or your hands to mix them until fully combined. The mixture should be thick and moldable—this is what will hold your balls together!
- Shape the mixture: Now comes the fun part! Roll the mixture into small balls, about one inch in diameter. Place them on a baking sheet lined with parchment paper. This prevents them from sticking and makes cleanup a breeze.
- Chill for 30 minutes: Pop the baking sheet into the refrigerator and let those little beauties chill for about 30 minutes. This step is key for helping them hold their shape when you dip them in chocolate!
- Melt the white chocolate: While the Oreo balls are chilling, it’s time to melt your white chocolate chips. Use a microwave-safe bowl and heat them in 30-second intervals, stirring in between until smooth. Be careful not to overheat—burnt chocolate is a bummer!
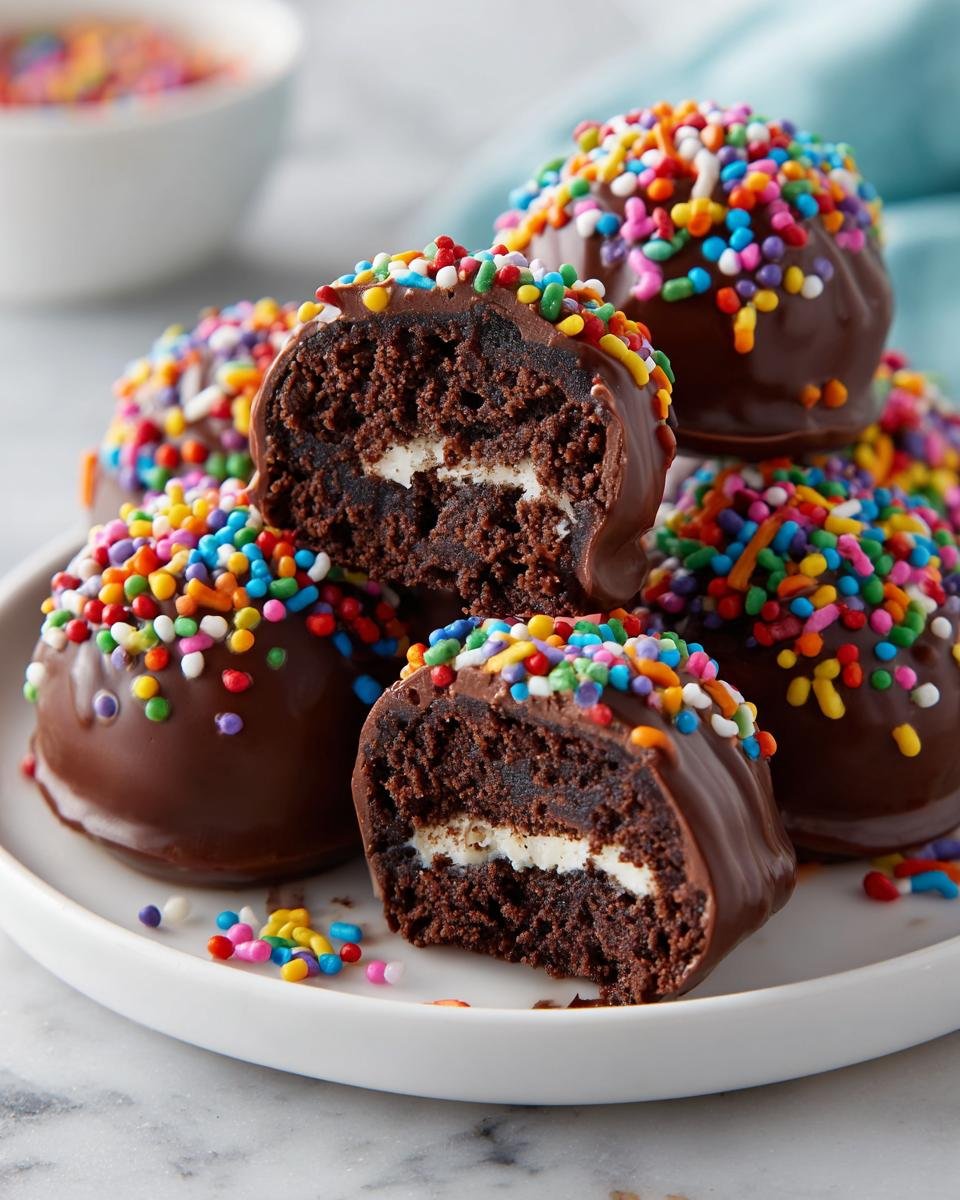
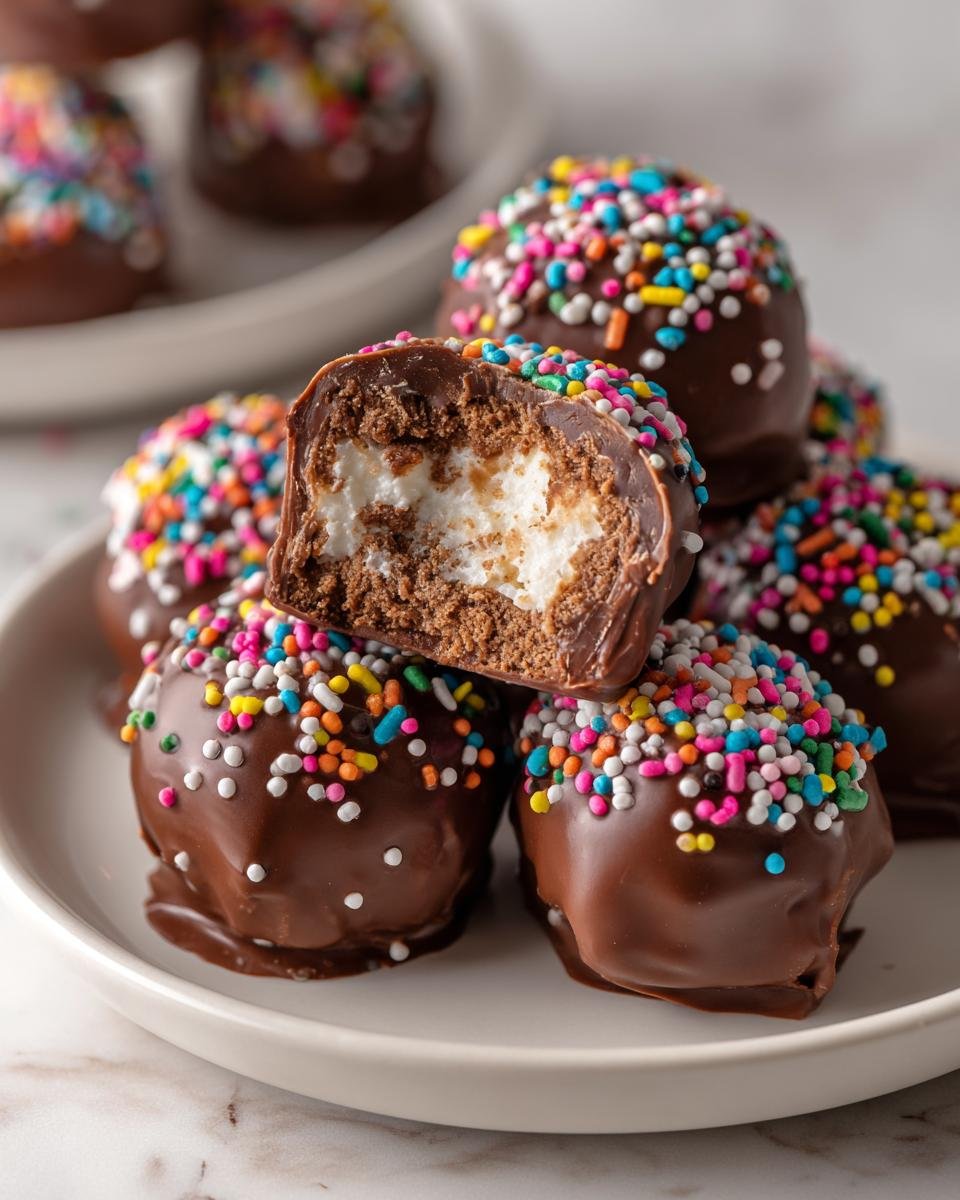
- Dip each ball: Once the Oreo balls are firm, take them out of the fridge. Using a fork or a toothpick, dip each ball into the melted chocolate, ensuring they’re fully coated. Let the excess chocolate drip off before placing them back on the baking sheet.
- Decorate: While the chocolate is still wet, sprinkle your favorite decorations on top. Whether it’s colorful sprinkles or crushed candy canes, this is your chance to get creative!
- Set in the fridge: Finally, return the baking sheet to the refrigerator and let the chocolate set for about 15 minutes. You’ll want to ensure the coating is firm before enjoying your creations.
And there you have it! These Holiday Oreo Balls are not only super easy to make, but they’re also incredibly fun to customize. Enjoy the process, and don’t forget to taste along the way—after all, that’s part of the fun!
Why You’ll Love Holiday Oreo Balls
- Quick and Easy: These treats come together in just 20 minutes of prep time, making them a go-to option for last-minute holiday gatherings!
- No-Bake Delight: No ovens involved, which means less mess and more time to enjoy the festivities.
- Customizable: You can switch up the toppings, use different chocolate for dipping, or even add flavorings to the cream cheese mixture. The possibilities are endless!
- Kid-Friendly: Perfect for involving little helpers in the kitchen—rolling the balls and decorating with sprinkles is a blast!
- Always a Crowd-Pleaser: Whether it’s a holiday party or just a cozy night in, these Holiday Oreo Balls are sure to impress everyone with their rich flavor and fun presentation.
Tips for Success with Holiday Oreo Balls
To make sure your Holiday Oreo Balls turn out perfectly every time, I’ve got a few little tips that will help you achieve the best texture and flavor. Trust me, these small details can make a big difference!
Use softened cream cheese: Make sure your cream cheese is nice and soft before mixing it with the crushed Oreos. If it’s too cold, you’ll end up with lumps, and we want that smooth, creamy texture!
Chill before dipping: Chilling the shaped balls for at least 30 minutes is crucial. It helps them firm up, so they hold their shape when you dip them in the melted chocolate. Nobody wants a chocolate puddle!
Don’t overheat the chocolate: When melting your white chocolate, be patient. Heat it in short intervals and stir in between. This prevents burning and ensures a smooth, glossy finish. If it does get too thick, you can stir in a teaspoon of vegetable oil to loosen it up a bit.
Get creative with decorations: Have fun with the toppings! From festive sprinkles to drizzles of colored chocolate, this is your chance to get inventive. You can even make themed Oreo balls for different holidays—imagine red and green for Christmas!
With these simple tips, you’ll be well on your way to making the most delicious Holiday Oreo Balls. Enjoy the process and celebrate every bite!
Variations of Holiday Oreo Balls
One of the best things about Holiday Oreo Balls is how easily they can be customized to fit your taste or the occasion. Let’s dive into some fun variations that will keep things exciting!
Chocolate Options: Instead of using just white chocolate for dipping, why not try milk or dark chocolate? Each type brings its own unique flavor to the party, and you can even mix them for a beautiful marbled effect!
Flavor Additions: Want to switch things up a bit? Consider adding a splash of peppermint extract to the cream cheese mixture for a refreshing twist. It pairs beautifully with the chocolate and gives those holiday vibes a boost!
Candy Mix-Ins: You can also fold in mini chocolate chips or crushed candy canes right into the Oreo mixture. This adds another layer of texture and flavor that’ll surprise your taste buds!
Seasonal Themes: Get creative with decorations for different seasons. Use pastel sprinkles for Easter, spooky toppings for Halloween, or red and green for Christmas. The sky’s the limit!
With these variations, you can make Holiday Oreo Balls truly your own. So, gather your loved ones, get experimenting, and enjoy every delightful bite!
Nutritional Information for Holiday Oreo Balls
When you’re indulging in Holiday Oreo Balls, it’s good to know what you’re treating yourself to! Here’s an estimated breakdown of the nutritional information for one delicious ball:
- Calories: 120
- Fat: 7g
- Saturated Fat: 4g
- Trans Fat: 0g
- Cholesterol: 10mg
- Sodium: 50mg
- Carbohydrates: 14g
- Fiber: 1g
- Sugar: 10g
- Protein: 1g
Keep in mind that these values are approximate and can vary based on the specific brands of ingredients you use. But hey, a little indulgence during the holidays is totally worth it, right?
Storage & Reheating Instructions
Storing your Holiday Oreo Balls is super simple! Just place any leftover treats in an airtight container, and they’ll stay fresh in the refrigerator for up to a week. Trust me, they rarely last that long in my house, but it’s nice to know they can hold up for a few days!
If you want to enjoy them later, there’s no need for reheating—these delicious bites are best enjoyed chilled. Just pull them out of the fridge when you’re ready to indulge, and they’ll be ready to go! You can also pop them in the freezer if you want to keep them for a longer time. Just make sure to separate layers with parchment paper to prevent sticking. When you’re ready to enjoy them, let them thaw in the fridge for a bit before digging in. They’re just as delightful, and trust me, the chocolate coating stays perfectly smooth!
Frequently Asked Questions about Holiday Oreo Balls
Got questions about making these delightful Holiday Oreo Balls? I’ve got you covered! Here are some common queries that come up, along with my best tips to ensure your treats turn out perfectly.
Can I use different types of cookies instead of Oreos? Absolutely! While Oreos are classic, you can experiment with any chocolate sandwich cookies or even vanilla ones for a different flavor. Just keep the cream cheese to cookie ratio the same for best results.
How long do these Oreo balls last? When stored in an airtight container in the fridge, these Holiday Oreo Balls can last up to a week. If you want to keep them longer, just pop them in the freezer!
Can I make these in advance? Yes, you can! These treats are perfect for making ahead of time. Just prepare them a few days before your gathering and store them in the fridge until you’re ready to serve.
What if my chocolate gets too thick while dipping? No worries! If your melted chocolate thickens up, simply stir in a teaspoon of vegetable oil to smooth it out. This will help you achieve that perfect coating!
For more recipes follow me in page Pinterest.
With these FAQs in mind, you’re all set to make some amazing Holiday Oreo Balls that everyone will love!
Print
Holiday Oreo Balls: 7 Joyful Steps to Festive Treats
- Total Time: 50 minutes
- Yield: 24 balls 1x
- Diet: Vegetarian
Description
Delicious no-bake treats made with Oreo cookies and cream cheese, perfect for holidays.
Ingredients
- 1 package Oreo cookies (36 cookies)
- 8 oz cream cheese, softened
- 2 cups white chocolate chips
- Sprinkles for decoration
Instructions
- Crush the Oreo cookies in a food processor until fine.
- Mix crushed Oreos with softened cream cheese until well combined.
- Shape the mixture into small balls and place them on a baking sheet.
- Chill the balls in the refrigerator for 30 minutes.
- Melt the white chocolate chips in a microwave-safe bowl.
- Dip each ball into the melted chocolate, covering completely.
- Place the chocolate-covered balls back on the baking sheet.
- Sprinkle with decorations before the chocolate hardens.
- Refrigerate until set, about 15 minutes.
Notes
- Store in an airtight container in the fridge.
- These can be made a few days in advance.
- Try different types of chocolate for a variation.
- Prep Time: 20 minutes
- Cook Time: 0 minutes
- Category: Dessert
- Method: No-bake
- Cuisine: American
Nutrition
- Serving Size: 1 ball
- Calories: 120
- Sugar: 10g
- Sodium: 50mg
- Fat: 7g
- Saturated Fat: 4g
- Unsaturated Fat: 2g
- Trans Fat: 0g
- Carbohydrates: 14g
- Fiber: 1g
- Protein: 1g
- Cholesterol: 10mg
Keywords: Holiday Oreo Balls, no-bake dessert, Oreo recipes