
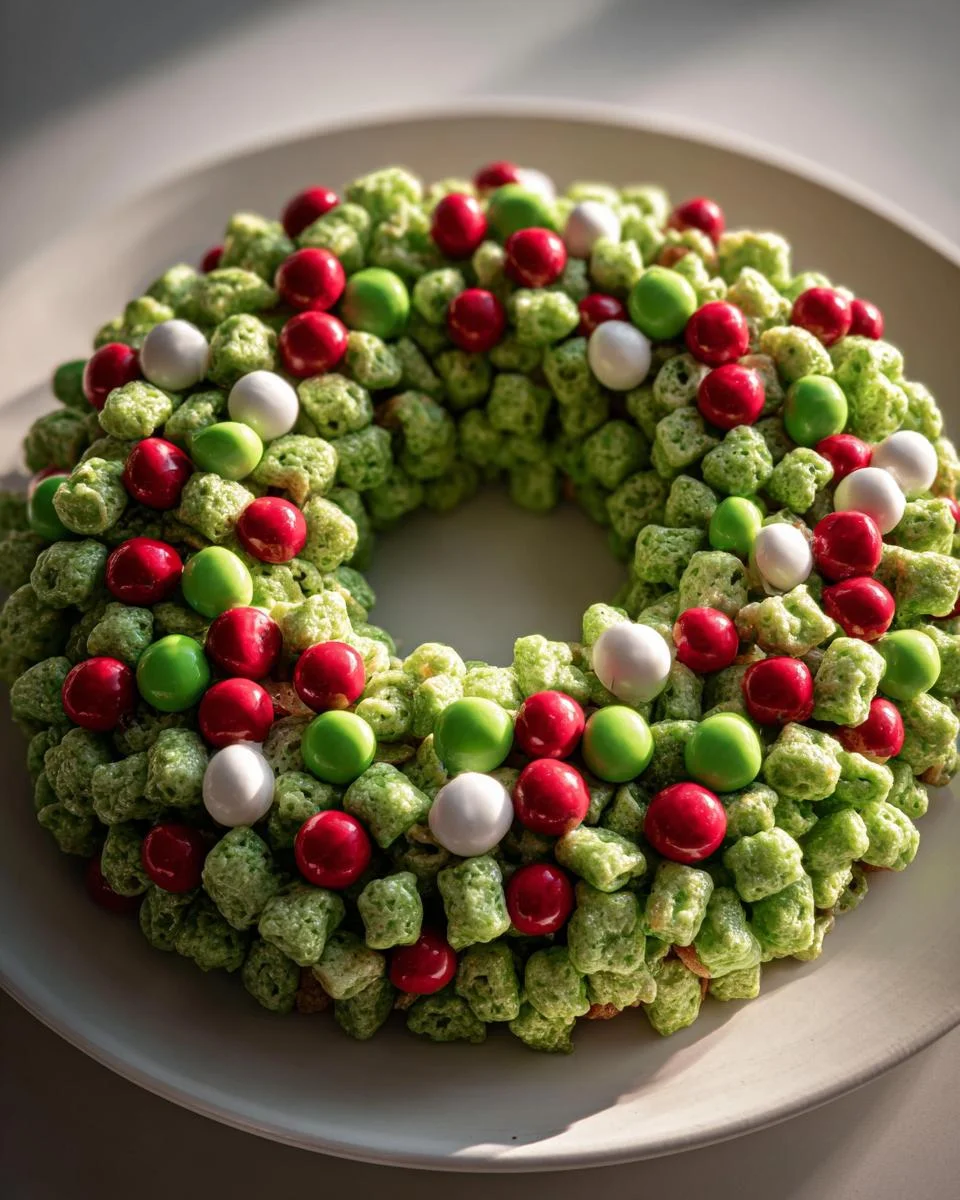
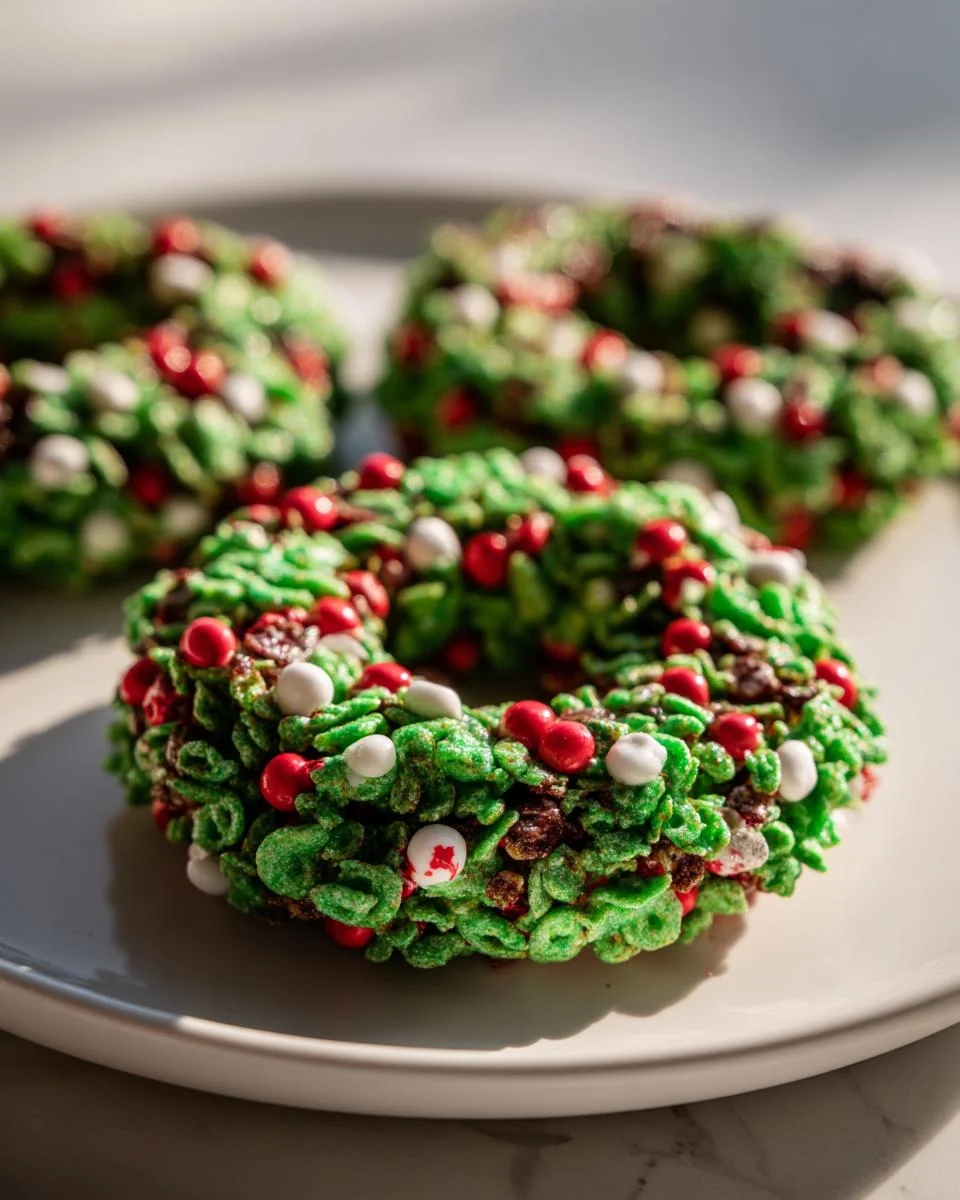
Oh my goodness, let me tell you about the joy of making Holiday Cornflake Wreaths! Every year, as the festive season rolls around, I can’t help but get giddy just thinking about these delightful treats. They’re not just a sweet snack; they’re a fun-filled tradition that brings the whole family together in the kitchen. My kids and I gather around the table, laughing and chatting as we melt candy and mix in the cornflakes and marshmallows. There’s something magical about shaping those wreaths, each one a bit different, and adding colorful decorations that make them look like they belong on a holiday postcard!
Plus, they’re so easy to whip up, which is perfect when you need a quick treat for gatherings or to gift to friends and neighbors. The best part? Watching those little faces light up when they see these whimsical wreaths – it’s pure holiday magic! So, grab your apron and let’s dive into this festive fun together!
Ingredients for Holiday Cornflake Wreaths
Now, let’s get to the fun part – gathering all the ingredients you’ll need to create these festive delights! Here’s what you’ll need:
- 2 cups of cornflakes: The star of the show! Make sure they’re nice and crunchy to hold their shape.
- 1 cup of mini marshmallows: These add a chewy sweetness that balances out the crunch of the cornflakes. Trust me, you’ll want these in every wreath!
- 1/2 cup of green candy melts: This is what gives our wreaths that classic holiday color. You can find these in most craft or baking stores.
- 1/4 cup of red candy decorations: Whether you go for sprinkles, red M&Ms, or any other festive candy, these little pops of color make your wreaths look irresistible.
- Optional: Chopped nuts or additional sprinkles for extra texture and decoration if you’re feeling adventurous!
Gather these ingredients, and you’ll be all set to create wreaths that are as delightful to look at as they are to eat! Let’s get started on preparing this festive treat!
How to Prepare Holiday Cornflake Wreaths
Alright, let’s roll up our sleeves and get into the fun part of making these adorable Holiday Cornflake Wreaths! I promise it’s a blast, and you’ll love how easy it is to bring these to life!
Prepare the Mixture
First things first, we need to melt those green candy melts. Grab a microwave-safe bowl and add your 1/2 cup of candy melts. Microwave them in 30-second intervals, stirring in between until they’re completely melted and smooth. This should take about 1-2 minutes total. Don’t rush it! If you overheat them, they can seize up. Once melted, gently fold in the 2 cups of cornflakes and 1 cup of mini marshmallows. Make sure everything is well-coated – this is what binds our wreaths together!
Form the Wreaths
Now comes the fun part – shaping those wreaths! I like to use a little bit of cooking spray on my hands to prevent sticking. Scoop out a handful of the mixture and form it into a circle, pressing it together firmly. Aim for about a 4-5 inch diameter. It doesn’t have to be perfect – the charm is in the uniqueness of each wreath! Once shaped, place it on parchment paper or a silicone baking mat. Before they set, sprinkle on those festive red candy decorations or any other toppings you fancy to make them pop!
Let Them Set
After all your wreaths are shaped and decorated, let them sit at room temperature for about 30 minutes. This is crucial because it allows the candy melts to harden up, giving your wreaths that perfect shape. If you’re in a hurry, you can pop them in the refrigerator for about 10-15 minutes instead. Once they’re set, you can store them in an airtight container at room temperature until you’re ready to serve. Trust me, they’ll be a hit at your holiday gatherings!
Why You’ll Love This Recipe
- Quick Preparation: You can whip up these delightful wreaths in no time, making them perfect for last-minute holiday treats!
- Festive Appearance: The vibrant colors and fun shapes are a feast for the eyes, instantly bringing holiday cheer to any gathering.
- Fun for Kids: This is a fantastic activity to get the little ones involved in the kitchen, and they’ll love shaping and decorating their own wreaths!
- Customizable: You can easily switch up the decorations and colors to match any holiday theme or personal preference.
- Deliciously Sweet: The combination of crunchy cornflakes and chewy marshmallows creates a delightful treat that everyone will adore!
- Great for Gifting: Pack them up in festive bags or boxes for a sweet homemade gift that friends and family will cherish.
Tips for Success
Making Holiday Cornflake Wreaths is a blast, but there are a few tips that’ll help you nail it and avoid any hiccups along the way! Trust me, these little pointers will make your wreath-making experience smooth and enjoyable!
- Get the Right Temperature: When melting your candy melts, make sure your microwave is set at a lower power level if possible. This helps prevent them from overheating and seizing up. You want that smooth, silky texture!
- Stir Gently: When mixing in the cornflakes and marshmallows, be gentle! You don’t want to crush the cornflakes. A light folding motion works best to keep them nice and crunchy.
- Use Cooking Spray: Spraying your hands with a bit of cooking spray makes shaping the wreaths much easier and keeps the mixture from sticking to you. It’s a game changer, I promise!
- Don’t Rush the Setting: Allowing the wreaths to set is crucial. If you’re in a hurry, pop them in the fridge, but don’t skip this step! Proper setting ensures they hold their shape and look beautiful.
- Have Fun with Toppings: Feel free to get creative with your decorations! Different colored sprinkles, edible glitter, or even holiday-themed candies can add a unique touch to each wreath.
- Make a Double Batch: These wreaths disappear quickly! If you’re making them for a gathering, I’d recommend doubling the recipe. You can never have too many festive treats!
With these tips in your back pocket, you’ll be well on your way to creating perfect Holiday Cornflake Wreaths that’ll be the talk of your holiday celebrations! Happy wreath-making!
Variations of Holiday Cornflake Wreaths
The beauty of Holiday Cornflake Wreaths lies in their versatility! Once you’ve mastered the basic recipe, the sky’s the limit for fun variations. Here are some exciting ideas to mix things up and make your wreaths even more festive!
- Colorful Candy Melts: Instead of sticking with just green candy melts, try using red, blue, or even white! You can create a rainbow of wreaths that are perfect for any holiday celebration. Imagine a blue wreath for a winter wonderland theme or a red one for a Christmas spin!
- Flavored Candy Melts: Want to add a twist? Look for flavored candy melts like strawberry, vanilla, or even chocolate! These not only change the color but also add a delightful flavor that can surprise your taste buds.
- Diverse Toppings: Go wild with toppings! Instead of just red candy decorations, consider using mini chocolate chips, crushed peppermint candies, or even coconut flakes for a snowy effect. You can even sprinkle on some edible glitter for an eye-catching sparkle!
- Nutty Wreaths: For an extra crunch, mix in some chopped nuts like pecans or almonds into your cornflake mixture. This not only gives a delightful texture but also adds a savory element that balances the sweetness.
- Chocolate Drizzle: Drizzle melted chocolate over the finished wreaths for an indulgent touch. Dark, milk, or white chocolate can give a whole new level of deliciousness and make your wreaths look extra special!
- Seasonal Themes: Customize your wreaths for different holidays! For Halloween, use orange and black candy melts and top with candy corn. For Valentine’s Day, go for pink and red melts, and sprinkle heart-shaped candies on top!
These variations not only keep things exciting but also allow your creativity to shine through. So gather your ingredients, experiment with different combinations, and make your Holiday Cornflake Wreaths uniquely yours!
Storage & Reheating Instructions
Now that you’ve made a batch of these delightful Holiday Cornflake Wreaths, let’s talk about how to keep them fresh and tasty! Proper storage is key to maintaining their crunchy goodness, so follow these simple tips to ensure your wreaths stay as delightful as the day you made them.
First off, once your wreaths have set completely, you’ll want to store them in an airtight container. This helps to keep moisture out and prevents them from getting soggy. If you’ve got a lot of wreaths, layering them with parchment paper between each layer can help avoid any sticking or squishing. They’ll stay fresh at room temperature for about 5-7 days, but I bet they won’t last that long with how delicious they are!
If you find yourself with leftover wreaths (which is rare, trust me!), you can also pop them in the fridge for a longer shelf life. Just make sure they’re in a sealed container to avoid picking up any fridge odors. You can keep them in the refrigerator for up to 2 weeks, but I recommend enjoying them sooner for the best texture and taste.
Now, if you want to bring back that crunch after storing, just let them sit at room temperature for a bit before serving. Avoid reheating them in the microwave, as that can make them chewy and lose their delightful crispiness. Instead, just let them warm up naturally, and they’ll be good as new!
So, whether you’re storing them for a party or saving some for later, these tips will help you enjoy your Holiday Cornflake Wreaths to the fullest! Happy snacking!
Nutritional Information
Let’s talk about the nutritional side of our delightful Holiday Cornflake Wreaths! While they’re certainly a sweet treat meant for special occasions, it’s good to have an idea of what you’re indulging in. Here’s an estimated breakdown for one wreath:
- Calories: Approximately 150 calories
- Total Fat: 5 g
- Saturated Fat: 2 g
- Sodium: 90 mg
- Total Carbohydrates: 27 g
- Dietary Fiber: 1 g
- Sugars: 10 g
- Protein: 1 g
Keep in mind, these numbers are just estimates and can vary based on the specific ingredients you use, especially if you decide to get creative with toppings or candy melts! Enjoy these festive wreaths as part of your holiday festivities, and remember that it’s all about balance and having fun in the kitchen!
FAQ about Holiday Cornflake Wreaths
Got questions about making these delightful Holiday Cornflake Wreaths? Don’t worry, I’ve got you covered! Here are some of the most common questions I get, along with my answers to help you make the most of this festive treat.
How long do Holiday Cornflake Wreaths last?
These wreaths are best enjoyed fresh, but if you store them properly in an airtight container, they can last about 5-7 days at room temperature. If you want them to last a bit longer, you can keep them in the fridge for up to 2 weeks. Just remember, they’re so tasty that they probably won’t last that long!
Can I make these wreaths ahead of time?
Absolutely! In fact, making them a day or two in advance can be a great way to save time during the busy holiday season. Just store them in an airtight container, and they’ll be ready to impress your guests whenever you need them. If you’re planning a big gathering, you can even make them a week ahead and keep them in the fridge!
What can I substitute if I don’t have certain ingredients?
If you’re missing any of the ingredients, don’t fret! For the candy melts, you can use chocolate chips or other types of melting chocolates. Just make sure to adjust the melting method slightly since they may behave differently. As for the decorations, feel free to get creative! Use any colorful candies, sprinkles, or even dried fruit you have on hand. The goal is to have fun and make them your own!
Can I use gluten-free cornflakes?
Yes, you can! Just make sure to choose gluten-free cornflakes, and your wreaths will still turn out delicious. This way, everyone can enjoy the festive fun, regardless of dietary restrictions!
What if my wreaths don’t hold their shape?
If your wreaths seem a bit wobbly, it could be that the candy melts didn’t set properly. Make sure to let them cool completely for at least 30 minutes at room temperature, or pop them in the fridge for a quicker setting time. If they’re still not holding, try reshaping them gently while they’re warm, and let them set again.
I hope these FAQs help you feel more confident as you whip up your own Holiday Cornflake Wreaths! Happy baking, and may your kitchen be filled with laughter and joy this holiday season!
For more recipes follow me in page Pinterest.
Print
Holiday Cornflake Wreaths: 5 Steps to Pure Festive Joy
- Total Time: 2 hours 18 minutes
- Yield: 2 loaves 1x
- Diet: Vegetarian
Description
This homemade bread recipe yields soft, fluffy loaves that are perfect for sandwiches or toast.
Ingredients
- 2 cups warm water (105–115°F / 474 g)
- 1 tablespoon active dry yeast
- 1/4 cup honey or sugar (85 g honey or 50 g sugar)
- 2 teaspoons salt
- 2 tablespoons oil (canola or vegetable, 30 ml)
- 4 to 5 1/2 cups all-purpose or bread flour (500–688 g)
Instructions
- In a large bowl or stand mixer, add yeast, warm water, and a pinch of the sugar or honey. Let rest for 5–10 minutes until foamy and bubbly.
- Add the remaining sugar or honey, salt, oil, and 3 cups of flour. Mix until combined.
- Add another cup of flour and mix. With the mixer running, add more flour 1/2 cup at a time until the dough pulls away from the sides of the bowl. The dough should be smooth, elastic, and slightly tacky but not sticky.
- Knead on medium speed for 4–5 minutes, or by hand on a lightly floured surface for 5–8 minutes.
- Lightly grease a large bowl, place the dough inside, turning once to coat. Cover and let rise in a warm place until doubled in size, about 1 1/2 hours.
- Grease two 9×5-inch loaf pans. Punch down the dough, divide into two equal portions, shape into logs, and place into the pans.
- Cover and let rise again for 45–60 minutes, until dough rises about 1 inch above the pans.
- Preheat oven to 350°F (175°C). Bake for 30–33 minutes, until golden brown and the loaf sounds hollow when tapped.
- Remove loaves from pans, place on a wire rack, brush tops with butter if desired, and cool at least 10 minutes before slicing.
- Store cooled bread in an airtight container at room temperature for 2–3 days or up to 5 days in the refrigerator.
Notes
- All-purpose or bread flour both work well. Bread flour gives a slightly chewier texture.
- Instant or rapid-rise yeast can be mixed directly with dry ingredients; rise times will be shorter.
- Let dough rise in a warm (turned-off) oven for faster results.
- Dough can be prepared up to the first rise and refrigerated for up to 1 day.
- Shape loaves before the second rise and freeze for up to 3 months. Thaw, allow to rise, then bake.
- Cool completely and freeze baked bread for up to 3 months. Thaw at room temperature.
- Prep Time: 15 minutes
- Cook Time: 33 minutes
- Category: Baking
- Method: Baking
- Cuisine: American
Nutrition
- Serving Size: 1 slice
- Calories: 202
- Sugar: 3 g
- Sodium: 196 mg
- Fat: 2 g
- Saturated Fat: 1 g
- Carbohydrates: 41 g
- Fiber: 1 g
- Protein: 5 g
Keywords: Homemade Bread, Bread Recipe, Baking Bread