
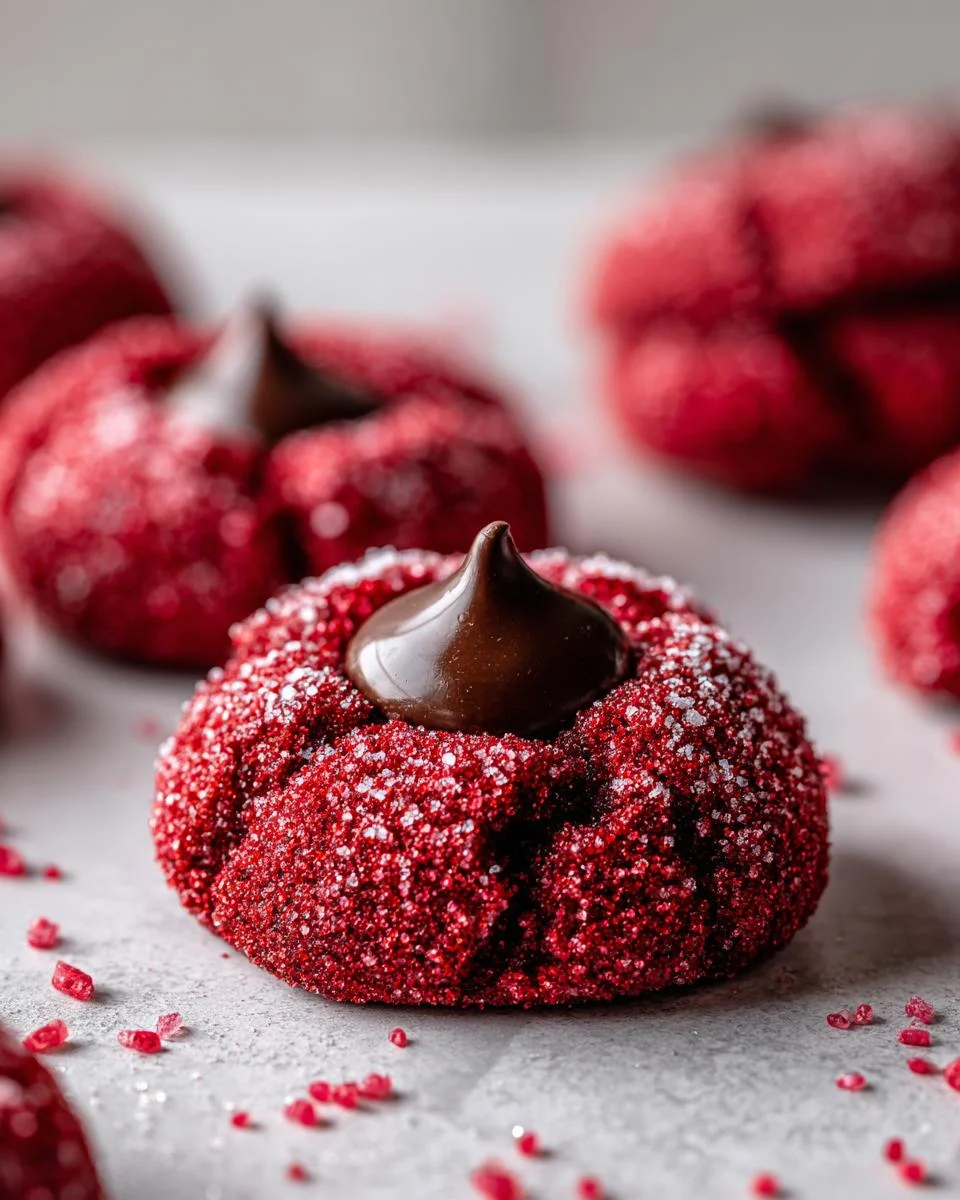
Did you know that Hershey’s red velvet blossoms are not just delicious but also a feast for the eyes? Their vibrant red color topped with a chocolate kiss makes them a favorite for festive gatherings and celebrations. I’ll never forget the first time I made these cookies for a holiday party—it was a whirlwind of flour, sugar, and laughter in my kitchen! My friends went wild when they saw those charming little treats, and they disappeared faster than I could say “red velvet.” This easy recipe for Hershey’s red velvet blossoms has become my go-to for any occasion because it’s not just about the taste; it’s about sharing joy and deliciousness. Whether it’s a birthday, holiday, or just a cozy afternoon, baking these cookies brings a smile to everyone’s face. Trust me, you’ll want to whip up a batch and feel the love fill your home!
Ingredients List
- 7 tbsp butter: Use either salted or unsalted, but make sure it’s softened to room temperature for easy creaming.
- 1/2 cup brown sugar: Light or dark will work, but dark brown sugar adds a deeper flavor.
- 2 tbsp granulated sugar: Just a touch to balance the sweetness.
- 1 tsp vanilla extract: Pure vanilla is best for that rich flavor.
- 1 large egg yolk: Make sure to separate the yolk from the white; we only need the yolk for this recipe.
- 1/4 tsp red food coloring gel: This is what gives those cookies their signature vibrant hue.
- 1 cup all-purpose flour: Measure it out carefully for the perfect texture.
- 1 tbsp cocoa powder: Just a little to enhance the chocolatey goodness.
- 1/2 tsp baking powder: This will help the cookies rise just right.
- 1/4 tsp salt: A pinch enhances all the flavors.
- 1/4 cup red sanding sugar: This adds a delightful crunch and festive sparkle.
- 18 Hershey chocolate kisses: The star of the show! Make sure to have these ready for topping.
How to Prepare Hershey’s Red Velvet Blossoms
Preheat and Prepare
First things first, you’ll want to preheat your oven to 350°F (175°C). This step is super important because a properly heated oven ensures that your cookies bake evenly and have that lovely texture we all crave. While that’s warming up, grab a large baking sheet and line it with parchment paper. This little trick not only makes for easy cleanup but also helps prevent the cookies from sticking. Trust me, you’ll thank yourself later!
Creaming the Ingredients
Now, let’s get to the fun part—creaming the butter and sugars! In a mixing bowl, combine the softened butter, brown sugar, and granulated sugar. You want to mix this until it’s smooth and fluffy, about 2-3 minutes. The texture should be light and airy, like whipped cream! If you have a hand mixer, it makes this part so much easier. Just be sure not to rush it; those air bubbles are what will help your cookies rise beautifully.
Mixing in Wet Ingredients
Once your butter and sugars are creamed to perfection, it’s time to add the wet ingredients! Gently mix in the egg yolk, vanilla extract, and red food coloring. I like to add the food coloring gradually to get that perfect vibrant hue without overdoing it. Mix until everything is combined and you have a lovely, rich red batter. Don’t worry if it seems a bit thick; that’s just how it should be!
Combining Dry Ingredients
Now, let’s bring the dry ingredients into the mix. In a separate bowl, whisk together the flour, cocoa powder, baking powder, and salt. Gradually add this mixture to your wet ingredients, stirring until just combined. Be careful not to overwork the dough; you want to avoid tough cookies! Stop mixing as soon as you don’t see any flour streaks—trust me, a few lumps are perfectly fine!
Forming and Baking the Cookies
With your dough ready, it’s time to form the cookies! Scoop out about a tablespoon of dough and roll it into a ball in your hands. Then, roll each ball in the red sanding sugar for that festive sparkle. Place the cookie balls on the prepared baking sheet, giving them a little space to spread. Bake them in your preheated oven for about 10 minutes. You’ll know they’re done when the edges look set but the centers are still soft. That’s the magic for perfect chewiness!
Adding the Hershey Kisses
As soon as you pull the cookies out of the oven, it’s time for the star of the show—those Hershey Kisses! Gently press one into the center of each cookie while they’re still warm. This way, they’ll melt just a bit and create that delicious chocolatey goodness. Let the cookies cool on the baking sheet for about 10 minutes before transferring them to a cooling rack. This cooling time helps them set up nicely, making them even more delightful to eat!
Why You’ll Love This Recipe
- Quick and Easy: This recipe is super simple and takes just 25 minutes from start to finish, making it perfect for last-minute cravings or surprise guests!
- Festive Appearance: The vibrant red color topped with a chocolate kiss makes these cookies a showstopper at any gathering. They’re perfect for holidays, parties, or just to brighten up your day!
- Delicious Flavor: With the rich taste of red velvet complemented by sweet chocolate, these cookies are a delightful treat for your taste buds.
- Perfect for Sharing: With 18 cookies in one batch, they’re great for sharing with friends, family, or coworkers—everyone will want to grab one!
- Kid-Friendly Fun: Baking these cookies can be a fun activity for kids, letting them help with mixing, rolling, and of course, pressing the Hershey Kisses!
Tips for Success
Making the perfect Hershey’s red velvet blossoms is all about attention to detail and a few handy tips! Here’s how you can ensure your cookies turn out fabulous every time:
- Butter Temperature: Make sure your butter is softened but not melted. If it’s too warm, it can lead to flat cookies. Leave it out for about an hour before you start baking.
- Sugar Variations: Feel free to experiment with sugars! You can swap out some of the brown sugar for coconut sugar if you want a slight caramel flavor. Just remember, the texture might vary slightly.
- Egg Yolk vs. Whole Egg: For a richer flavor, don’t be tempted to add the whole egg. The yolk keeps the cookies tender and prevents them from spreading too much.
- Food Coloring: If you want an even deeper red hue, don’t hesitate to add a bit more food coloring. Just do it gradually, so you get the shade you love without going overboard!
- Don’t Overmix: When you add the dry ingredients, mix until just combined. Overmixing can develop gluten, leading to tougher cookies. A few lumps are totally okay!
- Cooling Time: Resist the urge to skip the cooling time on the baking sheet. This helps the cookies set properly, ensuring they’re perfectly chewy and not too crumbly.
- Storage Tips: Store your cookies in an airtight container at room temperature or in the fridge to keep them fresh. If you want to freeze them, do so before adding the Hershey Kisses. Thaw and add the kisses before serving!
With these tips in your back pocket, you’ll be a pro at making these delightful cookies in no time. Happy baking!

Nutritional Information
Here’s the estimated nutritional information for each Hershey’s red velvet blossom cookie. Keep in mind that these values can vary slightly based on the specific ingredients you use and portion sizes. But this should give you a good idea of what to expect!
- Calories: 120
- Fat: 6g
- Saturated Fat: 4g
- Trans Fat: 0g
- Cholesterol: 20mg
- Sodium: 50mg
- Carbohydrates: 15g
- Fiber: 0g
- Sugar: 10g
- Protein: 1g
These delightful cookies are not only a treat for your taste buds but also a fun addition to your dessert table without feeling too heavy. Enjoy them in moderation, and don’t forget to share the joy!
FAQ Section
Q1: Can I make these cookies gluten-free?
Absolutely! You can substitute the all-purpose flour with a gluten-free flour blend. Just make sure it has a good binding agent like xanthan gum if it’s not already included. The cookies may have a slightly different texture, but they’ll still be delicious!
Q2: What can I use instead of red food coloring?
If you prefer to avoid artificial coloring, you can use beet juice or pureed beets for a natural red hue. Just keep in mind that the color may not be as vibrant, but it will add a lovely flavor!
Q3: How should I store leftover Hershey’s red velvet blossoms?
Store your cookies in an airtight container at room temperature for up to 3 days. If you want to keep them longer, you can refrigerate them for up to a week. Just make sure they’re in a sealed container to prevent them from drying out.
Q4: Can I freeze the cookie dough?
Yes, you can! Scoop the cookie dough balls onto a baking sheet and freeze them until solid. Then, transfer them to a freezer bag and store for up to 3 months. When you’re ready to bake, just add a few extra minutes to the baking time.
Q5: What are some variations I can try with this recipe?
The possibilities are endless! You can add chopped nuts, like walnuts or pecans, for some crunch. Or try mixing in some white chocolate chips for a sweet twist! You can even swap out the Hershey Kisses for other chocolate candies to mix things up.
Storage & Reheating Instructions
Storing your delicious Hershey’s red velvet blossoms is super easy, and following these tips will keep them fresh and tasty for days! First, if you have any leftovers (which I doubt because they’re so irresistible), let them cool completely on the cooling rack. Once they’re cool, place them in an airtight container. They’ll stay fresh at room temperature for about 3 days. Just make sure to keep them in a cool, dry place to prevent them from getting too soft or sticky.
If you want to keep them longer, pop them in the fridge! They can last for up to a week in there. Just remember to seal them well in a container to avoid any fridge odors mingling with your sweet treats.
Now, if you find yourself with a craving for a warm cookie later on, reheating is a breeze! Simply pop your cookie in the microwave for about 10-15 seconds. This little trick will make it soft and gooey again—just like when they came out of the oven! If you prefer a slightly crispier texture, you can reheat them in the oven at 350°F (175°C) for about 5 minutes. Whichever method you choose, just know that each bite will be a delightful reminder of why you baked these beauties in the first place!
For more recipes follow me in page Pinterest.
Print
Hershey’s Red Velvet Blossoms: 5 Reasons to Bake Joyful Cookies
- Total Time: 25 minutes
- Yield: 18 cookies 1x
- Diet: Vegetarian
Description
Easy Hershey’s Red Velvet Blossoms Cookies
Ingredients
- 7 tbsp butter salted or unsalted, softened
- 1/2 cup brown sugar
- 2 tbsp granulated sugar
- 1 tsp vanilla extract
- 1 large egg yolk
- 1/4 tsp red food coloring gel
- 1 cup AP flour
- 1 tbsp cocoa powder
- 1/2 tsp baking powder
- 1/4 tsp salt
- 1/4 cup red sanding sugar
- 18 Hershey chocolate kisses
Instructions
- Preheat the oven to 350F and line a large baking sheet with parchment paper.
- Cream the butter, brown sugar, and granulated sugar together until smooth.
- Add the egg yolk, vanilla, and red food coloring. Mix until combined.
- Add flour, cocoa powder, baking powder, and salt. Mix until the flour mixture disappears.
- Scoop out 18 cookie dough balls, roll them in your hands, and then in the red sanding sugar.
- Place the cookie balls on the prepared baking sheet and bake for 10 minutes.
- Press a chocolate kiss into the center of each cookie right after removing from the oven.
- Let the cookies cool on the baking sheet for 10 minutes before transferring to a cooling rack.
Notes
- You can store these cookies in an air-tight container at room temperature for up to 3 days.
- They can also be stored in the fridge for up to 7 days.
- Prep Time: 15 minutes
- Cook Time: 10 minutes
- Category: Dessert
- Method: Baking
- Cuisine: American
Nutrition
- Serving Size: 1 cookie
- Calories: 120
- Sugar: 10g
- Sodium: 50mg
- Fat: 6g
- Saturated Fat: 4g
- Unsaturated Fat: 2g
- Trans Fat: 0g
- Carbohydrates: 15g
- Fiber: 0g
- Protein: 1g
- Cholesterol: 20mg
Keywords: Hershey’s red velvet blossoms, red velvet cookies, easy cookie recipe