
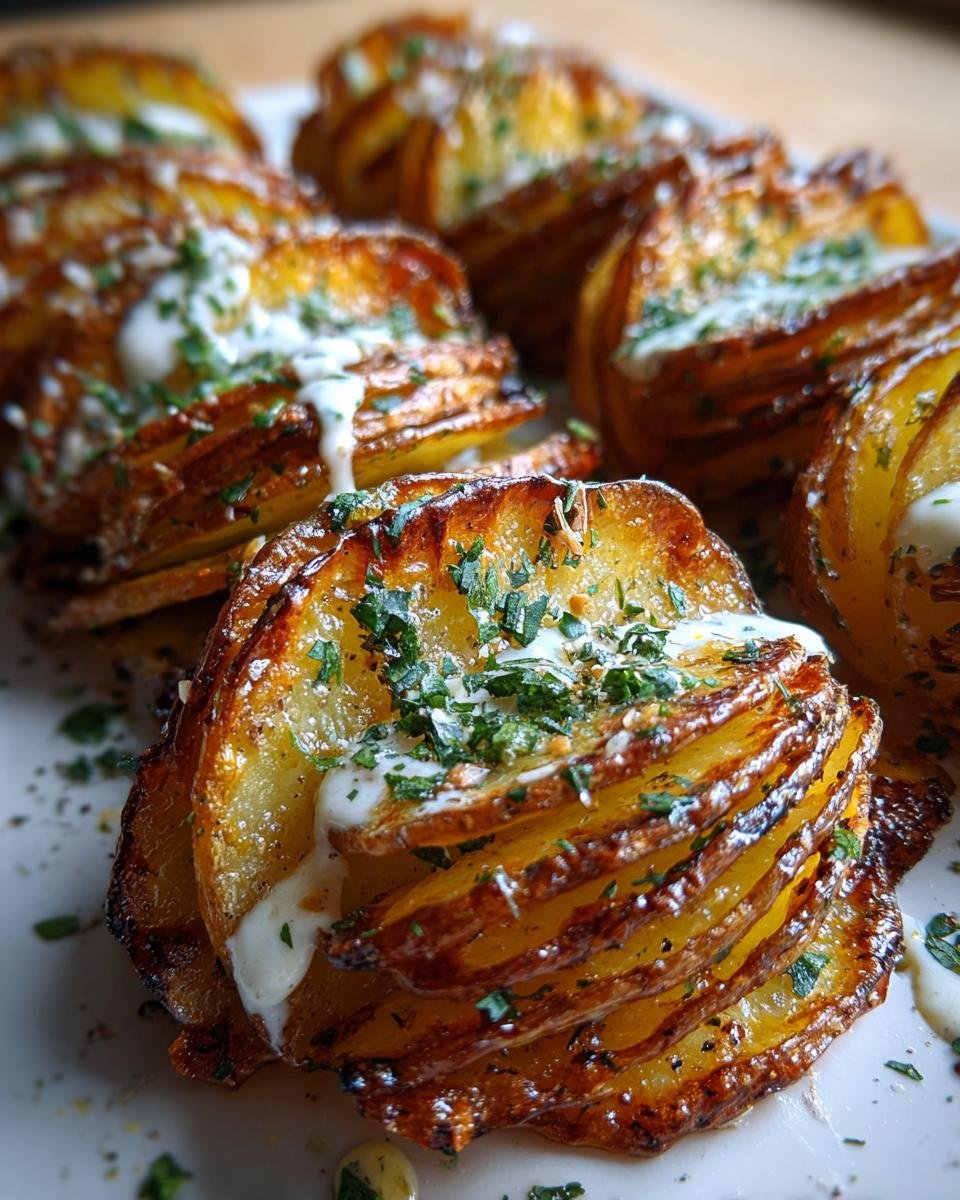
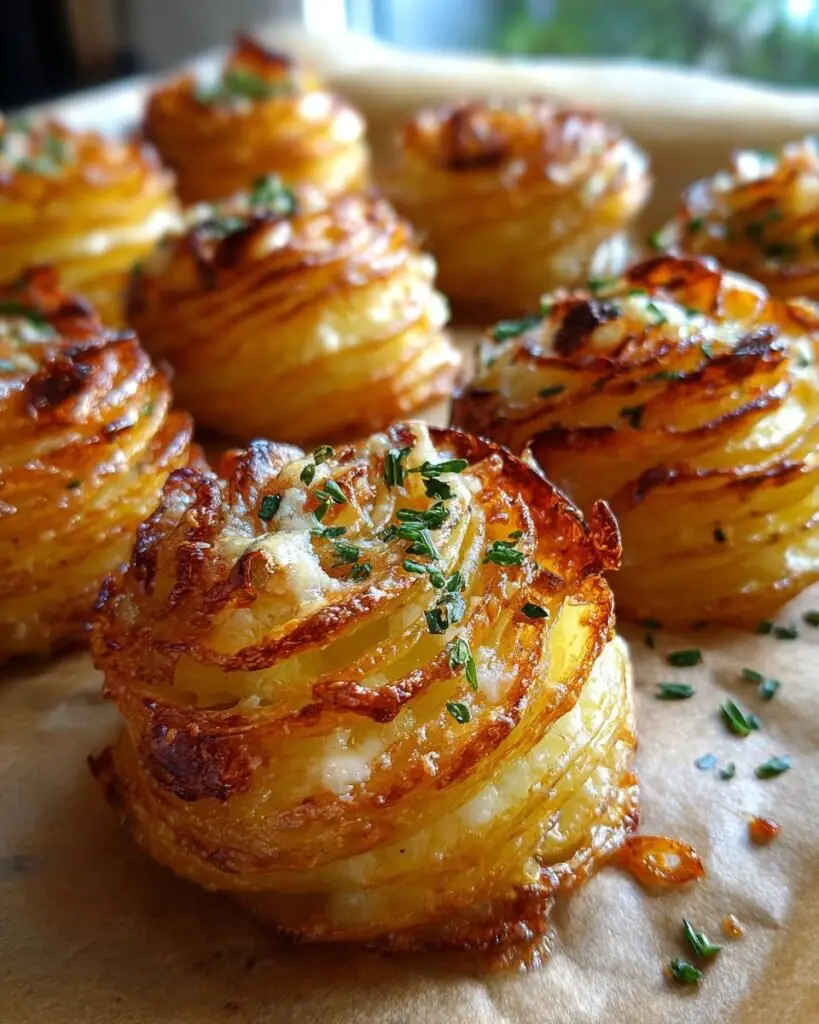
Oh my goodness, let me tell you about these Crispy Potato Stacks! They’re not just any side dish; they’re a crunchy, flavor-packed delight that takes simple potatoes to a whole new level. Imagine thinly sliced potatoes, layered with rich cream, fragrant garlic, and a sprinkle of fresh parmesan. The result? A beautifully baked stack that’s crispy on the outside and tender on the inside. Trust me, you won’t be able to resist popping these little stacks in your mouth!
This recipe holds a special place in my heart because I stumbled upon it during one of my many kitchen experiments. I was looking for a way to jazz up a regular dinner and, wow, did these deliver! They’ve quickly become a family favorite, making appearances at casual weeknight dinners and festive gatherings. Everyone goes crazy for that crunchy texture and savory flavor. If you’re looking for a side that’s not just delicious but also makes you feel like a gourmet chef, these Crispy Potato Stacks are your answer!
Ingredients List
To create these mouthwatering Crispy Potato Stacks, you’ll need just a handful of ingredients that come together beautifully. Here’s what you’ll need:
- 800 g potatoes, thinly sliced (I love using common brushed potatoes, like sebago, which you can find in any Australian supermarket)
- 4 tablespoons cream (the richness adds such a lovely texture)
- 4 tablespoons grated fresh parmesan (trust me, this makes all the difference for flavor!)
- Cooking or olive oil spray (for greasing your muffin tin)
- 2 garlic cloves, crushed or minced (the aroma is absolutely irresistible!)
Gather these ingredients, and you’re on your way to creating a dish that’ll impress everyone around your table!
How to Prepare Crispy Potato Stacks
Now that you’ve got your ingredients ready, let’s dive into the step-by-step process of making these Crispy Potato Stacks. I promise, it’s easier than you think, and the end result is so worth it!
Preheat the Oven
First things first, you’ll want to preheat your oven to 200°C (that’s about 400°F for my friends across the pond). Preheating is super important because it ensures that your Crispy Potato Stacks start cooking evenly as soon as they go in, helping them achieve that perfect crunch.
Prepare the Muffin Tin
While the oven is warming up, grab your 12-hole muffin tin. This is where the magic happens! Spray each hole generously with olive oil or cooking spray. This step is crucial to prevent your potato stacks from sticking, and it also helps them get that gorgeous golden color on the outside. Don’t skip it!
Mix the Ingredients
Now for the fun part – mixing! In a large mixing bowl, combine the thinly sliced potatoes with the cream, grated parmesan, and crushed garlic. Give everything a good toss. You want each potato slice to be well-coated in that creamy goodness. It’s okay to add a pinch of salt and pepper to taste here; it really brings out the flavors! The more, the merrier, as they say!
Assemble the Stacks
Next, it’s time to assemble those stacks! Divide the potato mixture evenly among the muffin tin holes. Make sure to pack them down a bit, but not too tightly; you want some air to circulate for that crispy texture. An even distribution is key to ensuring that all the stacks bake uniformly. Trust me, you’ll be glad you did!
Bake the Stacks
Pop the muffin tin into your preheated oven and let those beauties bake for about 50 minutes. You’ll know they’re done when the tops are beautifully golden and crispy, and the potatoes are cooked through. If you’re feeling adventurous, you can even turn on the broiler for the last couple of minutes to really get that top nice and crunchy. Just keep an eye on them so they don’t burn. Oops, nobody wants that!
Once they’re done baking, let them cool for a few minutes before gently removing them from the tin. You’ll want to use a fork or small spatula to help you lift them out without breaking. And there you have it — your very own Crispy Potato Stacks! Enjoy!
Tips for Success
Want to ensure your Crispy Potato Stacks turn out absolutely perfect? Here are some pro tips that’ll help you every step of the way!
- Use a Mandolin: If you have one, a mandolin slicer is a game changer for getting those even, thin potato slices. It saves time and gives you consistent thickness, which is key for even cooking!
- Soak the Potatoes: For extra crispiness, consider soaking the sliced potatoes in cold water for about 30 minutes before mixing them with the cream and seasonings. This step helps remove excess starch, leading to a crunchier texture.
- Don’t Rush the Greasing: Make sure to generously grease your muffin tin. A well-greased pan is crucial to prevent sticking and ensure that beautiful golden crust you’re after!
- Use Fresh Ingredients: Fresh garlic and high-quality parmesan can elevate the flavor of your stacks dramatically. Trust me, it’s worth it!
- Watch Closely at the End: When baking, keep an eye on the stacks during the last few minutes. Ovens can vary, and you don’t want to risk burning that lovely crispy top!
With these tips in your back pocket, your Crispy Potato Stacks will be the star of any meal! Enjoy the crunch!
Nutritional Information Section
Let’s talk numbers! Knowing the nutritional breakdown can really help you enjoy your Crispy Potato Stacks while keeping an eye on your diet. Here’s an estimated nutritional profile for one serving (that’s one stack):
- Calories: 293
- Fat: 15 g
- Saturated Fat: 8 g
- Unsaturated Fat: 5 g
- Trans Fat: 0 g
- Carbohydrates: 33 g
- Fiber: 3 g
- Sugar: 1 g
- Protein: 6 g
- Sodium: 200 mg
- Cholesterol: 30 mg
Keep in mind that these values are estimates and can vary based on the specific ingredients you use and your cooking methods. So, while you enjoy these delicious little stacks, you can also feel good about what you’re eating!
Why You’ll Love This Recipe
- Quick Preparation: With just 15 minutes of prep time, you can whip up these delicious Crispy Potato Stacks and have them in the oven before you know it!
- Delicious Flavor: The combination of creamy goodness, fragrant garlic, and savory parmesan creates a flavor explosion that will have everyone asking for seconds.
- Vegetarian-Friendly: Perfect for any meal, these stacks are a great side dish for vegetarians and meat-lovers alike, making them a versatile option for any gathering.
- Impressive Presentation: These beautifully layered stacks not only taste amazing but also look stunning on your table, adding a touch of elegance to any dinner.
- Customizable: Feel free to play around with ingredients! You can add herbs, spices, or even different cheeses to make it your own!
FAQ Section
Got questions about making Crispy Potato Stacks? Don’t worry, I’ve got you covered! Here are some of the most common queries I get, along with my answers to help you on your cooking journey.
Can I use other types of potatoes for this recipe?
Absolutely! While I love using sebago potatoes for their creamy texture, you can try other varieties like Yukon Gold or even red potatoes. Just keep in mind that different potatoes may yield slightly different textures, but they’ll still be delicious!
How do I store leftovers?
If you happen to have leftovers (which is rare in my house!), allow the stacks to cool completely, then store them in an airtight container in the fridge. They’re best eaten within a couple of days. Just a heads up, they might lose a bit of their crispiness, but you can pop them in the oven for a few minutes to revive that crunch.
Can I make these stacks ahead of time?
You sure can! You can prepare the potato stacks the day before, layer them in the muffin tin, cover with plastic wrap, and refrigerate. When you’re ready to bake, just pop them straight into the preheated oven. You might need to add a few extra minutes to the baking time since they’ll be cold from the fridge.
What can I serve with Crispy Potato Stacks?
These stacks pair wonderfully with just about anything! You can serve them alongside grilled meats, roasted veggies, or even as a fancy appetizer with a dipping sauce. They’re versatile enough to complement a wide range of dishes!
Can I freeze the Crispy Potato Stacks?
I don’t recommend freezing these stacks after baking, as they can lose their delightful crunch. If you must, freeze them before baking! Just layer them in a muffin tin, cover well, and freeze. When you’re ready to bake, you can cook them from frozen; just add a few extra minutes to the cooking time. Enjoy your cooking adventure!
Storage & Reheating Instructions
So, you’ve made a batch of those delicious Crispy Potato Stacks, and now you’re wondering how to keep those tasty little wonders for later? Don’t worry, I’ve got your back! Here’s how to properly store any leftovers and make sure they stay as crispy as possible when you reheat them.
First, let the stacks cool completely before storing. This step is super important because if you seal them while warm, they can get soggy. Once they’re cool, place the stacks in an airtight container. If you’ve got a layer of stacks, consider separating them with parchment paper to prevent sticking.
Store the container in the fridge, and they should be good for about 2-3 days. Honestly, they’re best when fresh, but I get it — life happens, and leftovers are a reality!
Now, when it’s time to reheat, you want to bring that crispiness back to life. Preheat your oven to 180°C (around 350°F). Place the potato stacks on a baking sheet lined with parchment paper (for easy cleanup and extra crisp) and pop them in the oven for about 10-15 minutes. You’ll know they’re ready when they start to look golden and feel crisp again. Ooh, that smell! Just like when they were fresh out of the oven!
Avoid using the microwave for reheating, as it tends to make them mushy instead of crispy. Trust me, the oven is the way to go for those perfectly crunchy bites. Enjoy your Crispy Potato Stacks even after the initial serving — they’re worth it!
For more recipes follow me in page Pinterest.
Print
Crispy Potato Stacks: 5 Reasons You’ll Adore This Flavor Bomb
- Total Time: 1 hour 5 minutes
- Yield: 4 servings 1x
- Diet: Vegetarian
Description
Crispy Potato Stacks are a delicious and crunchy side dish made from thinly sliced potatoes layered with cream, garlic, and parmesan.
Ingredients
- 800 g potatoes thinly sliced
- 4 tablespoon cream
- 4 tablespoon grated fresh parmesan
- cooking/olive oil spray
- 2 garlic cloves crushed/minced
Instructions
- Pre heat oven to 200c.
- Grease a 12 hole muffin tin with olive oil/cooking spray.
- Add cream, parmesan, and garlic to potatoes and mix, making sure slices are well coated. Add salt and pepper to taste.
- Divide potato mixture evenly between muffin tin holes.
- Bake for 50 mins or until potato is cooked through and the tops are crisp.
Notes
- The potatoes I use for the stacks are just the common brushed potatoes (sebago) available in every Australian supermarket.
- I use a mandolin to slice the potatoes.
- The amount of calories per serve is provided as a guide only, as ingredients and cooking methods can vary greatly.
- Prep Time: 15 minutes
- Cook Time: 50 minutes
- Category: Side Dish
- Method: Baking
- Cuisine: Australian
Nutrition
- Serving Size: 1 stack
- Calories: 293
- Sugar: 1 g
- Sodium: 200 mg
- Fat: 15 g
- Saturated Fat: 8 g
- Unsaturated Fat: 5 g
- Trans Fat: 0 g
- Carbohydrates: 33 g
- Fiber: 3 g
- Protein: 6 g
- Cholesterol: 30 mg
Keywords: Crispy Potato Stacks, baked potatoes, potato recipes