Welcome to the delightful world of Crispy Japanese Katsu Bowls! If you’re like me, juggling a busy schedule while trying to whip up something delicious can feel overwhelming. But fear not! This recipe is a quick solution for those hectic days when you want to impress your loved ones without spending hours in the kitchen. Imagine the satisfying crunch of perfectly breaded meat, served over fluffy rice, all drizzled with a savory sauce. It’s comfort food at its finest, and I can’t wait to share this culinary adventure with you!
Print
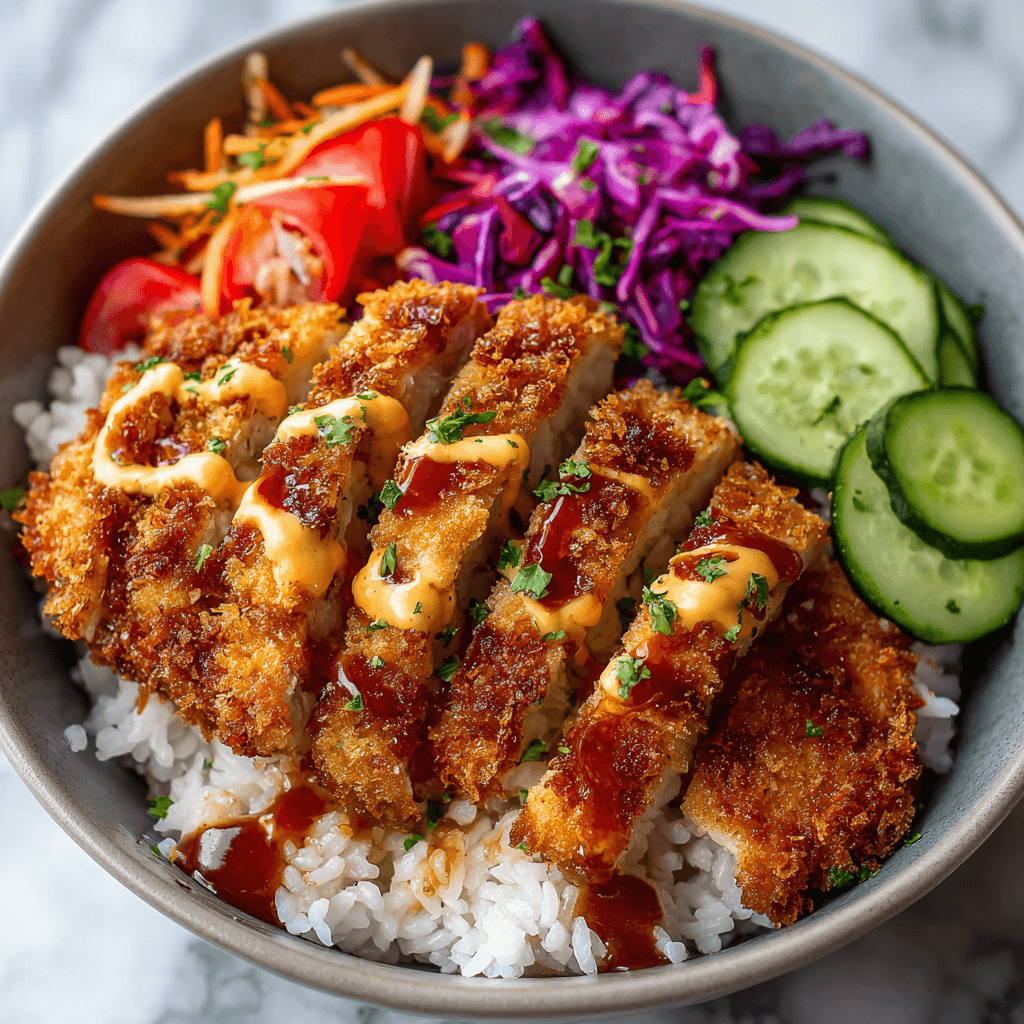
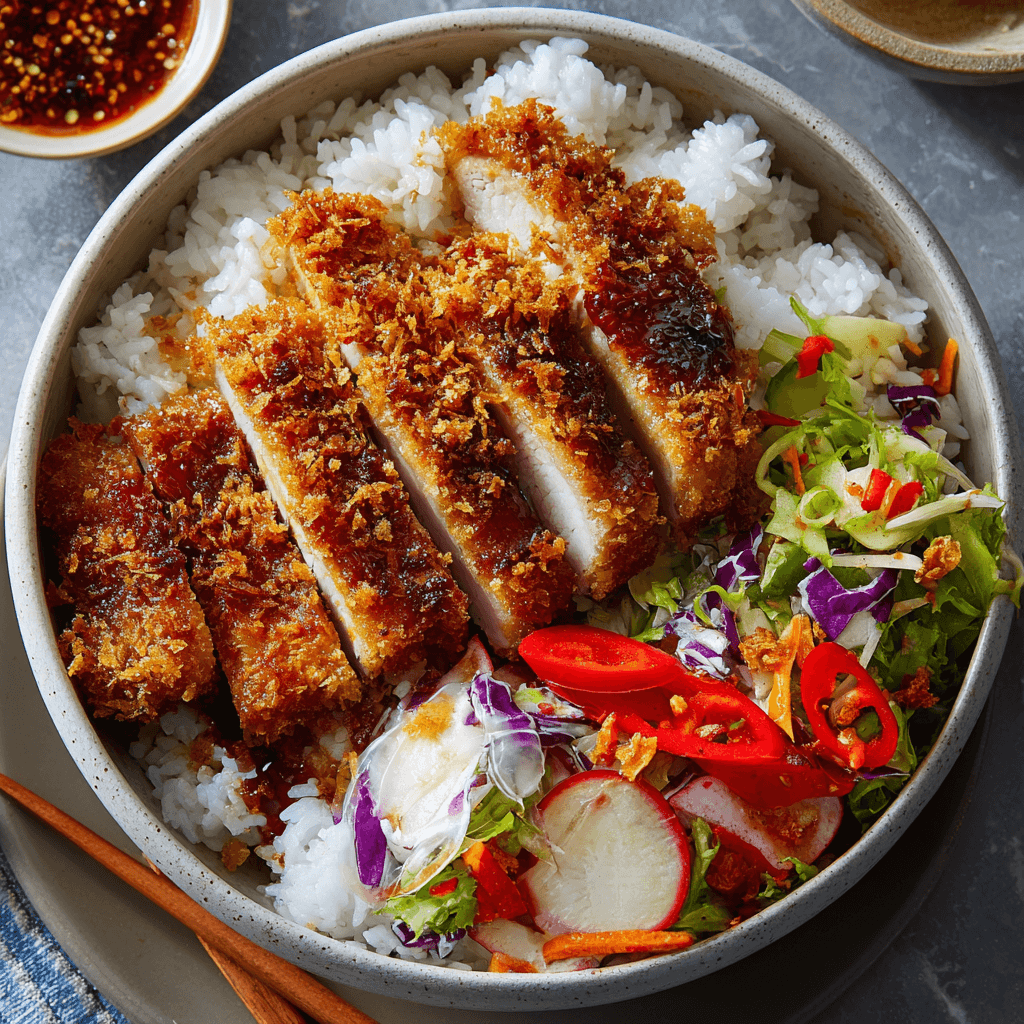
Crispy Japanese Katsu Bowls: Discover the Secret Recipe!
- Total Time: 30 minutes
- Yield: 2 servings 1x
- Diet: Gluten Free
Description
Crispy Japanese Katsu Bowls are a delicious and satisfying dish featuring breaded and fried meat served over rice with a flavorful sauce.
Ingredients
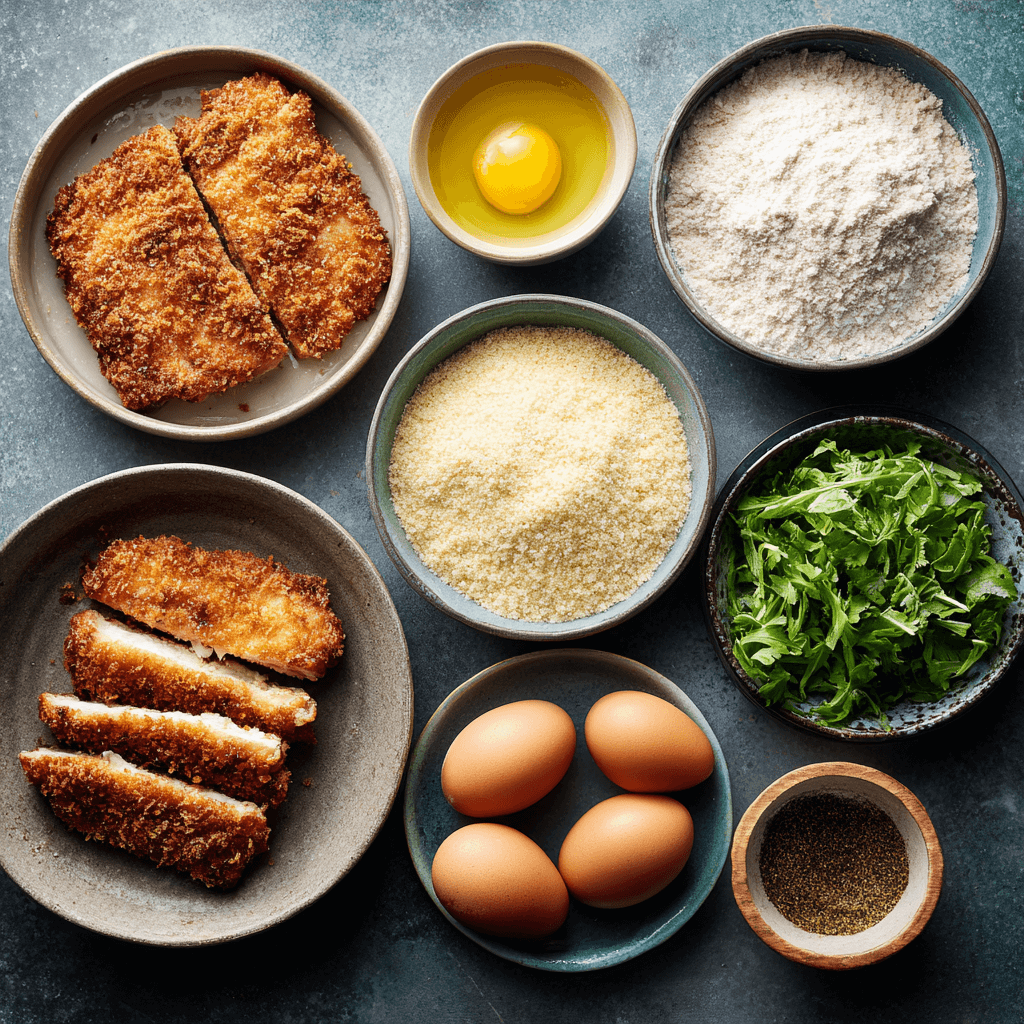
- 2 boneless pork chops
- 1 cup panko breadcrumbs
- 1/2 cup all-purpose flour
- 2 large eggs
- Salt and pepper to taste
- Vegetable oil for frying
- 2 cups cooked rice
- 1/4 cup tonkatsu sauce
- Chopped green onions for garnish
Instructions
- Season the pork chops with salt and pepper.
- Dredge each chop in flour, then dip in beaten eggs, and finally coat with panko breadcrumbs.
- Heat vegetable oil in a pan over medium heat.
- Fry the breaded pork chops until golden brown and cooked through, about 4-5 minutes per side.
- Remove from the pan and let rest before slicing.
- Serve the sliced katsu over cooked rice and drizzle with tonkatsu sauce.
- Garnish with chopped green onions.
Notes
- For a healthier option, you can bake the katsu instead of frying.
- Feel free to substitute chicken or tofu for the pork.
- Serve with pickled vegetables for added flavor.
- Prep Time: 15 minutes
- Cook Time: 15 minutes
- Category: Main Course
- Method: Frying
- Cuisine: Japanese
Nutrition
- Serving Size: 1 bowl
- Calories: 600
- Sugar: 5g
- Sodium: 800mg
- Fat: 30g
- Saturated Fat: 5g
- Unsaturated Fat: 20g
- Trans Fat: 0g
- Carbohydrates: 60g
- Fiber: 2g
- Protein: 25g
- Cholesterol: 70mg
Keywords: Crispy Japanese Katsu Bowls, Katsu, Japanese cuisine, fried pork, tonkatsu
Table of Contents
Why You’ll Love This Crispy Japanese Katsu Bowls
Crispy Japanese Katsu Bowls are not just a meal; they’re a celebration of flavor and simplicity. In just 30 minutes, you can create a dish that’s both satisfying and impressive. The crunchy texture of the katsu paired with the tender rice makes every bite a delight. Plus, it’s versatile! You can easily swap out ingredients to suit your family’s tastes. Trust me, this recipe will quickly become a weeknight favorite!
Ingredients for Crispy Japanese Katsu Bowls
Gathering the right ingredients is the first step to creating your Crispy Japanese Katsu Bowls. Here’s what you’ll need:
- Boneless pork chops: The star of the dish! They’re juicy and tender, perfect for frying.
- Panko breadcrumbs: These Japanese-style breadcrumbs give the katsu its signature crunch. They’re lighter and crispier than regular breadcrumbs.
- All-purpose flour: This helps the egg adhere to the pork, creating a delicious coating.
- Large eggs: Beaten eggs act as a binding agent, ensuring the breadcrumbs stick well.
- Salt and pepper: Simple seasonings that enhance the flavor of the pork. Don’t skip this step!
- Vegetable oil: Essential for frying. It should have a high smoke point for the best results.
- Cooked rice: A fluffy bed for your katsu. You can use white, brown, or even cauliflower rice for a lighter option.
- Tonkatsu sauce: This sweet and tangy sauce is the perfect finishing touch. It adds depth and flavor to the dish.
- Chopped green onions: A fresh garnish that adds a pop of color and flavor.
For those looking to mix things up, feel free to substitute chicken or tofu for the pork. You can also bake the katsu instead of frying for a healthier option. If you want to elevate the dish, serve it with pickled vegetables on the side. The ingredient list with exact quantities is available at the bottom of the article for easy printing!
How to Make Crispy Japanese Katsu Bowls
Now that you have all your ingredients ready, let’s dive into the fun part—making your Crispy Japanese Katsu Bowls! Follow these simple steps, and you’ll have a delicious meal in no time.
Step 1: Season the Pork Chops
Start by seasoning your boneless pork chops with salt and pepper. This simple step enhances the flavor of the meat. Don’t be shy—make sure to coat both sides evenly. The seasoning is the first layer of flavor that will shine through in your katsu!
Step 2: Prepare the Breading Station
Next, set up your breading station. In one bowl, place the all-purpose flour. In another, beat the large eggs until they’re smooth. Finally, pour the panko breadcrumbs into a third bowl. Dredge each pork chop in flour first, shaking off any excess. Then, dip it into the beaten eggs, ensuring it’s fully coated. Finally, press the chop into the panko breadcrumbs, covering it completely. This three-step process creates that irresistible crunch!
Step 3: Heat the Oil
Now it’s time to heat the vegetable oil. Pour enough oil into a pan to cover the bottom, about half an inch deep. Heat it over medium heat until it shimmers. To test if it’s ready, drop a small piece of bread into the oil. If it sizzles, you’re good to go! Properly heated oil is key to achieving that golden brown color.
Step 4: Fry the Pork Chops
Carefully place the breaded pork chops into the hot oil. Fry them for about 4-5 minutes on each side. You want them to be golden brown and cooked through. Keep an eye on them; if they start to darken too quickly, lower the heat. Once done, remove them from the pan and let them drain on a paper towel. This helps keep them crispy!
Step 5: Rest and Slice
After frying, let the katsu rest for a few minutes. This step is crucial! Resting allows the juices to redistribute, ensuring each bite is tender and juicy. Once rested, slice the katsu into strips. The beautiful golden crust will make your mouth water!
Step 6: Assemble the Bowl
Now, it’s time to assemble your bowl. Start with a generous scoop of cooked rice as the base. Lay the sliced katsu on top, and don’t forget to drizzle it with tonkatsu sauce. This sweet and tangy sauce is what brings everything together, adding a burst of flavor!
Step 7: Garnish
Finally, garnish your Crispy Japanese Katsu Bowls with chopped green onions. They add a fresh touch and a pop of color. Plus, they enhance the flavor beautifully. Your dish is now ready to be enjoyed!
Tips for Success
- Use a meat thermometer to ensure pork reaches 145°F for perfect doneness.
- Don’t overcrowd the pan while frying; this helps maintain the oil temperature.
- For extra crunch, double coat the pork by repeating the egg and breadcrumb steps.
- Let the katsu rest before slicing to keep it juicy.
- Experiment with different sauces for a unique twist!
Equipment Needed
- Frying pan: A non-stick skillet works well, but a cast-iron pan gives great heat retention.
- Meat thermometer: Essential for checking doneness; a simple kitchen thermometer will do.
- Mixing bowls: Use any bowls you have on hand for breading.
- Slotted spoon: Perfect for removing katsu from the oil without excess grease.
- Paper towels: Handy for draining the fried katsu and keeping it crispy.
Variations of Crispy Japanese Katsu Bowls
- Chicken Katsu: Swap the pork for boneless chicken breasts for a lighter option that’s just as delicious.
- Tofu Katsu: For a vegetarian twist, use firm tofu. Press it to remove excess moisture, then bread and fry as usual.
- Vegetable Katsu: Slice up your favorite vegetables like eggplant or zucchini, bread them, and fry for a colorful, crunchy dish.
- Spicy Katsu: Add a dash of cayenne pepper or chili flakes to the flour for a spicy kick that elevates the flavor.
- Gluten-Free Katsu: Substitute all-purpose flour with a gluten-free blend and use gluten-free panko for a safe option.
Serving Suggestions for Crispy Japanese Katsu Bowls
- Pickled vegetables: Serve alongside for a tangy contrast that complements the katsu.
- Steamed broccoli: A healthy side that adds color and nutrition to your meal.
- Green tea: A refreshing drink that pairs beautifully with the flavors of the dish.
- Sesame seeds: Sprinkle on top for added crunch and a nutty flavor.
- Serve in a bowl: Use a deep bowl for a cozy presentation that invites digging in!
For more recipes follow me in page Facebook and Pinterest
FAQs about Crispy Japanese Katsu Bowls
Can I make Crispy Japanese Katsu Bowls ahead of time?
Absolutely! You can prepare the katsu in advance and store it in the fridge. Just reheat it in the oven to maintain that crispy texture. Serve it fresh over rice with sauce for a quick meal!
What can I use instead of tonkatsu sauce?
If you don’t have tonkatsu sauce, a mix of ketchup and Worcestershire sauce can work in a pinch. It won’t be the same, but it’ll still add a nice flavor to your katsu bowls!
Is this recipe suitable for kids?
Yes! Kids usually love the crunchy texture of katsu. You can even let them help with the breading process. Just keep an eye on them while frying!
Can I bake the katsu instead of frying it?
Definitely! For a healthier option, place the breaded katsu on a baking sheet and bake at 400°F for about 20 minutes, flipping halfway through. You’ll still get a nice crunch!
What sides pair well with Crispy Japanese Katsu Bowls?
Steamed vegetables, pickled radishes, or a simple salad make great sides. They add freshness and balance to the rich flavors of the katsu!
Final Thoughts
Creating Crispy Japanese Katsu Bowls is more than just cooking; it’s about bringing joy to your table. The satisfying crunch of the katsu, paired with fluffy rice and a drizzle of tangy sauce, creates a comforting meal that warms the heart. Whether you’re sharing it with family or enjoying a quiet dinner alone, this dish is sure to impress. Plus, it’s quick and easy, making it perfect for busy nights. I hope you find as much joy in making and savoring this recipe as I do. Happy cooking, and enjoy every delicious bite!