As a passionate home cook, I know how important it is to have a few tricks up your sleeve, especially when it comes to impressing guests. That’s where this creative pie crust comes in! It’s not just any pie crust; it’s a delightful canvas for your favorite fillings, perfect for busy days or special occasions. Whether you’re whipping up a quick dessert for a family gathering or showcasing your baking skills at a potluck, this recipe will elevate your pies and leave everyone asking for seconds. Trust me, your loved ones will be wowed!
Print
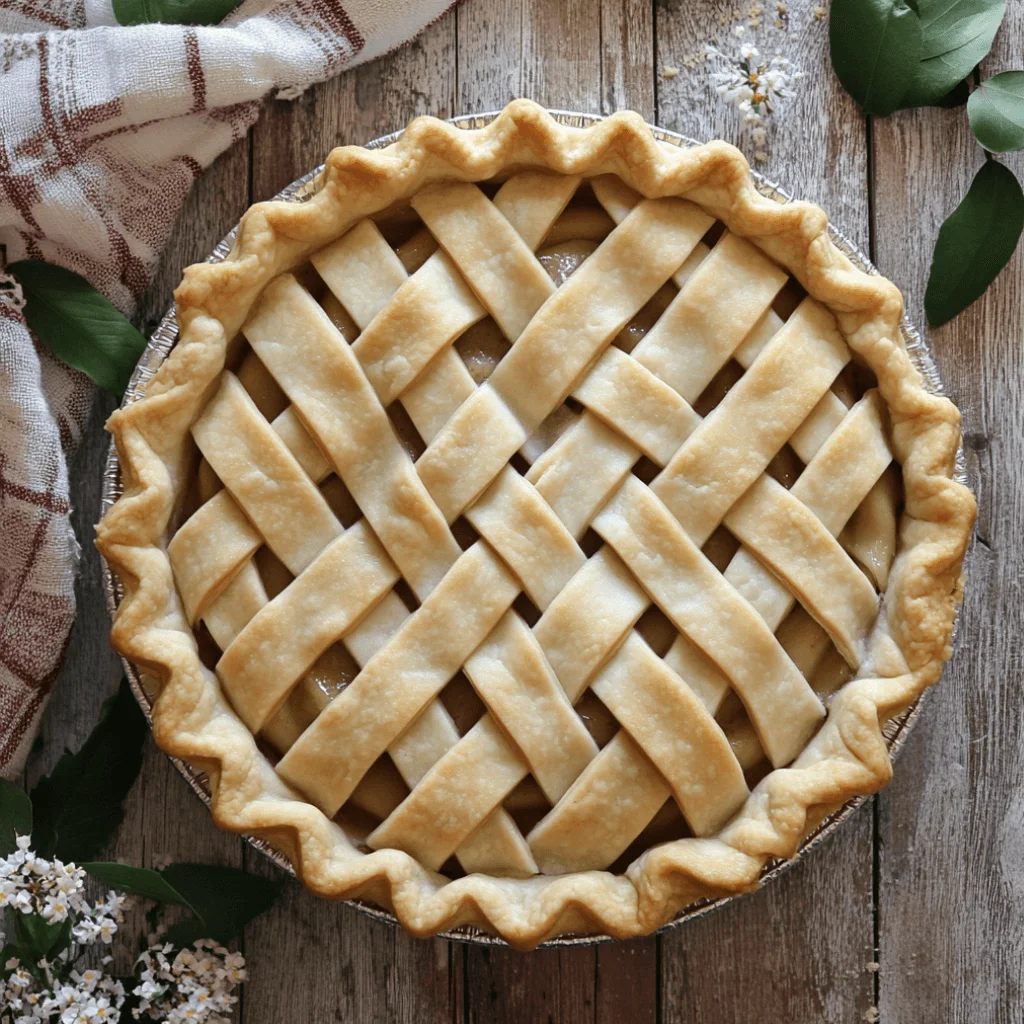
Creative pie crust that will impress your guests!
- Total Time: 4 hours 35 minutes
- Yield: 1 pie crust 1x
- Diet: Vegetarian
Description
A unique and impressive pie crust recipe that will elevate your desserts and wow your guests.
Ingredients
- 2 1/2 cups all-purpose flour
- 1 cup unsalted butter, chilled and diced
- 1/4 cup sugar
- 1/2 teaspoon salt
- 1/4 cup ice water
Instructions
- In a large bowl, combine flour, sugar, and salt.
- Add the chilled butter and mix until the mixture resembles coarse crumbs.
- Stir in ice water, a tablespoon at a time, until the mixture forms a ball.
- Wrap in plastic and refrigerate for at least 4 hours or overnight.
- Roll out the dough on a floured surface and shape it into your desired pie form.
- Pre-bake the crust at 375°F (190°C) for 15 minutes before adding your filling.
Notes
- For a sweeter crust, add more sugar to the dough.
- Experiment with different flavors by adding spices like cinnamon or nutmeg.
- Make sure the butter is very cold for a flaky texture.
- Prep Time: 20 minutes
- Cook Time: 15 minutes
- Category: Dessert
- Method: Baking
- Cuisine: American
Nutrition
- Serving Size: 1 slice
- Calories: 250
- Sugar: 2g
- Sodium: 150mg
- Fat: 15g
- Saturated Fat: 9g
- Unsaturated Fat: 4g
- Trans Fat: 0g
- Carbohydrates: 30g
- Fiber: 1g
- Protein: 3g
- Cholesterol: 30mg
Keywords: creative pie crust, pie crust recipe, unique pie crust
Table of Contents
Why You’ll Love This Creative Pie Crust
This creative pie crust is a game-changer for busy moms and professionals alike. It’s quick to prepare, taking just 20 minutes of hands-on time, and the rest is simply waiting for it to chill. The taste? Oh, it’s buttery and flaky, a perfect match for any filling you choose. Plus, it’s versatile! You can customize it with spices or sweetness, making it a delightful surprise for your guests every time.
Ingredients for Creative Pie Crust
Gathering the right ingredients is the first step to creating your masterpiece. Here’s what you’ll need for this creative pie crust:
- All-purpose flour: This is the backbone of your crust, providing structure and texture. You can also use whole wheat flour for a nuttier flavor.
- Unsalted butter: Chilled and diced, butter adds richness and flakiness. If you’re in a pinch, you can substitute with margarine, but the flavor won’t be quite the same.
- Sugar: A touch of sweetness balances the flavors. Feel free to adjust the amount based on your filling or even use brown sugar for a deeper taste.
- Salt: Just a pinch enhances the overall flavor. It’s essential for bringing out the sweetness in your crust.
- Ice water: This helps bind the dough without warming it up. The colder, the better! You can also use flavored water, like herbal infusions, for a unique twist.
For those who love to experiment, consider adding spices like cinnamon or nutmeg for a warm, aromatic touch. You can find the exact measurements for these ingredients at the bottom of the article, ready for printing!
How to Make Creative Pie Crust
Now that you have your ingredients ready, let’s dive into the fun part—making your creative pie crust! Follow these simple steps, and you’ll be on your way to a delicious pie that will impress everyone.
Step 1: Combine Dry Ingredients
Start by grabbing a large bowl. In it, mix together the all-purpose flour, sugar, and salt. This combination is the foundation of your crust. Make sure to whisk it well, so everything is evenly distributed. It’s like giving your crust a little pep talk before the big show!
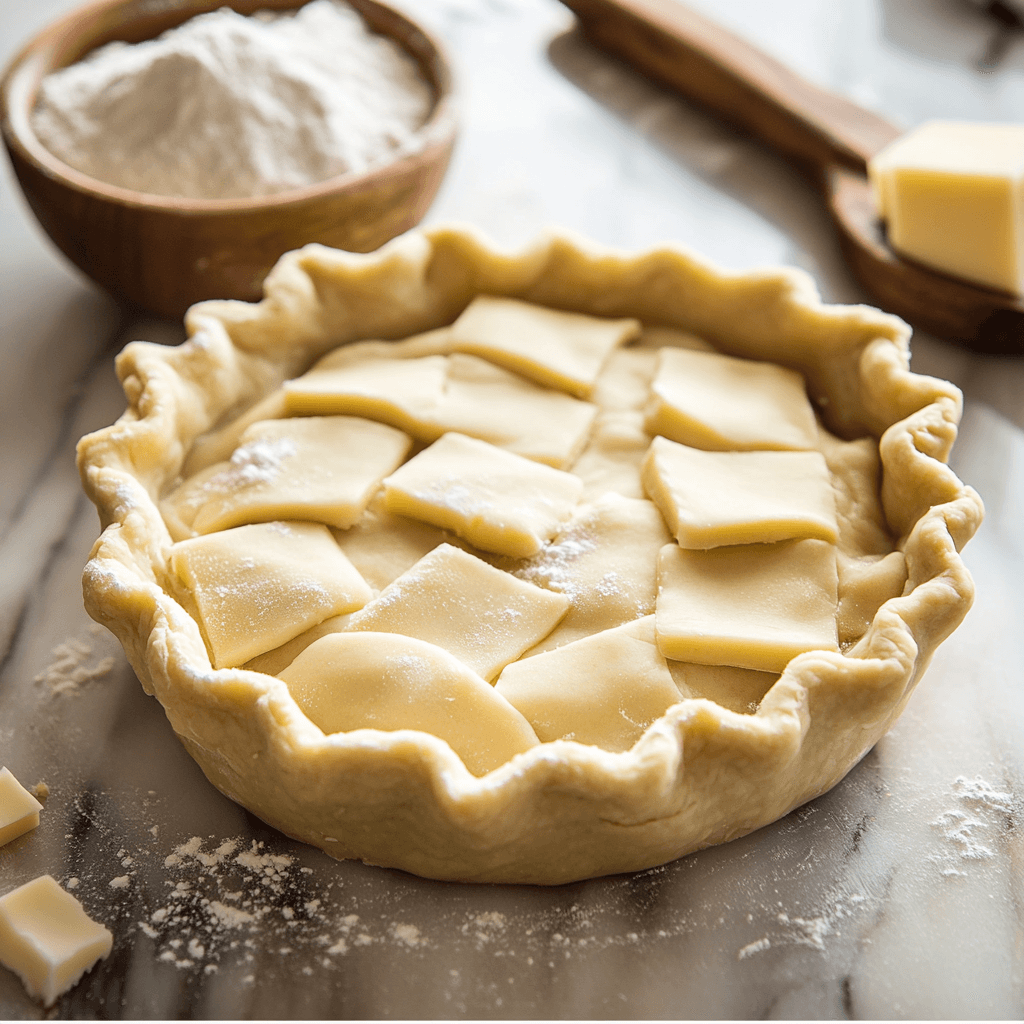
Step 2: Incorporate Butter
Next, add the chilled, diced butter to your dry mixture. Using a pastry cutter or your fingers, work the butter into the flour until it resembles coarse crumbs. This step is crucial for that flaky texture we all love. Think of it as creating little pockets of buttery goodness that will melt in your mouth!
Step 3: Add Ice Water
Now, it’s time to bring it all together. Gradually stir in the ice water, one tablespoon at a time. You want to mix until the dough starts to form a ball. Be careful not to overwork it; we want to keep that flakiness intact. If the dough feels too dry, add a bit more water. It’s all about finding that perfect balance!
Step 4: Chill the Dough
Once your dough is formed, wrap it in plastic wrap and refrigerate for at least four hours, or even overnight if you can wait. Chilling the dough is essential for a flaky crust. It allows the butter to firm up, which means a better texture when baked. Plus, it gives you time to plan your filling!
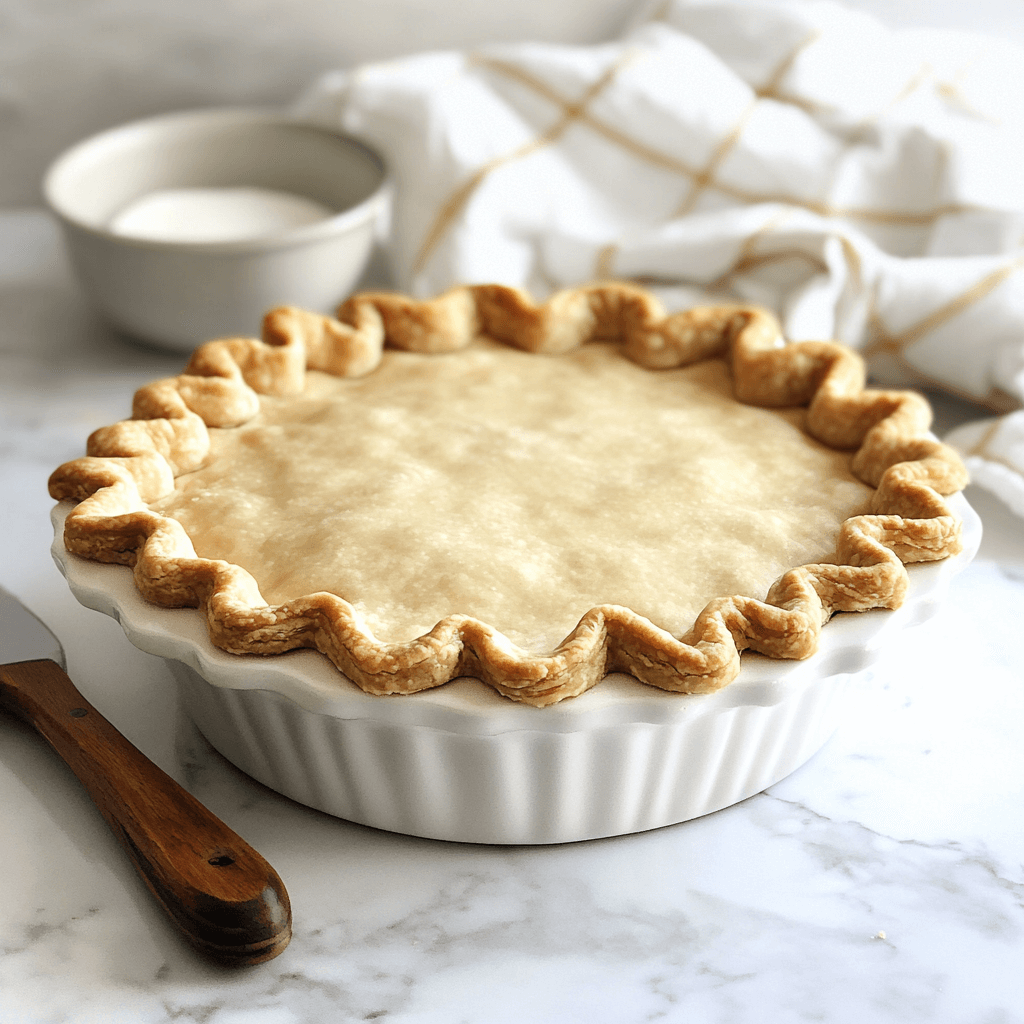
Step 5: Roll Out the Dough
When you’re ready to bake, take the dough out of the fridge. On a floured surface, roll it out to your desired thickness. Aim for about 1/8 inch thick. This is where you can get creative! Shape it into a circle or square, depending on your pie dish. Don’t worry if it’s not perfect; rustic is in!
Step 6: Pre-bake the Crust
Finally, preheat your oven to 375°F (190°C). Place your rolled-out crust into your pie dish and trim any excess. Prick the bottom with a fork to prevent bubbling. Bake for about 15 minutes until it’s lightly golden. This pre-baking step ensures your crust stays crisp, even with a delicious filling. Now, you’re ready to fill it with your favorite ingredients!
Tips for Success
- Always use chilled butter for a flaky texture.
- Don’t skip the chilling time; it’s crucial for the dough.
- When rolling out, keep your surface and rolling pin floured to prevent sticking.
- For a decorative touch, use cookie cutters to create shapes from excess dough.
- Experiment with different spices to customize your crust flavor.
Equipment Needed
- Mixing bowl: A large bowl for combining ingredients. Any size will do, just make sure it’s sturdy.
- Pastry cutter: Ideal for incorporating butter. You can also use your fingers or a fork if you don’t have one.
- Rolling pin: Essential for rolling out the dough. A wine bottle works in a pinch!
- Pie dish: A standard pie plate is perfect. Use a tart pan for a fancier look.
Variations on Creative Pie Crust
- Whole Wheat Crust: Swap half of the all-purpose flour for whole wheat flour for a nuttier flavor and added fiber.
- Herb-Infused Crust: Add finely chopped fresh herbs like rosemary or thyme to the dough for a savory twist, perfect for quiches or savory pies.
- Chocolate Crust: Mix in cocoa powder to the flour for a rich, chocolatey base that pairs beautifully with fruit fillings.
- Gluten-Free Option: Use a gluten-free flour blend to make this crust suitable for those with gluten sensitivities.
- Nutty Crust: Incorporate ground nuts, like almonds or pecans, into the flour for a crunchy texture and unique flavor.
Serving Suggestions for Creative Pie Crust
- Pair your pie with a scoop of vanilla ice cream for a classic dessert experience.
- Serve with a dollop of freshly whipped cream to add a touch of elegance.
- For a refreshing twist, offer a side of berry compote or fruit salad.
- Consider a warm cup of spiced chai or coffee to complement the flavors.
- Present your pie on a rustic wooden board for a charming, homemade look.
For more recipes follow me in page Facebook and Pinterest
FAQs about Creative Pie Crust
Can I make this creative pie crust ahead of time?
Absolutely! You can prepare the dough a day or two in advance. Just wrap it tightly in plastic wrap and store it in the fridge. This way, you’ll have it ready to roll out whenever you need it!
What can I use if I don’t have a pastry cutter?
No worries! You can use your fingers to work the butter into the flour. Alternatively, a fork or even two knives can do the trick. Just remember to keep the butter cold for that flaky texture!
How do I prevent my pie crust from getting soggy?
Pre-baking your crust is key! This step helps create a barrier that keeps moisture from the filling from soaking into the crust. You can also sprinkle a bit of flour or cornstarch on the bottom before adding your filling for extra protection.
Can I freeze the pie crust?
Yes! You can freeze the unbaked crust for up to three months. Just wrap it well in plastic wrap and then in aluminum foil. When you’re ready to use it, let it thaw in the fridge overnight before rolling it out.
What fillings work best with this creative pie crust?
This crust is incredibly versatile! It pairs beautifully with sweet fillings like fruit, custard, or chocolate. For savory options, think quiches or pot pies. The possibilities are endless!
Final Thoughts
Creating this creative pie crust is more than just a cooking task; it’s a delightful journey that brings joy to your kitchen. The process is simple yet rewarding, allowing you to express your culinary creativity. Each bite of your finished pie will remind you of the love and effort you put into it. Whether it’s a family gathering or a cozy night in, this crust will elevate your desserts and create lasting memories. So roll up your sleeves, embrace the mess, and enjoy the sweet satisfaction of baking something truly special for your loved ones!