As a passionate home cook, I know how hectic life can get, especially for busy moms and professionals. That’s why I’m excited to share this creative pie crust recipe with you! It’s not just any pie crust; it’s a delightful twist that elevates your desserts and makes them truly memorable. Whether you’re whipping up a quick dessert for a family gathering or impressing friends at a dinner party, this crust is your secret weapon. With just a few simple ingredients, you can create a delicious base that will have everyone asking for seconds!
Print
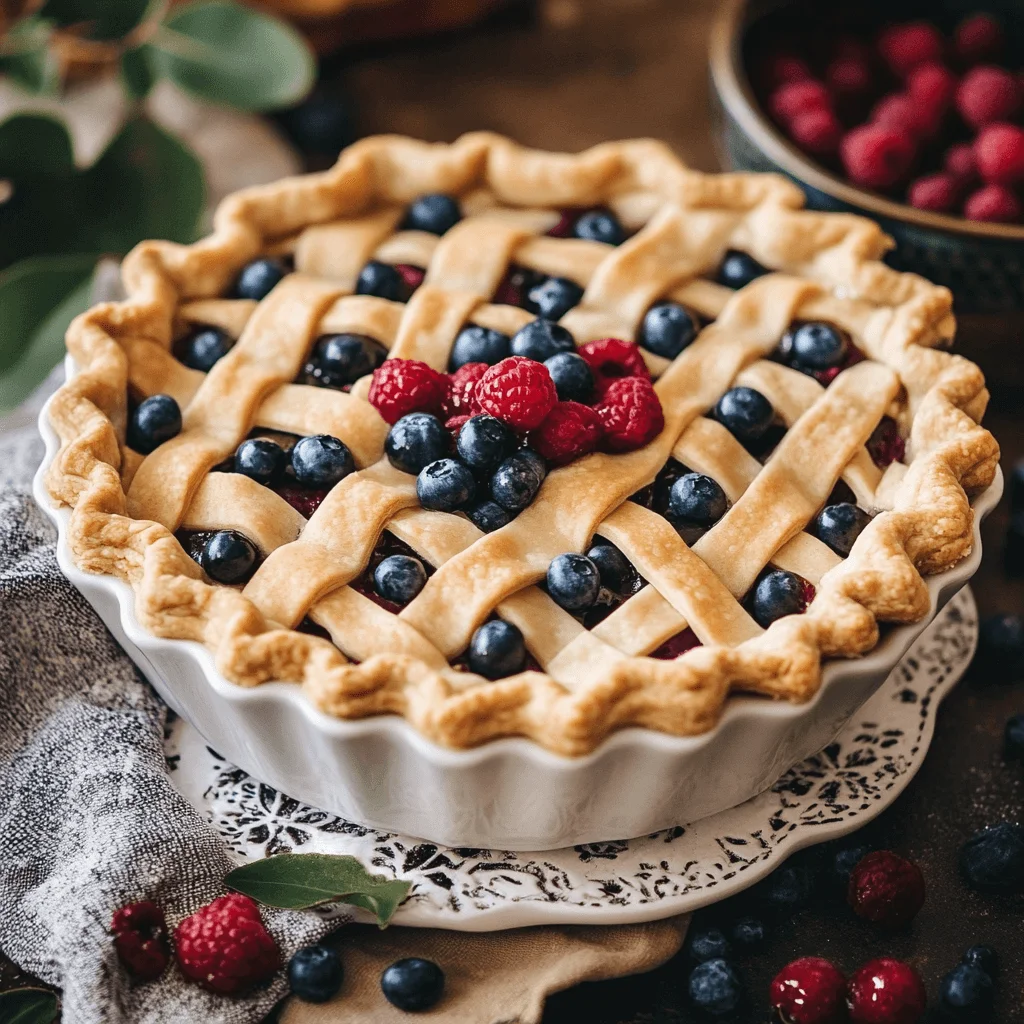
Creative pie crust that transforms your desserts today!
- Total Time: 1 hour 45 minutes (including chilling time)
- Yield: 1 pie crust 1x
- Diet: Vegetarian
Description
A unique and versatile pie crust recipe that elevates your desserts with creative flavors and textures.
Ingredients
- 2 1/2 cups all-purpose flour
- 1 cup unsalted butter, chilled and diced
- 1/4 cup granulated sugar
- 1/4 teaspoon salt
- 1/4 cup cold water
- 1 teaspoon vanilla extract (optional)
Instructions
- In a large bowl, combine flour, sugar, and salt.
- Add the chilled butter and mix until the mixture resembles coarse crumbs.
- Stir in cold water and vanilla extract until the dough comes together.
- Wrap the dough in plastic wrap and refrigerate for at least 1 hour.
- Preheat the oven to 375°F (190°C).
- Roll out the dough on a floured surface and fit it into a pie pan.
- Trim the excess dough and crimp the edges as desired.
- Fill with your favorite filling and bake according to the filling’s instructions.
Notes
- For a sweeter crust, increase the sugar to 1/2 cup.
- Experiment with different extracts like almond or lemon for added flavor.
- Make sure the butter is very cold for a flaky crust.
- Prep Time: 15 minutes
- Cook Time: 30 minutes
- Category: Dessert
- Method: Baking
- Cuisine: American
Nutrition
- Serving Size: 1 slice
- Calories: 200
- Sugar: 2g
- Sodium: 150mg
- Fat: 12g
- Saturated Fat: 7g
- Unsaturated Fat: 3g
- Trans Fat: 0g
- Carbohydrates: 22g
- Fiber: 1g
- Protein: 3g
- Cholesterol: 30mg
Keywords: creative pie crust, dessert crust, pie recipe
Table of Contents
Why You’ll Love This Creative Pie Crust
This creative pie crust is a game-changer for anyone who loves to bake but feels pressed for time. It’s incredibly easy to make, requiring just a handful of ingredients you probably already have in your pantry. Plus, the flavor options are endless! You can customize it to suit any filling, making it a versatile choice for any occasion. Trust me, your taste buds will thank you!

Ingredients for Creative Pie Crust
Gathering the right ingredients is the first step to creating your delicious creative pie crust. Here’s what you’ll need:
- All-purpose flour: This is the backbone of your crust, providing structure and texture. It’s versatile and perfect for any pie.
- Unsalted butter: Chilled and diced, butter adds richness and flakiness. Using unsalted allows you to control the saltiness of your crust.
- Granulated sugar: A touch of sweetness enhances the flavor. You can adjust the amount based on your filling or personal preference.
- Salt: Just a pinch balances the sweetness and enhances the overall flavor of the crust.
- Cold water: This helps bring the dough together without melting the butter, ensuring a flaky texture.
- Vanilla extract (optional): A splash of vanilla adds a lovely depth of flavor. Feel free to experiment with other extracts like almond or lemon for a unique twist!
For exact measurements, check the bottom of the article where you can find everything listed for easy printing. Happy baking!
How to Make Creative Pie Crust
Now that you have your ingredients ready, let’s dive into the fun part—making your creative pie crust! Follow these simple steps, and you’ll have a delicious base for your favorite fillings in no time.
Step 1: Combine Dry Ingredients
Start by grabbing a large bowl. In it, mix together the all-purpose flour, granulated sugar, and salt. Use a whisk or a fork to ensure everything is well combined. This step is crucial as it sets the foundation for your crust. The sugar will add a hint of sweetness, while the salt enhances the flavor.
Step 2: Incorporate Butter
Next, it’s time to add the chilled, diced butter. Using your fingers or a pastry cutter, mix the butter into the dry ingredients. You want the mixture to resemble coarse crumbs. This is where the magic happens! The cold butter creates those flaky layers we all love in a pie crust.
Step 3: Add Wet Ingredients
Now, stir in the cold water and, if you’re feeling adventurous, the optional vanilla extract. Mix until the dough starts to come together. Don’t overwork it; you want to keep that flakiness intact. If the dough feels too dry, add a little more water, one tablespoon at a time.
Step 4: Chill the Dough
Once your dough is ready, wrap it in plastic wrap and refrigerate for at least one hour. Chilling is essential! It allows the butter to firm up, which helps create that perfect flaky texture when baked. Plus, it gives you a little break before the next steps!
Step 5: Preheat the Oven
While your dough is chilling, go ahead and preheat your oven to 375°F (190°C). This way, your oven will be ready to go as soon as your crust is prepared. A hot oven is key to achieving that golden-brown finish.
Step 6: Roll Out the Dough
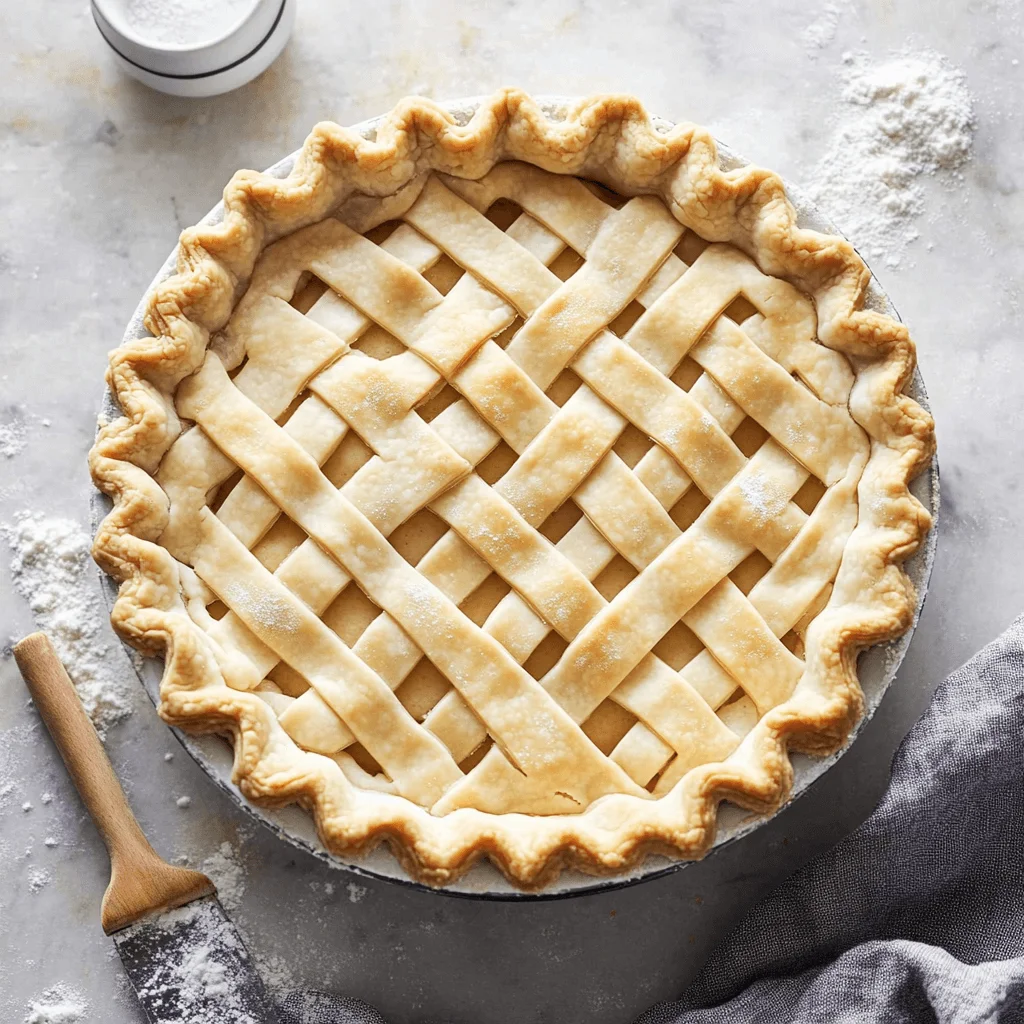
After the dough has chilled, take it out of the fridge. On a floured surface, roll it out to your desired thickness. Aim for about 1/8 inch thick. Carefully fit the rolled dough into your pie pan, making sure it covers the bottom and sides evenly. This is where you can get creative with shapes and designs!
Step 7: Trim and Crimp
Once the dough is in the pan, trim any excess hanging over the edges. You can crimp the edges with your fingers or a fork for a decorative touch. This not only looks pretty but also helps seal in your filling. Plus, it’s a great way to show off your baking skills!
Step 8: Fill and Bake
Finally, fill your crust with your favorite filling. Whether it’s a luscious fruit filling or a rich chocolate ganache, the choice is yours! Bake according to the filling’s instructions, and watch as your creative pie crust transforms into a delicious dessert that will impress everyone.
Tips for Success
- Always use very cold butter for a flaky texture.
- Don’t skip the chilling step; it’s crucial for the dough’s consistency.
- When rolling out, keep your surface and rolling pin floured to prevent sticking.
- For a sweeter crust, feel free to increase the sugar to 1/2 cup.
- Experiment with different extracts to find your favorite flavor combination!
Equipment Needed
- Mixing bowl: A large bowl for combining ingredients. A sturdy pot can work in a pinch.
- Pastry cutter or fork: For mixing butter into the flour. Your fingers can do the job too!
- Rolling pin: Essential for rolling out dough. A wine bottle can serve as a fun alternative.
- Pie pan: A standard pie dish is ideal. Any oven-safe dish can work if you’re in a bind.
Variations of Creative Pie Crust
- Whole Wheat Flour: Swap half of the all-purpose flour for whole wheat flour for a nuttier flavor and added fiber.
- Gluten-Free Option: Use a gluten-free all-purpose flour blend to make this crust suitable for those with gluten sensitivities.
- Herb-Infused Crust: Add finely chopped fresh herbs like rosemary or thyme for a savory twist, perfect for quiches or savory pies.
- Cocoa Powder: Mix in a couple of tablespoons of cocoa powder for a chocolatey crust that pairs beautifully with sweet fillings.
- Nut Crust: Incorporate ground nuts like almonds or pecans into the dough for a rich, flavorful base that adds texture.
- Spiced Crust: Add a teaspoon of cinnamon or nutmeg to the dry ingredients for a warm, aromatic flavor that complements fruit fillings.
Serving Suggestions for Creative Pie Crust
- Pair your pie with a scoop of vanilla ice cream for a classic dessert experience.
- Serve with freshly whipped cream and a sprinkle of cinnamon for added flair.
- Complement fruit pies with a drizzle of caramel sauce for a sweet touch.
- For drinks, consider a light herbal tea or a glass of sparkling water.
- Presentation tip: Dust with powdered sugar before serving for an elegant finish!
For more recipes follow me in page Facebook and Pinterest
FAQs about Creative Pie Crust
As you embark on your journey to create this delightful creative pie crust, you might have a few questions. Here are some common queries I’ve encountered, along with helpful answers to guide you along the way!
Can I make this creative pie crust ahead of time?
Absolutely! You can prepare the dough in advance and store it in the refrigerator for up to 3 days. Just remember to wrap it tightly in plastic wrap. If you want to keep it longer, freeze the dough for up to 3 months. Just thaw it in the fridge before rolling it out.
What can I use instead of butter?
If you’re looking for a dairy-free option, you can substitute butter with coconut oil or a vegan butter alternative. Just make sure it’s chilled, just like the butter, to maintain that flaky texture!
How do I prevent my crust from getting soggy?
To avoid a soggy bottom, consider pre-baking your crust for about 10 minutes before adding the filling. This helps set the crust and creates a barrier against moisture. You can also sprinkle a thin layer of breadcrumbs or ground nuts on the bottom before adding the filling.
Can I use this crust for savory pies?
Definitely! This creative pie crust is versatile enough for both sweet and savory fillings. Just adjust the sugar to your taste, or omit it entirely for a more neutral flavor that pairs well with quiches or meat pies.
What’s the best way to store leftover pie?
Store any leftover pie in the refrigerator, covered with plastic wrap or in an airtight container. It should stay fresh for about 3-4 days. If you want to keep it longer, consider freezing individual slices for a quick treat later!
Final Thoughts
Creating this creative pie crust is more than just a baking task; it’s a delightful experience that brings joy to your kitchen. The aroma of freshly baked pie fills the air, wrapping your home in warmth and comfort. Each bite of your dessert, nestled in this flaky, flavorful crust, is a reminder of the love and creativity you poured into it. Whether it’s a family gathering or a quiet evening treat, this pie crust transforms ordinary moments into cherished memories. So roll up your sleeves, embrace the process, and let your culinary creativity shine!