
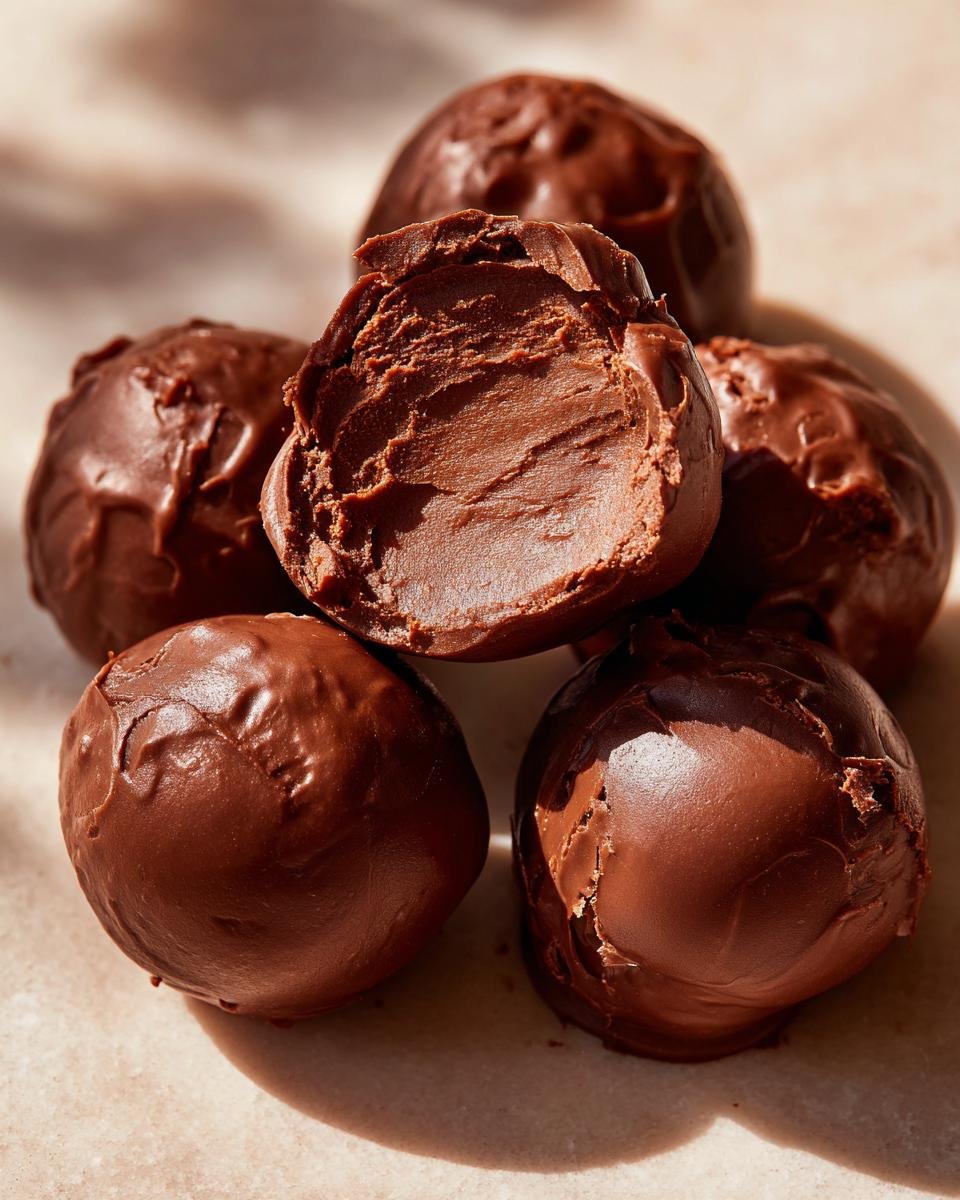
Oh my goodness, let me tell you about these Chocolate Covered Cheesecake Balls! They are pure bliss, and they’ve become my go-to dessert for just about any occasion. I mean, who can resist the creamy goodness of cheesecake wrapped in a luscious chocolate coat? Not me, that’s for sure! These delightful bites are not only incredibly easy to whip up, but they also make a stunning presentation that will impress everyone, from your best friends to family gatherings.

I remember the first time I made these for a potluck. The moment I set them out, they practically disappeared! People were raving about the rich cheesecake filling and the smooth chocolate outside. It’s just such a winning combination! These little treats are perfect for parties, holidays, or just a cozy night in when you want to treat yourself. Seriously, they take less than an hour to make, and you’ll find yourself wanting to make them again and again.
What I love most is their versatility. You can customize them with different toppings or flavors, making them truly your own. So, gather your ingredients, and let’s get started on creating these magical bites that’ll have everyone asking for your secret recipe!
Ingredients List
To create these irresistible Chocolate Covered Cheesecake Balls, you’ll need just a handful of simple ingredients that come together to create pure magic. Here’s what you’ll need:
- 8 oz softened cream cheese: Make sure it’s at room temperature so it mixes smoothly into a creamy filling.
- 1/2 cup powdered sugar: This adds sweetness and a lovely light texture to the cheesecake filling.
- 1 tsp vanilla extract: For that warm, aromatic flavor that ties everything together beautifully.
- 1 cup chocolate chips: I recommend using high-quality chocolate for the best taste. You can go dark, semi-sweet, or even milk chocolate, depending on your preference!
- 1 tbsp vegetable oil: This little bit of oil helps the chocolate melt smoothly and coat those cheesecake balls perfectly.
Gather these ingredients, and you’re already halfway to creating a decadent treat that everyone will adore!
How to Prepare Chocolate Covered Cheesecake Balls
Alright, let’s get into the fun part! Making these Chocolate Covered Cheesecake Balls is super easy, and I promise you’ll be amazed at how quickly they come together. Just follow these simple steps, and you’ll be on your way to creating these delicious bites of joy!
Step 1: Mix the Cheesecake Filling
First things first, grab a medium-sized bowl and toss in that softened cream cheese, powdered sugar, and vanilla extract. Now, using a hand mixer or a sturdy spatula, mix everything together until it’s smooth and creamy. You want it to be velvety, with no lumps in sight. Trust me, this texture is key for that dreamy cheesecake experience!
Step 2: Form the Balls
Once your cheesecake filling is all mixed up and looking good, it’s time to roll it into balls! Using your hands, take about a tablespoon of the mixture and roll it into a ball shape. Don’t worry about being perfect; they can be a little rustic! Place each ball on a baking sheet lined with parchment paper. Now, here’s the crucial part: pop that baking sheet into the freezer for about 30 minutes. This helps the balls hold their shape when you dip them in chocolate!
Step 3: Melt the Chocolate
While your cheesecake balls are chilling, let’s get that chocolate ready! In a microwave-safe bowl, combine chocolate chips and vegetable oil. Microwave it in 30-second intervals, stirring between each one, until it’s completely melted and smooth. You want a creamy consistency that’s easy to dip into. If it’s too thick, just add a tiny bit more oil until it’s perfect!
Step 4: Dip the Cheesecake Balls
Now comes the fun part—dipping! Take your chilled cheesecake balls out of the freezer and one by one, carefully dip each ball into the melted chocolate. Make sure they’re fully coated; this is where that chocolate magic happens! I like to use a fork to lift them out, letting any excess chocolate drip off before placing them back on the parchment-lined tray. And don’t stress if they look a little messy—chocolate is forgiving!
Step 5: Set the Chocolate
Once all the balls are coated in chocolate, it’s time to let them set! Just place the tray in the refrigerator for about 20-30 minutes, or until the chocolate hardens. This is the moment you’ve been waiting for—once they’re firm, they’re ready to be devoured! Just try to resist sneaking a taste before your guests arrive (or don’t; I won’t judge!).
Why You’ll Love This Recipe
There are so many reasons to fall head over heels for these Chocolate Covered Cheesecake Balls. Here are just a few of the things that make this dessert a must-try:
- Simplicity of Preparation: Seriously, these beauties come together in no time! With just a handful of ingredients and a few easy steps, you’ll be on your way to dessert bliss in under an hour.
- Taste Appeal: The combination of creamy cheesecake and rich chocolate is absolutely heavenly. Each bite is a delightful mix of flavors and textures that will have your taste buds singing!
- Versatility for Occasions: Whether it’s a birthday party, holiday gathering, or just a cozy movie night, these cheesecake balls fit right in. You can whip them up for any occasion, and they’re sure to impress!
- Vegetarian-Friendly: With no meat or animal products beyond the essential dairy, these treats can be enjoyed by vegetarians, making them a great choice for a wide range of guests.
- Customizable: Feel free to get creative! You can roll them in crushed nuts, sprinkles, or even drizzle extra chocolate on top. The options are endless, letting you make them uniquely yours!
Trust me, once you try these Chocolate Covered Cheesecake Balls, you’ll understand why they’ve earned a special place in my heart and kitchen. They’re not just a dessert; they’re a little piece of joy that’s perfect for sharing (or not!).
Tips for Success
Ready to take your Chocolate Covered Cheesecake Balls to the next level? Here are some of my best tips for ensuring that your cheesecake balls turn out perfectly every single time!
Use High-Quality Chocolate
Oh, let me tell you, the chocolate makes all the difference! Invest in some high-quality chocolate chips or bars for melting. The richer the chocolate, the more delicious your cheesecake balls will taste. Plus, it melts smoother, which gives you that stunning, shiny coating. Trust me, your taste buds will thank you!
Chill the Cheesecake Balls Thoroughly
Don’t skip the freezing step! Chilling the cheesecake balls for 30 minutes is crucial to keep their shape during the dipping process. If they’re too warm, they might start to fall apart when they hit that melted chocolate. You want them to be firm and ready to dive into that chocolate bath!
Customize Your Toppings
Get creative with toppings! Once your chocolate has set, you can roll your cheesecake balls in crushed nuts, sprinkles, or even crushed cookies for an extra crunch. You can also drizzle some melted chocolate on top for a fancy touch. Mix and match to find your favorite combinations—each variation can feel like a brand-new treat!
Keep Your Work Area Clean
Chocolate can get a little messy, so keep some paper towels handy! Wipe your hands and any surfaces as you go to avoid chocolate splatters everywhere. A clean workspace makes the whole process much more enjoyable, plus it helps in keeping those cheesecake balls looking neat and tidy.
Let Them Set in the Refrigerator
After dipping, don’t rush to dig in! Place your coated cheesecake balls in the refrigerator for at least 20-30 minutes to let the chocolate harden. This step ensures that they stay intact when you take a bite, and you’ll get that lovely crack when you sink your teeth into them. Patience is key here!
With these tips in your back pocket, you’re all set to create the most delightful Chocolate Covered Cheesecake Balls that will have everyone coming back for more. Enjoy the process, and happy baking!
Variations
One of the best things about these Chocolate Covered Cheesecake Balls is how versatile they are! You can easily mix things up to create new flavors and textures that will keep your taste buds excited. Here are some delicious variations to try:
Flavor Infusions
Want to get adventurous? Add a twist to the cheesecake filling by incorporating different flavor extracts! Here are a few ideas:
- Mint Chocolate: Swap in mint extract for a refreshing take. Just a teaspoon will do the trick, and you’ll have a mint chocolate dream!
- Chocolate Orange: Add some orange zest and a splash of orange extract to the cream cheese mixture. This combo creates a bright, zesty flavor that’s absolutely divine.
- Peanut Butter Bliss: Mix in a few tablespoons of creamy peanut butter into the filling for a nutty, rich flavor. You can even drizzle some melted chocolate or peanut butter on top for a beautiful finish!
Custom Toppings
Get creative with how you finish these little bites! Here are some fun topping ideas:
- Crushed Nuts: Roll your cheesecake balls in chopped almonds, walnuts, or pecans for a delightful crunch.
- Sprinkles: Brighten things up with colorful sprinkles! This is especially fun for kids’ parties or festive gatherings.
- Coconut Flakes: For a tropical twist, roll the balls in shredded coconut. It adds a lovely chewiness and a hint of sweetness.
- Crushed Cookies: Use crushed Oreos or graham crackers for a unique texture and extra flavor. Just mix them in or roll the balls in them for a delicious finishing touch!
Chocolate Variations
Switch up the chocolate coating for even more fun! Here are a few suggestions:
- White Chocolate: Melt some white chocolate for a sweet and creamy coating that pairs beautifully with the cheesecake filling.
- Dark Chocolate: If you prefer a more intense flavor, opt for dark chocolate. It adds a rich depth that balances the sweetness of the cheesecake.
- Colored Melting Chocolate: For a festive flair, try using colored melting chocolate for dipping. It’s perfect for holidays and celebrations!
With these variations, you can create a whole assortment of Chocolate Covered Cheesecake Balls that are sure to impress your family and friends. The possibilities are endless, so let your creativity shine and have fun experimenting!
Storage & Reheating Instructions
Now that you’ve made these delightful Chocolate Covered Cheesecake Balls, you might be wondering how to keep them fresh for later enjoyment. Don’t worry, I’ve got you covered! Proper storage is key to maintaining their deliciousness and texture.
First off, after the chocolate has completely set, you’ll want to transfer your cheesecake balls to an airtight container. Layer them gently, placing parchment paper between the layers if you’re stacking them. This little trick keeps them from sticking together and helps preserve that lovely chocolate coating.
Store the container in the refrigerator, where they can stay fresh for up to a week. I promise, they’ll still taste amazing even after a few days! Just remember to let them sit at room temperature for a few minutes before enjoying, as it brings out all those wonderful flavors and creaminess.
As for reheating, you won’t need to! These treats are best enjoyed cold or at room temperature. If you find yourself with leftovers, just pop them back in the fridge and savor the magic over the next few days.
So, go ahead and make a big batch! With the right storage, you can indulge in these Chocolate Covered Cheesecake Balls whenever the craving strikes. Happy snacking!
Nutritional Information Section
Alright, let’s break down the nutritional information for these delightful Chocolate Covered Cheesecake Balls! Knowing what’s in these treats can help you enjoy them even more, especially if you’re keeping an eye on your diet. Here’s the estimated nutritional data per serving, which is one cheesecake ball:
- Calories: 120
- Fat: 8g
- Saturated Fat: 4g
- Unsaturated Fat: 2g
- Trans Fat: 0g
- Sodium: 50mg
- Carbohydrates: 10g
- Fiber: 0g
- Sugar: 6g
- Protein: 2g
- Cholesterol: 15mg
Keep in mind that these values are estimates and can vary based on the specific ingredients you use. But rest assured, you’re treating yourself to a delicious indulgence that’s still manageable in moderation. Enjoy every creamy, chocolatey bite!
For more recipes follow me in page Facebook and Pinterest
FAQ Section
Q1: Can I use low-fat cream cheese for the Chocolate Covered Cheesecake Balls?
Absolutely! You can use low-fat cream cheese if you want to lighten things up a bit. Just keep in mind that it might affect the creaminess slightly, but they’ll still be delicious!
Q2: How long do these cheesecake balls last in the fridge?
These Chocolate Covered Cheesecake Balls can last up to a week in the refrigerator when stored properly in an airtight container. They’re perfect for making ahead of time for parties or snacks throughout the week!
Q3: Can I freeze Chocolate Covered Cheesecake Balls?
Yes, you can freeze them! Just make sure they’re fully set and then place them in a single layer in an airtight container. They’ll keep well in the freezer for about 2-3 months. When you’re ready to enjoy them, let them thaw in the fridge overnight.
Q4: What other toppings can I use besides chocolate?
Oh, the options are endless! You can roll your cheesecake balls in crushed nuts, coconut flakes, or even colorful sprinkles for a fun twist. You could also drizzle them with caramel or melted chocolate for an extra sweet touch!
Q5: Can I make these cheesecake balls without chocolate?
While chocolate is a key component, you could definitely skip the chocolate coating and just enjoy the cheesecake balls as they are! They’ll still be creamy and delicious, just without that chocolatey goodness. But I highly recommend giving them a try with chocolate at least once!

Chocolate Covered Cheesecake Balls: 5 Sweet Blissful Bites
- Total Time: 50 minutes
- Yield: 20 balls 1x
- Diet: Vegetarian
Description
Delicious chocolate covered cheesecake balls that are easy to make and perfect for any occasion.
Ingredients
- 8 oz cream cheese, softened
- 1/2 cup powdered sugar
- 1 tsp vanilla extract
- 1 cup chocolate chips
- 1 tbsp vegetable oil
Instructions
- In a bowl, mix cream cheese, powdered sugar, and vanilla until smooth.
- Roll the mixture into small balls and freeze for 30 minutes.
- Melt chocolate chips with vegetable oil in a microwave-safe bowl.
- Dip each ball into the melted chocolate, ensuring they are fully coated.
- Place coated balls on a parchment-lined tray.
- Refrigerate until chocolate hardens.
Notes
- Use high-quality chocolate for better taste.
- Store in the refrigerator.
- Can be customized with different toppings.
- Prep Time: 15 minutes
- Cook Time: 5 minutes
- Category: Dessert
- Method: No-Bake
- Cuisine: American
Nutrition
- Serving Size: 1 ball
- Calories: 120
- Sugar: 6g
- Sodium: 50mg
- Fat: 8g
- Saturated Fat: 4g
- Unsaturated Fat: 2g
- Trans Fat: 0g
- Carbohydrates: 10g
- Fiber: 0g
- Protein: 2g
- Cholesterol: 15mg
Keywords: Chocolate Covered Cheesecake Balls