
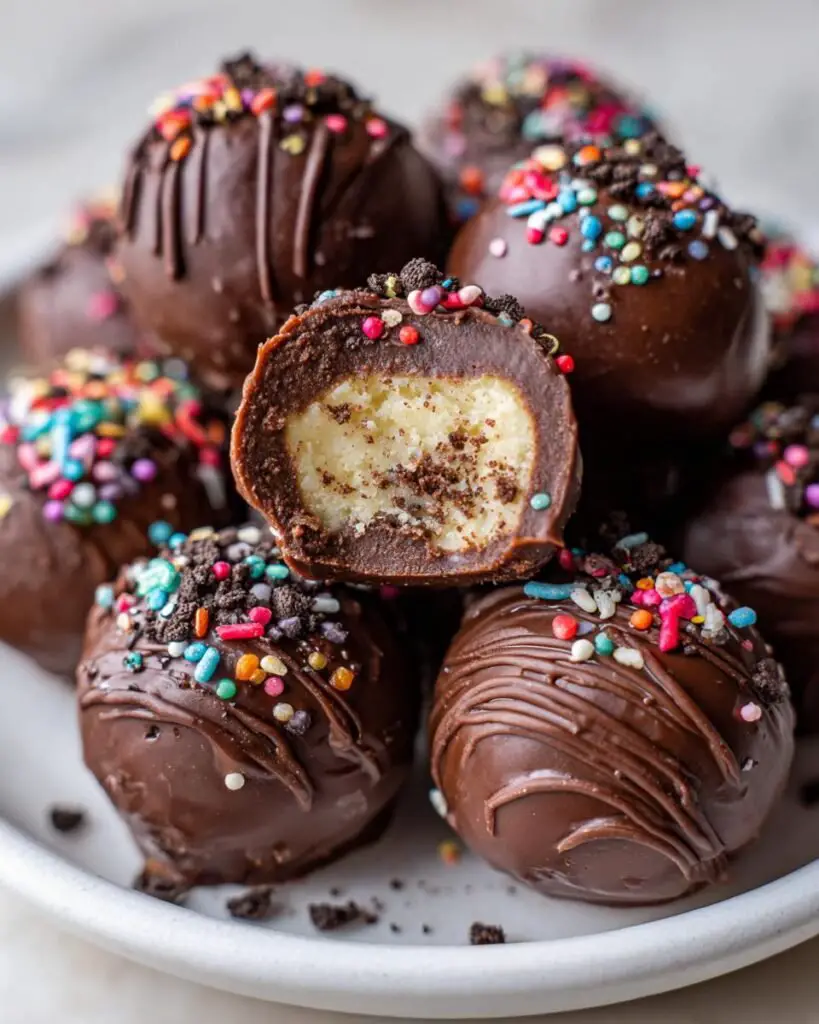
Oh my goodness, if you haven’t tried making Oreo balls yet, you’re totally missing out! Seriously, these little treats are a game-changer for any dessert table. They’re super easy to whip up, and the best part? You don’t even need an oven! I remember the first time I made them for a family gathering; everyone went absolutely nuts over them! The combination of that rich cream cheese and crushed Oreos, all coated in chocolate, is just heavenly. Plus, they’re perfect for any occasion—birthdays, holidays, or even just a cozy night in. Trust me, once you try this simple recipe, you’ll be hooked—and so will everyone you share them with!

Ingredients List
Gathering the right ingredients is key to whipping up these delightful Oreo balls! Here’s everything you’ll need:
- 36 regular Oreo cookies (14.3oz/405g): The star of the show! You can use any classic flavor or even try Golden or Mint Creme Oreos for a fun twist.
- 8 ounces (226g) full-fat brick cream cheese, softened: Make sure it’s the brick kind, not spreadable. This gives the Oreo balls that creamy, dreamy texture that melts in your mouth.
- 12 ounces (339g) semi-sweet or white chocolate, coarsely chopped: Choose your favorite! Semi-sweet chocolate gives a nice balance, while white chocolate adds a lovely sweetness.
- 1/2 teaspoon vegetable oil or coconut oil: This will help the chocolate melt smoothly, making it easier to coat those delicious truffles.
- Optional for garnish: Feel free to get creative with sprinkles, crushed Oreo crumbs, or additional melted chocolate to make your truffles even more festive!
With these simple ingredients, you’re all set to create something amazing!
How to Make Oreo Balls (Truffles)
Alright, let’s dive into the fun part—making those mouth-watering Oreo balls! I promise, it’s going to be a blast! Follow these steps, and you’ll have a delicious batch ready to impress your friends and family.
Prepare the Oreo Filling
First things first, grab your food processor! Toss those 36 Oreo cookies right in and pulse them until they turn into fine crumbs. It should look like sand—perfect for mixing! Then, take your softened cream cheese and add it to the Oreo crumbs. Use a sturdy spatula or your trusty mixing spoon to combine everything until it’s all blended together into a thick, dough-like consistency. Trust me, you’ll want to make sure it’s well-mixed; this is where the magic happens!
Form the Truffles
Now comes the fun part—rolling the mixture into truffle balls! Scoop out a tablespoon of the filling and gently roll it between your palms to form a ball. I like to make them about the size of a golf ball, but feel free to go smaller or larger, depending on your preference! If the mixture feels sticky, don’t panic; just pop it in the fridge for about 15 minutes to chill. This will make it easier to handle when you’re rolling. Once they’re chilled, place your rolled balls on a lined baking sheet and get ready for the next step!
Melt the Chocolate
Time to melt that chocolate! In a microwave-safe bowl, combine the chopped chocolate and your choice of vegetable or coconut oil. Microwave it in 30-second intervals, stirring in between until it’s smooth and silky. You want that perfect dipping consistency—just make sure not to overheat it, or you’ll end up with a lumpy mess. If the chocolate seems a bit thick, adding that splash of oil will help it glide over the truffles like a dream!
Coat the Truffles
Now, let’s coat those beautiful truffles! Using a fork or a toothpick, dip each truffle into the melted chocolate, ensuring it’s fully coated. Lift it out and let the excess chocolate drip off back into the bowl. You want just the right amount of chocolate on there—too much, and it’ll be heavy; too little, and you won’t get that delicious chocolate layer. If you want to add sprinkles or crushed Oreos on top, do it while the chocolate is still wet so they stick! It’s all about that presentation!
Set and Serve
After coating, place your chocolate-covered truffles back on the lined baking sheet. Now, they need to chill in the fridge for at least an hour to set. This is the hardest part—waiting! But trust me, it’s worth it. Once they’re firm, you can serve them right away or store them in an airtight container in the fridge. They’re perfect for sharing at parties, or you can keep them all to yourself for a cozy night in. Just remember, the longer they sit, the more amazing they taste!
Why You’ll Love This Recipe
Let me tell you, there are so many reasons to adore these Oreo balls! They’re not just tasty; they’re also super convenient. Here’s why you’ll want to make them again and again:
- Quick and Easy: With just a few simple steps and no baking required, you can whip these up in no time! Perfect for those last-minute dessert cravings.
- Perfect for Any Occasion: Whether it’s a birthday party, holiday gathering, or even a movie night at home, these truffles are a hit with everyone!
- Customizable: Feel free to get creative! You can use different flavors of Oreos, mix in fun toppings, or even switch up the chocolate. The possibilities are endless!
- Make Ahead: You can prepare these truffles in advance and store them in the fridge or freezer, making them an ideal make-ahead treat for busy days.
- Fun to Make: Involving the kids or friends in the process is a blast! Rolling the truffles and dipping them in chocolate is a fun activity that brings everyone together.
- Guaranteed Crowd-Pleaser: Trust me, these little bites of joy will vanish faster than you can say “Oreo!” Everyone loves them, and you’ll be the star of the dessert table!
Tips for Success
Alright, let’s make sure your Oreo balls turn out absolutely perfect! Here are some handy tips to help you along the way:
- Chill, Chill, Chill: Don’t skip the chilling steps! Chilling the mixture before rolling makes it much easier to handle. If you find the balls getting too sticky, just pop them back in the fridge for an extra 10-15 minutes.
- Use Full-Fat Cream Cheese: Stick with full-fat brick cream cheese for the best flavor and texture. The spreadable kind just doesn’t give the same creamy consistency that makes these truffles so dreamy.
- Don’t Overheat the Chocolate: When melting your chocolate, keep an eye on it! Overheating can lead to a grainy texture. Stirring every 30 seconds helps ensure it melts evenly and stays smooth.
- Experiment with Oreos: Feel free to switch things up by using different flavors of Oreos! Golden, Mint, or even seasonal flavors can add a fun twist to your truffles.
- Master Your Coating Technique: When dipping the truffles, let the excess chocolate drip off for a cleaner finish. You can also use a skewer or toothpick to help with dipping and lifting them out.
- Keep Them Fresh: To keep your Oreo balls fresh and tasty, store them in an airtight container in the refrigerator. They’ll last up to a week, but trust me, they’ll probably be gone long before then!
- Garnish Like a Pro: Get creative with your garnishes! Adding crushed Oreos, colorful sprinkles, or even a drizzle of contrasting chocolate will make your truffles look as good as they taste!
With these tips in your back pocket, you’re all set to make the most delicious Oreo balls ever. Happy baking!
Nutritional Information
When indulging in these delightful Oreo balls, it’s always good to know what you’re treating yourself to! Here’s the typical nutritional breakdown for one truffle:
- Calories: 110
- Fat: 6g
- Saturated Fat: 3g
- Trans Fat: 0g
- Cholesterol: 5mg
- Sodium: 50mg
- Carbohydrates: 13g
- Fiber: 0g
- Sugar: 9g
- Protein: 1g
Keep in mind that these values are estimates, so your results might vary a bit based on the ingredients you choose. But hey, it’s all about enjoying the deliciousness, right?
FAQ Section
Got questions about making those scrumptious Oreo balls? Don’t worry, I’ve got you covered! Here are some common inquiries and answers that will help you on your truffle-making journey:
- Can I use other types of cookies instead of Oreos? Absolutely! While Oreos are the classic choice, you can experiment with different types of cookies. Try using chocolate chip cookies, peanut butter cookies, or even graham crackers for a unique twist!
- How long do Oreo balls last? If stored properly in an airtight container in the fridge, these truffles can last up to a week. You can also freeze them for 2-3 months if you want to save some for later!
- Can I make these truffles dairy-free? Yes, you can! Look for dairy-free cream cheese and use dairy-free chocolate to make a delicious version that fits your dietary needs.
- What should I do if my chocolate is too thick for coating? If your melted chocolate is too thick, just stir in a little more vegetable or coconut oil. This will help thin it out and make it easier to dip your truffles!
- Can I make these truffles ahead of time? Definitely! You can prepare the Oreo filling and roll them into balls a day or two in advance. Just keep them chilled in the fridge until you’re ready to coat them in chocolate.
- What’s the best way to melt chocolate? The microwave is super convenient! Just remember to melt it in short bursts of 30 seconds, stirring in between, to avoid overheating. You can also use a double boiler for more control over the melting process.
- Do I have to chill the truffles before coating? Yes, chilling the rolled truffles for at least an hour helps them hold their shape when you dip them in chocolate. If they’re sticky, a quick chill in the fridge can make rolling much easier!
With these FAQs, you should feel ready to dive into making your very own Oreo balls. They’re such a fun treat to whip up, and I’m sure you’ll impress everyone with your delicious creations!
Storage & Reheating Instructions
Now that you’ve made these scrumptious Oreo balls, you’ll want to know how to store them properly to keep them fresh and delicious! Here’s the scoop:
Storing Your Oreo Balls: To keep your truffles in tip-top shape, place them in an airtight container. You can line the container with parchment paper to prevent sticking. They’ll stay fresh in the refrigerator for up to a week. Just make sure they’re completely set before you transfer them, so they don’t stick together!
If you’ve got leftovers (which is rare, trust me!), you can also freeze these little delights! Pop them in a freezer-safe container or a zip-top bag, and they’ll last for 2-3 months. Just remember to label the container with the date so you know how long they’ve been hanging out in there!
Reheating Instructions: While these truffles are best enjoyed cold or at room temperature, if you ever want to soften them slightly, simply let them sit out for about 10-15 minutes before serving. This will bring back that delicious creamy texture without losing any of that wonderful chocolate coating.
So go ahead and make a big batch—these treats are perfect for sharing, and you’ll want to keep them around as a sweet little surprise for yourself too!
Serving Suggestions
Now that you’ve got these delightful Oreo balls ready to go, let’s talk about how to serve them up and make the experience even more special! Presentation can elevate any dessert, and these truffles are no exception. Here are some fun ideas to make your Oreo balls shine:
- Truffle Tower: Create a beautiful dessert display by stacking your Oreo balls on a tiered cake stand. This not only looks stunning but also makes it easy for guests to grab their favorites!
- Chocolate Dipping Station: Set up a fun DIY chocolate dipping station! Provide some melted chocolate, sprinkles, crushed nuts, and other toppings for guests to customize their own truffles. It’s a great interactive treat for parties!
- Festive Plates: Use colorful or themed plates to serve your Oreo balls. For a holiday gathering, you might use festive paper plates or red and green napkins to match the season!
- Garnish Galore: Sprinkle some extra crushed Oreos or colorful sprinkles on top of the truffles just before serving. This adds a festive touch and makes them even more inviting!
- Pair with Coffee or Milk: Serve your Oreo balls alongside a glass of cold milk or a cup of rich coffee. The creamy textures of the truffles pair beautifully with these beverages, making for a perfect dessert experience!
- Gift-Worthy Treats: Package them up in cute boxes or mason jars tied with a ribbon to give as gifts. Everyone loves receiving homemade goodies, and your Oreo balls will surely be a hit!
With these serving suggestions, your Oreo balls will not only taste amazing but also look absolutely gorgeous. So go ahead, get creative, and enjoy the smiles you’ll bring to everyone around!
For more recipes follow me in page Pinterest.
Print
How to Make Oreo Balls (Truffles) for Irresistible Delight
- Total Time: 1 hour 45 minutes
- Yield: 36 truffles 1x
- Diet: Vegetarian
Description
Learn how to make delicious Oreo balls, also known as truffles, with this simple recipe.
Ingredients
- 36 (14.3oz/405g) regular Oreo cookies
- 8 ounces (226g) full-fat brick cream cheese, softened
- 12 ounces (339g) semi-sweet or white chocolate, coarsely chopped
- 1/2 teaspoon vegetable oil or coconut oil
- Optional for garnish: sprinkles, Oreo crumbs, additional melted chocolate
Instructions
- Make the Oreo truffle filling: Place the Oreos in a food processor and pulse into a fine crumb.
- Beat the Oreo crumbs with the softened cream cheese until combined.
- Scoop out a spoonful of the mixture and roll into a ball. Place on a lined baking sheet.
- If sticky, refrigerate for 15 minutes before rolling.
- Refrigerate the balls for at least 1 hour or freeze for 30 minutes.
- Melt chocolate and oil in a bowl, stirring until smooth.
- Coat each Oreo ball in melted chocolate, letting excess drip off.
- Top with garnishes if desired while chocolate is wet.
- Refrigerate for at least 1 hour to set before serving.
Notes
- Make ahead: Chill the balls for up to 3 days before coating.
- Freeze the finished truffles for 2–3 months.
- Use regular, Golden, or Mint Creme Oreos; avoid Double-Stuf.
- Use brick cream cheese, not spreadable.
- For best results, use baking chocolate bars.
- Thin chocolate with oil for easier coating.
- Avoid tempering chocolate for this recipe.
- Prep Time: 30 minutes
- Cook Time: 15 minutes
- Category: Dessert
- Method: No-Bake
- Cuisine: American
Nutrition
- Serving Size: 1 truffle
- Calories: 110
- Sugar: 9g
- Sodium: 50mg
- Fat: 6g
- Saturated Fat: 3g
- Unsaturated Fat: 2g
- Trans Fat: 0g
- Carbohydrates: 13g
- Fiber: 0g
- Protein: 1g
- Cholesterol: 5mg
Keywords: Oreo Balls, Truffles, No-Bake Dessert, Chocolate Treats