Oh my goodness, let me tell you about these *Holiday Cookies: Black Forest Inspired Treats*! They’re not just cookies; they’re little bites of joy that whisk you away to a winter wonderland. Imagine the rich, chocolatey goodness mingling with the tartness of cherries. It’s like bringing a piece of the holiday spirit into your kitchen! I’ve always loved the classic Black Forest cake, but transforming it into cookies? Pure genius! These treats have become a staple at our family gatherings, adding that extra sprinkle of magic to our celebrations. Every time I bake them, the warm aroma fills my home, drawing everyone in. Trust me, these cookies will be the highlight of your holiday cookie platter, leaving your friends and family raving about them long after the last crumb has vanished!
Ingredients List
Gathering the right ingredients is key to making these delightful *Holiday Cookies: Black Forest Inspired Treats*. Here’s what you’ll need:
- 1 cup all-purpose flour – the foundation for our cookies.
- 1/2 cup unsweetened cocoa powder – for that rich, chocolatey flavor.
- 1/2 cup granulated sugar – because we all love a little sweetness!
- 1/4 cup brown sugar – adds that lovely caramel note.
- 1/2 teaspoon baking soda – helps the cookies rise just right.
- 1/4 teaspoon salt – enhances all the flavors beautifully.
- 1/2 cup unsalted butter, softened – it makes everything better!
- 1 large egg – binds everything together.
- 1 teaspoon vanilla extract – for that warm, inviting aroma.
- 1 cup dark chocolate chips – the star of the show!
- 1/2 cup dried cherries – for that classic Black Forest touch.
- Optional: powdered sugar for dusting – for a festive finish!
Make sure to have everything on hand before you start, so you can dive right into the fun of baking these cookies!
How to Prepare Holiday Cookies: Black Forest Inspired Treats
Now, let’s dive into the magic of making these *Holiday Cookies: Black Forest Inspired Treats*! It’s a fun and straightforward process that’ll fill your kitchen with delightful aromas. Just follow these steps, and you’ll be on your way to cookie perfection!
Step 1: Prepare the Mixture
First things first, gather all your ingredients and tools. You’ll need a mixing bowl, a whisk, a spatula, and a baking sheet lined with parchment paper. This prep work makes everything so much smoother! Start by measuring out your dry ingredients: flour, cocoa powder, granulated sugar, brown sugar, baking soda, and salt. In a separate bowl, let’s get the wet ingredients ready: beat the softened butter until it’s creamy, then add in the egg and vanilla extract. Mixing these ahead of time ensures everything blends beautifully later on.
Step 2: Mix Ingredients
Alright, now it’s time to combine everything! Gradually add the dry mixture into the wet ingredients. I like to do this in three parts to avoid flour clouds and to ensure a consistent dough. Use your spatula to fold the ingredients together gently; you want to keep the air in there for soft, chewy cookies. Once the dough starts to come together, toss in those dark chocolate chips and dried cherries. Oh, the joy! Mix just until everything is evenly distributed—don’t overdo it!
Step 3: Shape the Cookies
Now comes the fun part: shaping those cookies! Using a cookie scoop or a tablespoon, drop rounded balls of dough onto your prepared baking sheet, making sure to leave enough space between them since they’ll spread a bit while baking. If you want them to look extra festive, you can gently press down on the tops, but I love leaving them fluffy and pillowy. If you’re feeling fancy, dust them with powdered sugar right before serving for that holiday sparkle!
Step 4: Baking Instructions
Preheat your oven to 350°F (175°C). Once it’s nice and hot, pop those trays of cookies into the oven and bake for about 10-12 minutes. You want the edges to look set while the centers remain soft. Trust me, they’ll firm up as they cool! After baking, let them sit on the baking sheet for 5 minutes before transferring them to a wire rack to cool completely. This little step helps them maintain that perfect chewy texture. And there you have it—your *Holiday Cookies: Black Forest Inspired Treats* are ready to bring joy to your holiday celebrations!
Tips for Success
Let’s make sure your *Holiday Cookies: Black Forest Inspired Treats* turn out absolutely perfect! Here are some handy tips to keep in mind:
- Measure accurately: Baking is a science, so be precise with your ingredient measurements. Use a kitchen scale if you have one for the best results!
- Don’t overmix: When combining your wet and dry ingredients, mix just until combined. Overmixing can lead to tough cookies. We want soft and chewy!
- Use room temperature ingredients: Make sure your butter and egg are at room temperature. This helps them blend more easily and creates a smoother dough.
- Chill the dough (optional): If you’re in a warm kitchen or want a thicker cookie, chill the dough for about 30 minutes before baking. This will help them hold their shape better.
- Check your oven temperature: Ovens can be tricky! Use an oven thermometer to ensure your baking temperature is accurate. This ensures even baking.
- Cool on the baking sheet: Let the cookies cool on the baking sheet for a few minutes before transferring them to a wire rack. This prevents them from breaking apart!
- Storage tips: Keep any leftovers in an airtight container at room temperature for up to a week. You can also freeze the cookies for longer storage—just thaw them at room temperature when you’re ready to enjoy!
With these tips in your back pocket, you’re all set to create some amazing holiday cookies that will impress everyone at your gatherings!
Why You’ll Love This Recipe
- Quick and Easy: With just a handful of simple steps, you can whip up these delightful cookies in no time! Perfect for busy holiday schedules.
- Decadent Flavor: The combination of rich chocolate and tart cherries creates a mouthwatering flavor explosion that’s sure to impress.
- Chewy Texture: These cookies strike that perfect balance between soft and chewy, making them irresistible with every bite.
- Festive Appeal: Their beautiful appearance and holiday-inspired flavor make them a standout addition to any festive cookie platter.
- Customizable: Feel free to adjust the chocolate and cherry ratios or add nuts for a unique twist that caters to your taste buds!
- Perfect for Sharing: Whether you’re hosting a gathering or gifting treats to friends, these cookies are a wonderful way to spread holiday cheer.
Nutritional Information
As with all recipes, the nutritional values can vary based on the specific ingredients and brands you choose, so these numbers are an estimate. However, here’s a breakdown of the typical nutritional content per serving of *Holiday Cookies: Black Forest Inspired Treats*:
- Calories: 150
- Fat: 8g
- Saturated Fat: 5g
- Cholesterol: 30mg
- Sodium: 100mg
- Carbohydrates: 18g
- Fiber: 1g
- Sugar: 7g
- Protein: 2g
These delicious cookies are not only a treat for your taste buds but also a fun addition to your holiday festivities! Enjoy them in moderation as part of a balanced diet!

FAQ Section
Got questions about making these *Holiday Cookies: Black Forest Inspired Treats*? Don’t worry, I’ve got you covered! Here are some common queries that can help you bake up a storm:
- Can I use fresh cherries instead of dried? Absolutely! Fresh cherries can add a juicy burst of flavor, but you’ll want to chop them up and ensure they’re pitted. Just keep in mind they will add extra moisture, so you might need to adjust your dry ingredients slightly.
- What if I don’t have unsweetened cocoa powder? If you’re in a pinch, you can substitute it with sweetened cocoa powder, but reduce the granulated sugar in your recipe to maintain the right balance of sweetness. Keep in mind the flavor will be a bit sweeter!
- How do I know when my cookies are done baking? Look for the edges to be set and the centers to appear slightly soft. A gentle press in the center should spring back, but they’ll firm up as they cool. This little trick ensures they stay chewy and delicious!
- Can I make the dough ahead of time? Yes, you can! Just prepare the dough, wrap it tightly in plastic wrap, and refrigerate it for up to 3 days. When you’re ready, scoop and bake as directed. This is perfect for those busy holiday baking days!
- How should I store my leftover cookies? Store your cookies in an airtight container at room temperature for up to a week. If you want to keep them longer, you can freeze them! Just thaw at room temperature when you’re ready to enjoy them again.
With these tips, you’ll navigate your way through baking these cookies like a pro! Enjoy the process and happy baking!
Storage & Reheating Instructions
Once you’ve baked your delightful *Holiday Cookies: Black Forest Inspired Treats*, you’ll want to make sure they stay fresh and delicious for as long as possible! Here’s how to store them properly, along with some tips for reheating if you want that freshly baked taste again.
Storing Your Cookies
To keep your cookies in tip-top shape, place them in an airtight container at room temperature. This will help maintain their chewy texture and prevent them from drying out. They’ll typically last about a week this way—if they last that long, that is! If you want to savor them even longer, consider freezing them.
To freeze, simply layer your cookies between sheets of parchment paper in an airtight container or a resealable freezer bag. Make sure to squeeze out any excess air to prevent freezer burn. They can be stored in the freezer for up to three months!
Reheating for Freshness
If you’re lucky enough to have leftovers and want to enjoy that warm, gooey goodness again, reheating is super simple! Preheat your oven to 350°F (175°C) and place the cookies on a baking sheet. Heat them for about 5-7 minutes, just until they’re warmed through. This little trick will bring back that fresh-out-of-the-oven vibe!
If you’re in a rush, you can also pop one in the microwave for about 10-15 seconds. Just be careful not to overdo it, or you’ll end up with a cookie that’s more like a rock than a treat!
With these storage and reheating tips, you can enjoy your *Holiday Cookies: Black Forest Inspired Treats* whenever the craving strikes! Happy munching!
Serving Suggestions
Now that you’ve baked up a batch of those delightful *Holiday Cookies: Black Forest Inspired Treats*, it’s time to think about how to elevate the experience! These cookies are fantastic on their own, but pairing them with the right treats and beverages can take your holiday celebrations to the next level.
- Hot Chocolate: What could be better than a cozy mug of rich hot chocolate alongside your cookies? The creamy sweetness complements the chocolatey goodness of the cookies perfectly. You can even top it off with whipped cream and a sprinkle of cocoa for an extra festive touch!
- Spiced Apple Cider: A warm cup of spiced apple cider brings a lovely fall flavor that pairs beautifully with the tart cherries in the cookies. The cinnamon and nutmeg notes will make your home smell like a holiday wonderland.
- Vanilla Ice Cream: For a decadent treat, serve these cookies warm with a scoop of vanilla ice cream. The melty ice cream against the chewy cookie is a match made in dessert heaven!
- Cheese Platter: Create a festive cheese platter with a variety of cheeses, nuts, and dried fruits. The savory elements balance out the sweetness of the cookies, making for a delightful snacking experience.
- Holiday Punch: A refreshing holiday punch, whether it’s fruity or sparkling, can add a fun twist to your cookie spread. The fizzy bubbles are sure to bring smiles to your guests!
These suggestions will not only enhance the joy of your *Holiday Cookies: Black Forest Inspired Treats* but also create a beautiful spread that your friends and family will love! Enjoy the festivities and happy baking!
For more recipes follow me in page Pinterest.
Print
Holiday Cookies: Black Forest Inspired Treats You’ll Adore
- Total Time: 25 minutes
- Yield: 4 servings 1x
- Diet: Low Carb
Description
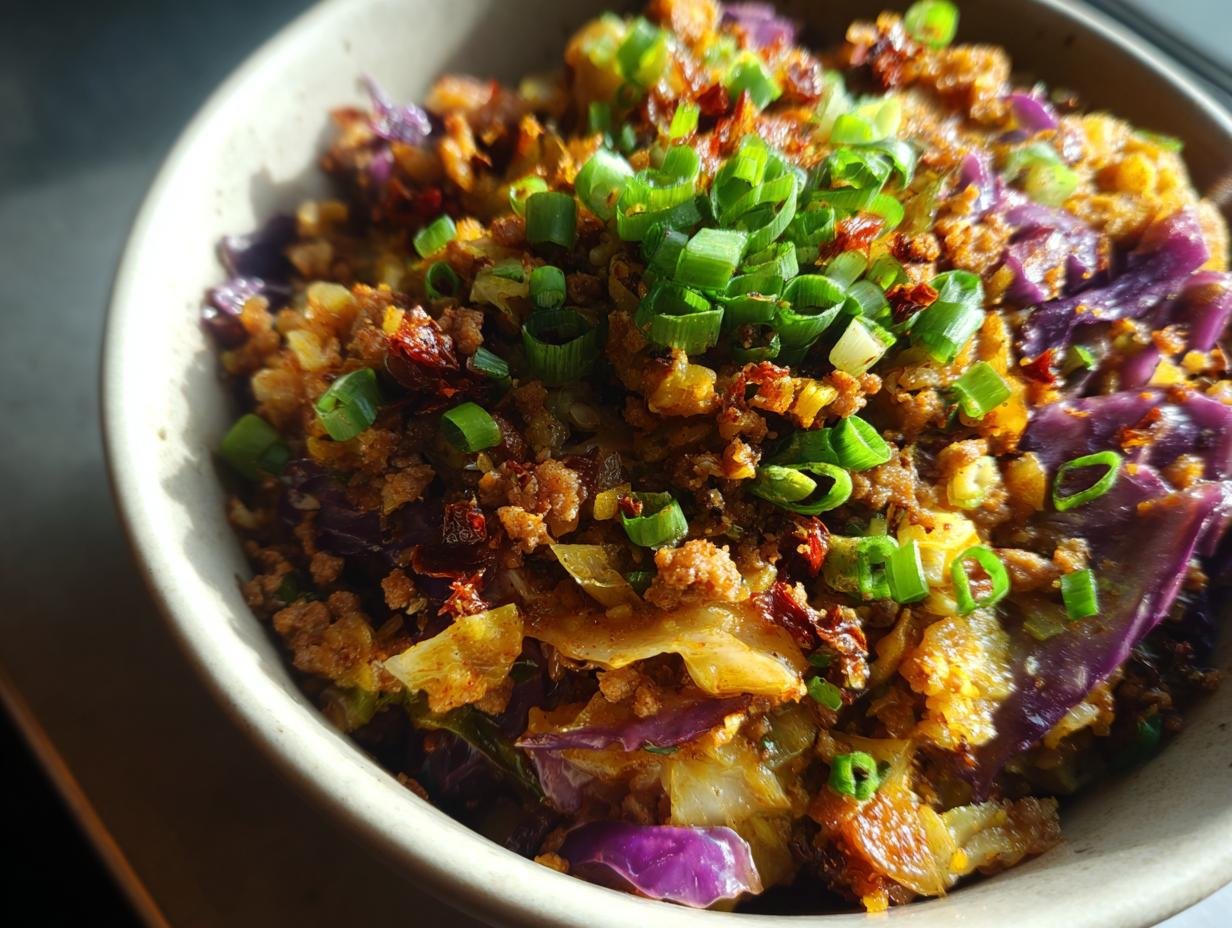
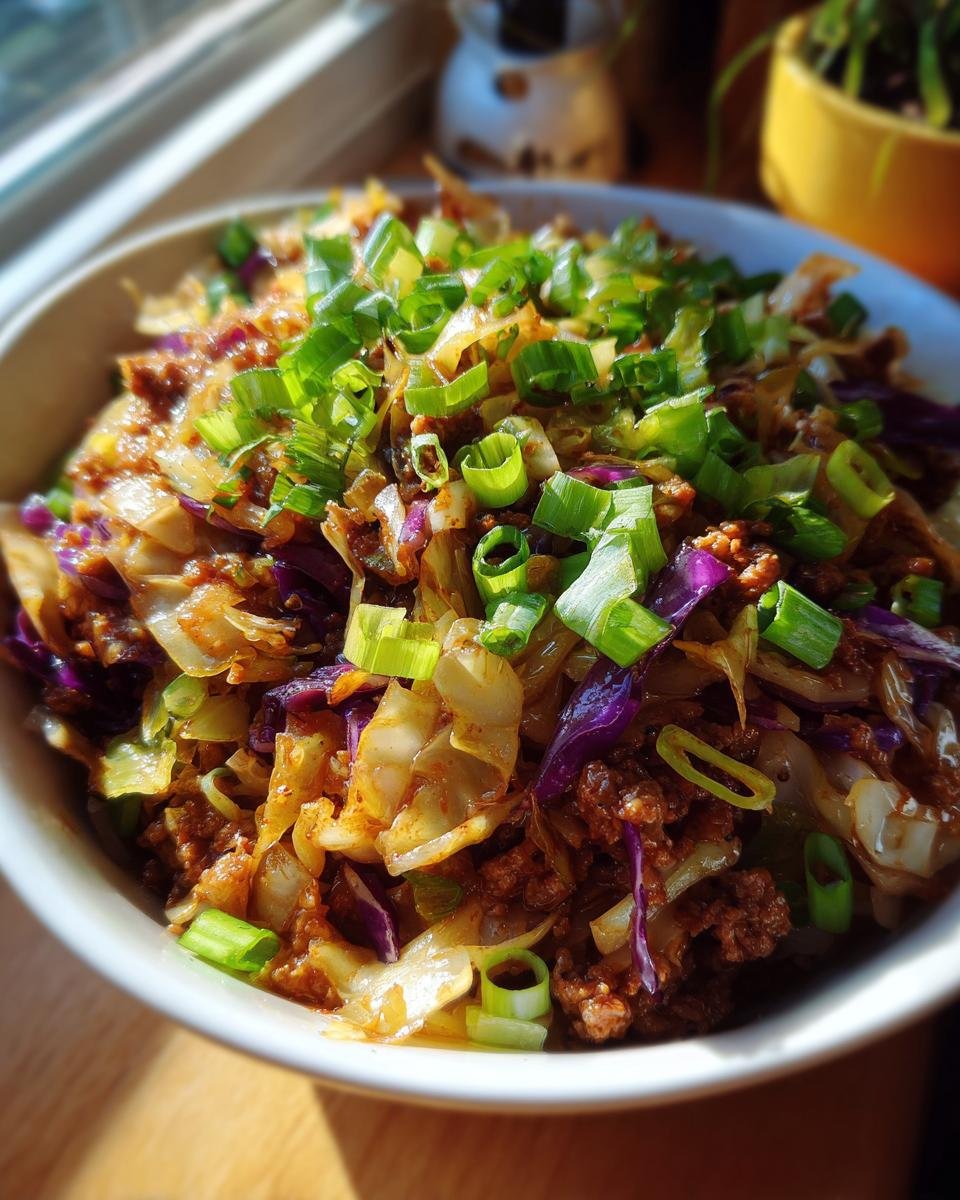
A quick and easy low-carb egg roll in a bowl recipe packed with flavor.
Ingredients
- 1 lb ground pork
- 1 bag (14 oz) coleslaw mix
- 2 tablespoons soy sauce
- 1 tablespoon sesame oil
- 1 teaspoon garlic, minced
- 1 teaspoon ginger, minced
- 2 green onions, chopped
- Salt and pepper to taste
Instructions
- In a large skillet, heat sesame oil over medium heat.
- Add ground pork and cook until browned.
- Stir in garlic and ginger, cooking for 1 minute.
- Add coleslaw mix and soy sauce, stirring until combined.
- Cook for 5-7 minutes, until cabbage is tender.
- Season with salt and pepper.
- Garnish with green onions before serving.
Notes
- Substitute ground turkey for a leaner option.
- Add diced bell peppers for extra crunch.
- Store leftovers in an airtight container in the fridge.
- Prep Time: 10 minutes
- Cook Time: 15 minutes
- Category: Main Dish
- Method: Stovetop
- Cuisine: Asian
Nutrition
- Serving Size: 1 serving
- Calories: 300
- Sugar: 3g
- Sodium: 700mg
- Fat: 20g
- Saturated Fat: 6g
- Unsaturated Fat: 14g
- Trans Fat: 0g
- Carbohydrates: 8g
- Fiber: 2g
- Protein: 25g
- Cholesterol: 80mg
Keywords: Egg Roll in a Bowl Recipe, Low-Carb, Keto