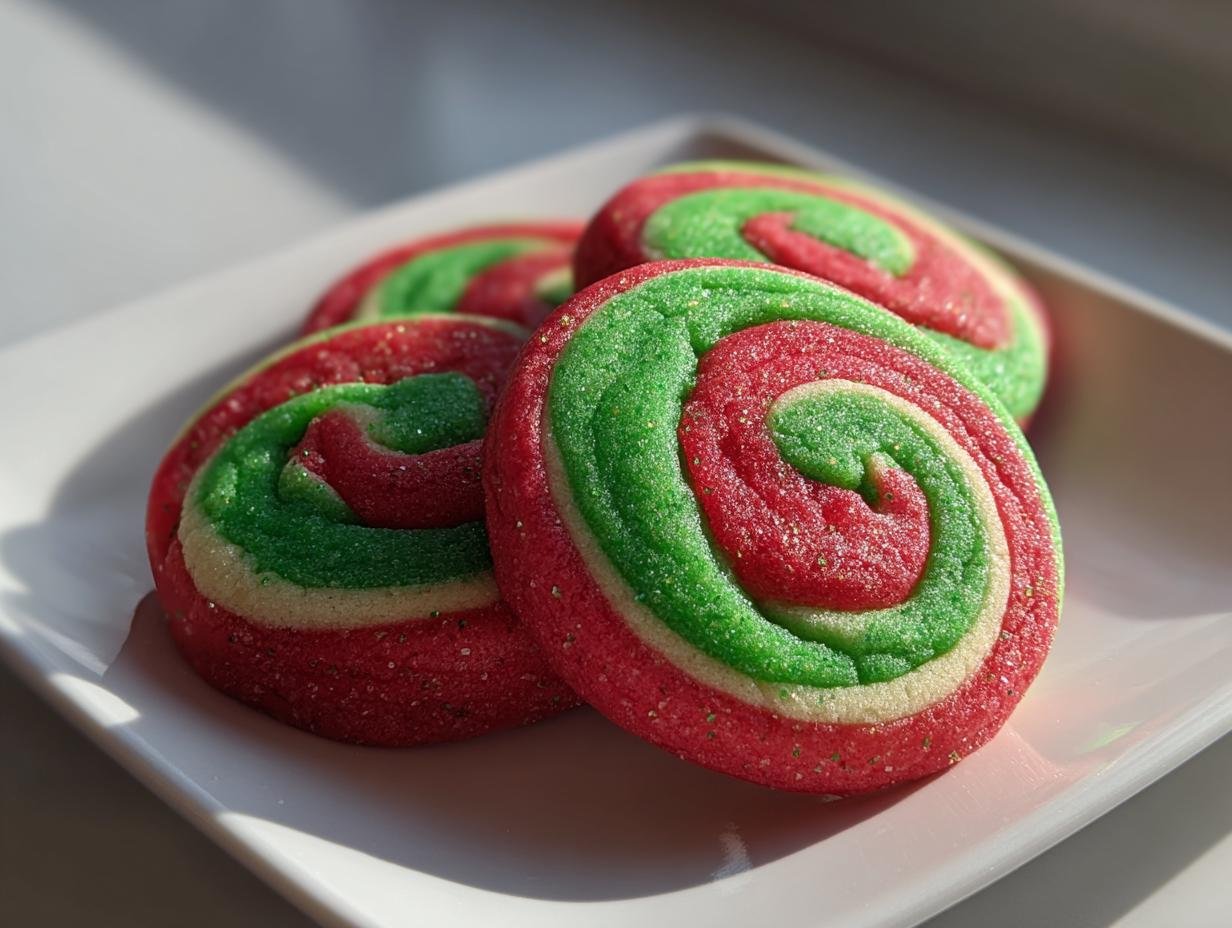
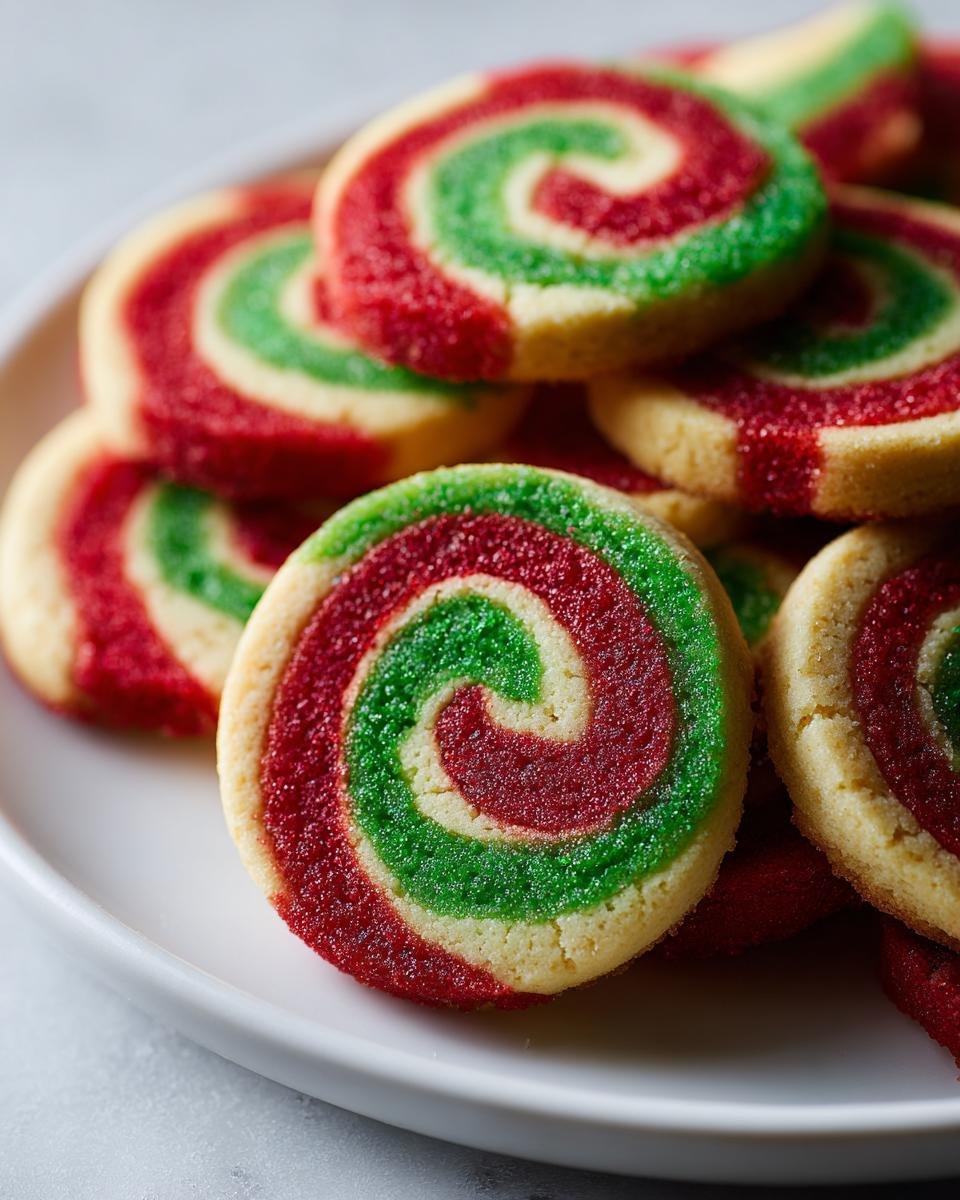
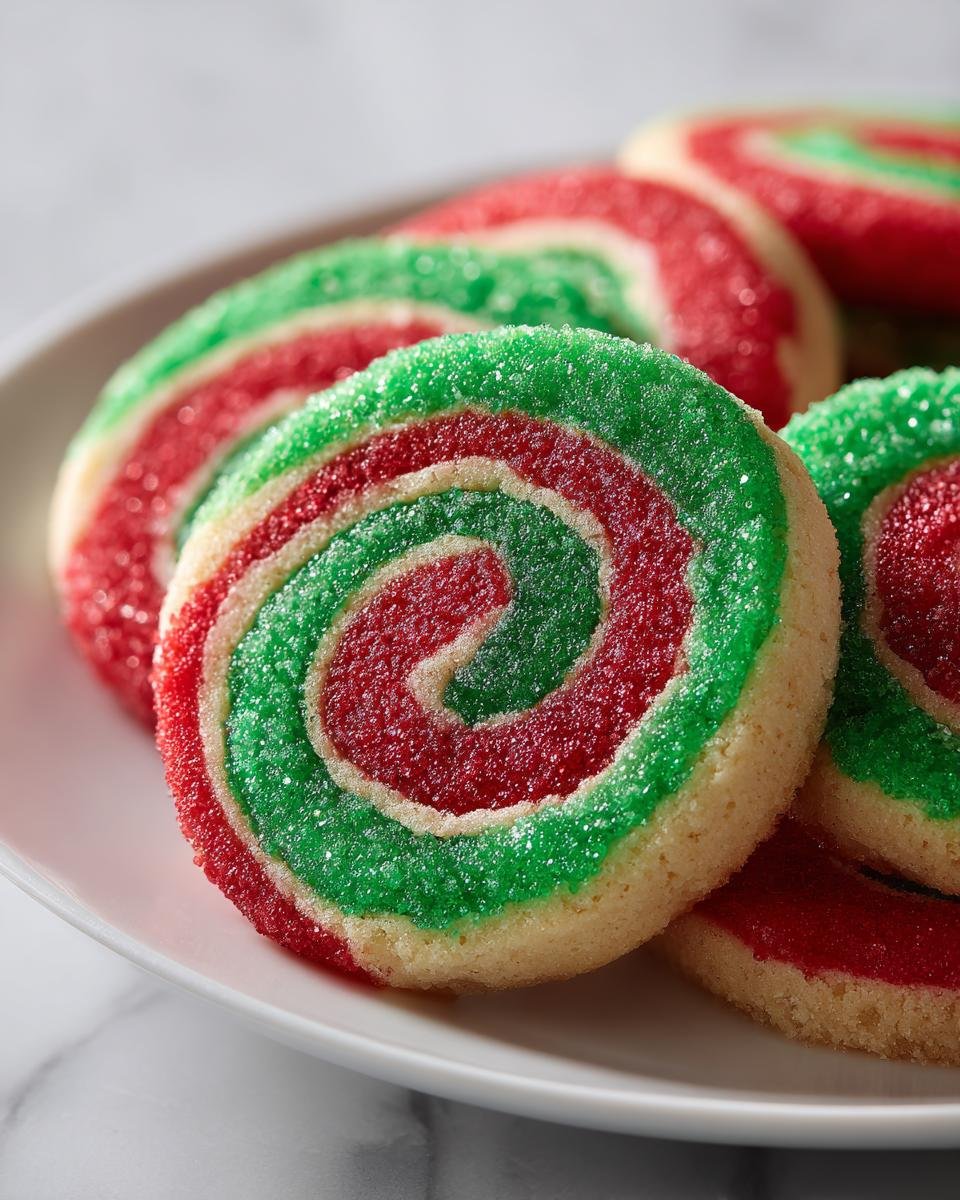
Oh my goodness, let me tell you about these Holiday Pinwheel Cookies! They’re the kind of colorful, festive treats that make my heart sing every time I bake them. The joy of rolling out that vibrant dough and watching it transform into beautiful swirls is pure magic! I can still remember the first time I made them with my kids – the giggles and flour-covered faces made it a holiday memory I’ll cherish forever. These cookies are perfect for any holiday gathering, spreading cheer and sweetness wherever they go. Plus, they’re so easy to make! With just a few simple ingredients, you’ll have a delightful batch ready to impress your friends and family. Trust me, the smiles on their faces when they see those bright pinwheels are worth every moment spent in the kitchen. So let’s dive in and get ready to bake some fun with these Holiday Pinwheel Cookies!
Ingredients List
- 2 cups all-purpose flour
- 1 cup unsalted butter, softened
- 1 cup granulated sugar
- 1 large egg
- 1 teaspoon vanilla extract
- 1/2 teaspoon baking powder
- 1/4 teaspoon salt
- 1/2 cup red food coloring
- 1/2 cup green food coloring
These simple ingredients come together to create the most delightful and colorful Holiday Pinwheel Cookies. Make sure to soften the butter beforehand for that creamy texture when you cream it with the sugar. And don’t skimp on the food coloring! It’s what gives these cookies their festive flair, so feel free to be a little generous. Happy baking!
How to Prepare Holiday Pinwheel Cookies
Preheat and Prepare
First things first, let’s get that oven preheating to 350°F (175°C). While that’s warming up, I like to clear off my countertop and lay out all my ingredients. It makes the whole process smoother and way more fun! Trust me, having everything within reach makes baking so much easier.
Cream the Butter and Sugar
Now, grab a big mixing bowl and start creaming together the softened butter and granulated sugar. I usually use a hand mixer, but a good old-fashioned wooden spoon works just as well. You want to beat them together until the mixture is light and fluffy—think of it like creating little clouds of sweetness! This step is crucial because it helps incorporate air into the batter, giving your cookies that perfect texture.
Mix in Egg and Vanilla
Once your butter and sugar are fluffy, it’s time to add the egg and vanilla extract. Pour them in and mix until everything is combined smoothly. I always make sure to scrape down the sides of the bowl to catch any stubborn bits. A well-mixed batter is key to ensuring each cookie has that delicious flavor!
Combine Dry Ingredients
In another bowl, whisk together the all-purpose flour, baking powder, and salt until well combined. This step helps distribute the baking powder evenly, so your cookies rise perfectly! Gradually add the dry mixture into the wet ingredients, mixing just until combined. You don’t want to overmix here; a few flour streaks are totally okay!
Color and Shape the Dough
Now comes the fun part—dividing the dough! Split it into two equal portions. Color one half with red food coloring and the other with green. I suggest using a spatula or your hands to mix in the coloring until you get vibrant, even hues. Then, roll each portion into rectangles on parchment paper. Make sure they’re about 1/4 inch thick, so they roll up nicely!
Roll and Chill the Log
Place the green dough on top of the red dough and gently roll them together to create a log. It’s like wrapping a colorful present! Once rolled, wrap it tightly in plastic wrap and chill in the refrigerator for at least an hour. Chilling is super important because it helps the dough firm up so the cookies hold their shape while baking.
Bake the Cookies
After your dough has chilled, preheat your oven again if needed and slice the log into 1/4 inch thick rounds. Place them on a baking sheet lined with parchment paper. Bake for 10-12 minutes until the edges are lightly golden. You’ll know they’re done when they look just slightly firm to the touch. Let them cool on the baking sheet before transferring to a wire rack. And oh boy, the aroma in your kitchen will be heavenly!
Tips for Success
To make sure your Holiday Pinwheel Cookies turn out perfectly every time, here are some tried-and-true tips! First, don’t skip the chilling step. It’s crucial for ensuring your dough is firm enough to slice without losing those beautiful swirls. If the dough feels too soft after rolling, pop it back in the fridge for a few more minutes.
When rolling out the dough, try to keep the rectangles as even as possible. This helps ensure uniform thickness, so all your cookies bake evenly. If your dough sticks to the parchment paper, a light dusting of flour can help prevent that!
Keep an eye on your baking time. Ovens can vary, so start checking your cookies around the 10-minute mark. You want them to be just lightly golden around the edges—if they start to darken too much, they can become dry. Follow these tips, and you’ll have a festive batch of cookies that’ll wow everyone!
FAQ Section
Can I use different colors for the dough?
Absolutely! The beauty of Holiday Pinwheel Cookies is that you can let your creativity shine. Feel free to use any colors you like! Think about using vibrant blues, yellows, or even pastels for a unique twist. Just remember that the colors you choose will impact the festive appearance, so don’t be afraid to mix and match to create your own holiday masterpiece!
How do I store Holiday Pinwheel Cookies?
To keep your Holiday Pinwheel Cookies fresh and delicious, store them in an airtight container at room temperature. They’ll stay good for up to a week! Just make sure they’re completely cooled before you store them to prevent any sogginess. If you’re layering them in the container, I recommend placing parchment paper between layers to keep those beautiful pinwheels intact!
Can I freeze these cookies?
You bet! Freezing these cookies is super easy and a great way to prepare for upcoming gatherings. Simply place the cooled cookies in an airtight container or freezer bag, and they can be frozen for up to three months. When you’re ready to enjoy them, just take them out and let them thaw at room temperature for about 30 minutes. They’ll taste as fresh as the day you baked them!
Nutritional Information Section
When it comes to enjoying these delightful Holiday Pinwheel Cookies, it’s good to know what you’re munching on! Keep in mind that nutrition can vary based on the specific ingredients and brands you use, so these values are just estimates. Each cookie typically contains:
- Calories: 150
- Fat: 7g
- Saturated Fat: 4g
- Unsaturated Fat: 2g
- Trans Fat: 0g
- Cholesterol: 20mg
- Sodium: 50mg
- Carbohydrates: 20g
- Fiber: 0g
- Sugar: 10g
- Protein: 2g
So, go ahead and treat yourself! These cookies are a fun and festive addition to your holiday celebrations, and knowing their nutritional breakdown makes it even sweeter.
Why You’ll Love This Recipe
- Quick and Easy: With simple ingredients and straightforward steps, you can whip these up in no time!
- Colorful and Festive: The vibrant red and green swirls are perfect for adding a splash of holiday cheer to any gathering.
- Fun for the Whole Family: Baking these cookies is a delightful activity to share with kids and loved ones, creating joyful memories.
- Always a Hit: Everyone loves cookies, and these pinwheels are sure to impress friends and family at your holiday celebrations.
- Versatile: You can easily customize the colors and even add sprinkles for a fun twist!
Serving Suggestions
These colorful Holiday Pinwheel Cookies are perfect on their own, but why not elevate your treat table a bit more? They pair wonderfully with a warm cup of spiced chai or rich hot chocolate, adding a festive touch to your holiday gatherings. If you’re feeling adventurous, try serving them alongside a creamy vanilla ice cream or a scoop of peppermint ice cream for a delightful contrast. You could also plate them with some classic gingerbread cookies or sugar cookies to create an eye-catching dessert spread. Trust me, nothing beats the joy of sharing these sweet treats with loved ones during the holidays!
For more recipes follow me in page Pinterest.
Print
Holiday Pinwheel Cookies: 7 Steps to Festive Bliss
- Total Time: 1 hour 42 minutes
- Yield: 24 cookies 1x
- Diet: Vegetarian
Description
These Holiday Pinwheel Cookies are colorful and festive, perfect for any holiday gathering.
Ingredients
- 2 cups all-purpose flour
- 1 cup unsalted butter, softened
- 1 cup granulated sugar
- 1 large egg
- 1 teaspoon vanilla extract
- 1/2 teaspoon baking powder
- 1/4 teaspoon salt
- 1/2 cup red food coloring
- 1/2 cup green food coloring
Instructions
- Preheat your oven to 350°F (175°C).
- In a bowl, cream together the butter and sugar.
- Add the egg and vanilla extract, and mix well.
- In another bowl, whisk together flour, baking powder, and salt.
- Gradually add the dry ingredients to the wet ingredients.
- Divide the dough into two portions. Color one with red food coloring and the other with green food coloring.
- Roll each dough into a rectangle on parchment paper.
- Layer the green dough on top of the red dough and roll tightly.
- Chill the log in the refrigerator for 1 hour.
- Slice the log into 1/4 inch thick rounds and place on a baking sheet.
- Bake for 10-12 minutes until edges are lightly golden.
- Let cool before serving.
Notes
- Store in an airtight container for up to a week.
- For a fun twist, add sprinkles before baking.
- These cookies can be frozen for later use.
- Prep Time: 30 minutes
- Cook Time: 12 minutes
- Category: Dessert
- Method: Baking
- Cuisine: American
Nutrition
- Serving Size: 1 cookie
- Calories: 150
- Sugar: 10g
- Sodium: 50mg
- Fat: 7g
- Saturated Fat: 4g
- Unsaturated Fat: 2g
- Trans Fat: 0g
- Carbohydrates: 20g
- Fiber: 0g
- Protein: 2g
- Cholesterol: 20mg
Keywords: Holiday Pinwheel Cookies, festive cookies, holiday baking