There’s something truly magical about homemade ice cream, isn’t there? The way it melts in your mouth, the rich, creamy texture, and that delightful burst of flavor—it’s pure bliss! And what if I told you that you can indulge guilt-free with this delicious sugar-free vanilla ice cream recipe? Yep, you heard me right! Making ice cream at home is not only a fun activity, but it also allows you to control what goes into it. I’ve spent countless summer afternoons experimenting with flavors and techniques, and I can tell you, there’s nothing like the satisfaction of creating your own dessert masterpiece.

This sugar-free vanilla ice cream is a game changer. It satisfies those sweet cravings without any of the guilt that often comes with traditional desserts. With just a handful of simple ingredients, you’ll have a creamy, dreamy treat that everyone can enjoy, regardless of dietary needs. Trust me, once you try this recipe, you’ll wonder why you ever settled for store-bought ice cream. So, let’s dive into the delicious world of making your own ice cream—it’s easier than you think!
Ingredients List
- 2 cups heavy cream – This rich and luscious cream is the base of our ice cream, giving it that wonderful creamy texture.
- 1 cup unsweetened almond milk – This adds a lightness and smoothness without any added sugars, perfect for keeping it guilt-free!
- 1 tablespoon vanilla extract – You can’t have vanilla ice cream without this key ingredient! It enhances the flavor beautifully.
- 1/2 cup erythritol or preferred sugar substitute – This sugar alternative provides sweetness without the calories, so you can indulge without worry.
- 1/4 teaspoon salt – A little pinch of salt elevates all the flavors, making your ice cream even more delicious.
How to Prepare Indulge Guilt-Free: Delicious Sugar Free Vanilla Ice Cream Recipe
Step 1: Combine Ingredients
Let’s get started! First, grab a mixing bowl and add in the 2 cups of heavy cream, 1 cup of unsweetened almond milk, 1 tablespoon of vanilla extract, 1/2 cup of erythritol, and 1/4 teaspoon of salt. Just throw everything in there! It’s like a little party for your taste buds waiting to happen. Use a spatula or spoon to make sure everything gets into the bowl. It’s important to have all the ingredients ready so that you can whip them together seamlessly.
Step 2: Whisk Until Smooth
Now comes the fun part—whisking! Grab a whisk or an electric mixer and start blending the mixture until the erythritol dissolves completely. This step is super important because you want a smooth, creamy base without any gritty bits. It should feel velvety and luxurious, almost like you’re making a magic potion! Don’t rush through this; take a minute or two to really get it smooth. Trust me, it’ll make a world of difference in the final product!
Step 3: Churn the Mixture
Once you’ve got that gorgeous mixture ready, it’s time to churn! Pour the creamy goodness into your ice cream maker, making sure not to overfill it. Follow the manufacturer’s instructions for churning—usually, it takes about 20-30 minutes to reach that perfect soft-serve consistency. You’ll see it transform right before your eyes, thickening up beautifully. Just keep an eye on it; you don’t want to walk away and miss that magical moment when it’s ready!
Step 4: Freeze for Firmness
After churning, it’s time to transfer your ice cream to a lidded container. This step is crucial! Cover it tightly and pop it in the freezer for at least 4 hours. I know it’s hard to wait, but this freezing time allows the flavors to meld and the ice cream to firm up. You’ll be rewarded with the perfect scoopable texture once it’s ready. I promise, the anticipation will only make that first taste even sweeter!
Step 5: Serve and Enjoy
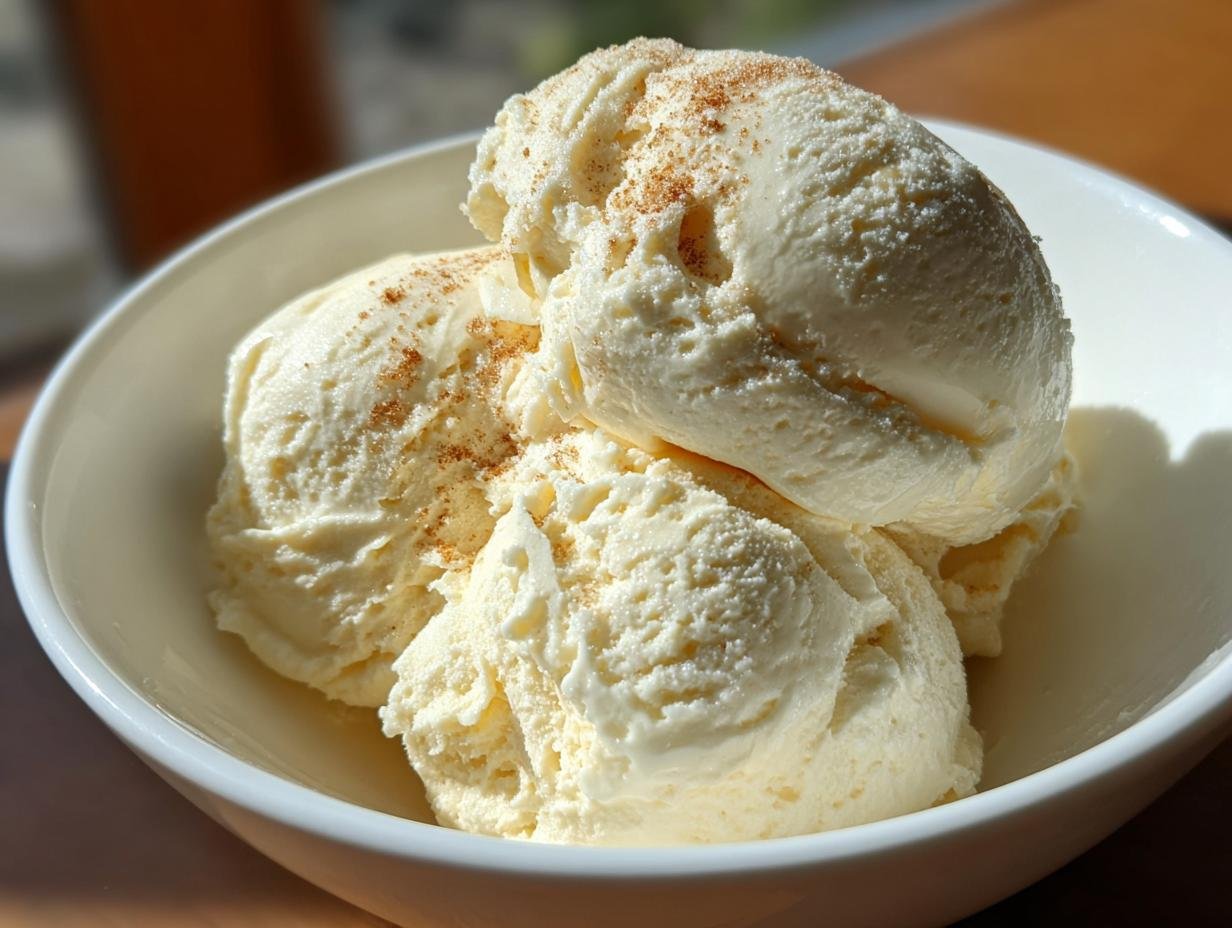
Finally, it’s time to dig in! When you’re ready to serve, let the ice cream sit at room temperature for a few minutes. This little trick helps soften it up, making it easier to scoop. Grab your favorite bowl, scoop a generous amount, and enjoy every creamy bite. If you want to indulge even more, add some fresh berries or a sprinkle of nuts on top. This sugar-free vanilla ice cream is a treat that everyone will love—no guilt involved!
Why You’ll Love This Recipe
- Quick Preparation: You’ll whip this up in just about 10 minutes! It’s so easy, you’ll wonder why you didn’t start making ice cream at home sooner.
- Guilt-Free Indulgence: With this recipe, you can satisfy your sweet tooth without any of the guilt that comes from sugary treats. It’s a win-win!
- Sugar-Free: By using erythritol or your favorite sugar substitute, this ice cream is perfect for anyone watching their sugar intake, making it suitable for diabetics too.
- Creamy Texture: The combination of heavy cream and almond milk gives you that rich, velvety mouthfeel that you crave in ice cream without the added sugar.
- Satisfying Sweet Cravings: Whether it’s a hot summer day or a cozy movie night, this delicious sugar-free vanilla ice cream hits the spot and keeps those cravings at bay!
Tips for Success
Let’s make sure your sugar-free vanilla ice cream turns out perfectly every time! Here are some of my favorite pro tips that I’ve picked up along the way to help you achieve that creamy, dreamy texture and just the right amount of sweetness.
Adjusting Sweetness
Everyone has their own sweet spot when it comes to dessert, so don’t hesitate to adjust the sweetness to your liking. If you prefer a sweeter ice cream, feel free to add a little more erythritol, but do it gradually—maybe an extra tablespoon at a time—mixing well after each addition. Remember, you can always add more, but you can’t take it out once it’s in!
Chill Your Mixing Bowl
For an even creamier texture, try chilling your mixing bowl and whisk or mixer attachments in the freezer for about 10-15 minutes before you start. This little trick helps keep the mixture cold while you’re whisking, which can lead to a better overall texture in the final product. Trust me, it’s worth the extra step!
Don’t Skip the Freezing Time
The freezing time is crucial for achieving that perfect scoopable texture. If you don’t freeze it long enough, your ice cream might end up too soft and melty. So, be patient and allow it to freeze for at least 4 hours—this is when the magic really happens! You’ll want to resist the temptation to dig in too soon!
Use a Quality Ice Cream Maker
If you’re serious about making homemade ice cream, investing in a good quality ice cream maker can make a big difference. Some machines churn faster and more effectively than others, which can affect the texture of your ice cream. If you find yourself making ice cream often, it’s worth doing a little research to find one that suits your needs!
Experiment with Flavors
Once you’ve mastered the basics of this sugar-free vanilla ice cream, don’t be afraid to get adventurous! You can add in fruit purees, chocolate chips, or even a swirl of nut butter for a fun twist. Just make sure any mix-ins are low in sugar as well to keep it guilt-free. The world of flavors is your oyster, so have fun with it!
Nutritional Information
When it comes to enjoying this delicious sugar-free vanilla ice cream, it’s always good to know what you’re indulging in! However, keep in mind that nutritional values can vary based on the specific ingredients and brands you choose, so these numbers are just estimates. Always check your own products for precise information.
Here’s a typical breakdown for one serving (1/2 cup) of this ice cream:
- Calories: 180
- Fat: 18g
- Saturated Fat: 10g
- Unsaturated Fat: 8g
- Trans Fat: 0g
- Carbohydrates: 3g
- Sugar: 0g
- Fiber: 0g
- Protein: 2g
- Cholesterol: 60mg
- Sodium: 50mg
This ice cream is a fantastic way to treat yourself while sticking to your dietary goals! Enjoy every creamy, guilt-free scoop, and feel good about what you’re eating.

FAQ Section
Got questions? I’ve got answers! Here are some common queries I get about this delicious sugar-free vanilla ice cream recipe. Let’s dive in!
Can I use a different sweetener instead of erythritol?
Absolutely! While I love erythritol for its sweetness without calories, you can try other sugar substitutes like stevia or monk fruit sweetener. Just keep in mind that different sweeteners have different sweetness levels, so you might need to adjust the amount you use. Always taste as you go to find that perfect balance!
What’s the shelf life of this ice cream?
This sugar-free vanilla ice cream can be stored in an airtight container in the freezer for about 2 to 3 weeks. But trust me, it’s so delicious that it probably won’t last that long! Just make sure you keep it tightly sealed to prevent freezer burn.
How can I make this recipe without an ice cream maker?
No ice cream maker? No problem! You can still make this recipe using a simple method. After combining and whisking your ingredients, pour the mixture into a shallow dish and place it in the freezer. Every 30 minutes, take it out and stir vigorously with a fork to break up any ice crystals until it reaches your desired texture. This will take a bit longer, but it’ll still be worth it!
Can I add mix-ins to the ice cream?
Of course! Once your ice cream is churned and creamy, feel free to fold in some mix-ins like sugar-free chocolate chips, nuts, or fresh fruit. Just make sure to adjust the sweetness if your mix-ins have any sugar. It’s a great way to customize your ice cream and make it even more delightful!
Is this ice cream suitable for diabetics?
Yes! This sugar-free vanilla ice cream is a fantastic option for anyone watching their sugar intake, including diabetics. Just remember to monitor portion sizes and check the nutritional content of any add-ins you might use to stay within your dietary preferences.
Storage & Reheating Instructions
Now that you’ve made this delicious sugar-free vanilla ice cream, you might be wondering how to store it properly and keep it fresh for those sweet cravings later on. Storing your ice cream correctly is key to maintaining that creamy texture and delightful flavor!
To store your leftover ice cream, simply transfer it into an airtight container. I love using a container that’s just the right size—this helps minimize air exposure, which can cause freezer burn. Make sure to smooth the top before sealing it tightly. If you’re feeling fancy, you can even place a layer of plastic wrap directly on the surface of the ice cream before putting the lid on. This extra barrier can help keep it fresh longer!
Your sugar-free vanilla ice cream can be stored in the freezer for about 2 to 3 weeks. But let’s be real—if it lasts that long, I’d be surprised! Just remember to scoop out portions with a clean spoon to avoid introducing any unwanted bacteria into your container.
If you happen to have some leftovers that have hardened a bit too much, don’t worry! To bring it back to that perfect scoopable texture, let the ice cream sit at room temperature for about 5-10 minutes before serving. This little trick makes it easy to scoop without breaking your ice cream scoop. If you’re in a hurry, you can also give it a quick stir with a spoon to soften it up. Enjoy every delightful bite, guilt-free!
For more recipes follow me in page Pinterest.
Print
Indulge Guilt-Free with 5 Amazing Sugar Free Vanilla Ice Cream
- Total Time: 4 hours 10 minutes
- Yield: 4 servings 1x
- Diet: Diabetic
Description
A simple recipe for sugar-free vanilla ice cream that satisfies your sweet cravings without the guilt.
Ingredients
- 2 cups heavy cream
- 1 cup unsweetened almond milk
- 1 tablespoon vanilla extract
- 1/2 cup erythritol or preferred sugar substitute
- 1/4 teaspoon salt
Instructions
- In a mixing bowl, combine heavy cream, almond milk, vanilla extract, erythritol, and salt.
- Whisk until the erythritol dissolves completely.
- Pour the mixture into an ice cream maker.
- Churn according to the manufacturer’s instructions until it reaches a soft-serve consistency.
- Transfer to a lidded container and freeze for at least 4 hours.
- Scoop and serve.
Notes
- For a creamier texture, let the ice cream sit at room temperature for a few minutes before scooping.
- Store leftovers in an airtight container in the freezer.
- Adjust sweetness to taste based on your preference.
- Prep Time: 10 minutes
- Cook Time: 0 minutes
- Category: Dessert
- Method: Ice Cream Maker
- Cuisine: American
Nutrition
- Serving Size: 1/2 cup
- Calories: 180
- Sugar: 0g
- Sodium: 50mg
- Fat: 18g
- Saturated Fat: 10g
- Unsaturated Fat: 8g
- Trans Fat: 0g
- Carbohydrates: 3g
- Fiber: 0g
- Protein: 2g
- Cholesterol: 60mg
Keywords: sugar free vanilla ice cream, healthy dessert, guilt-free ice cream