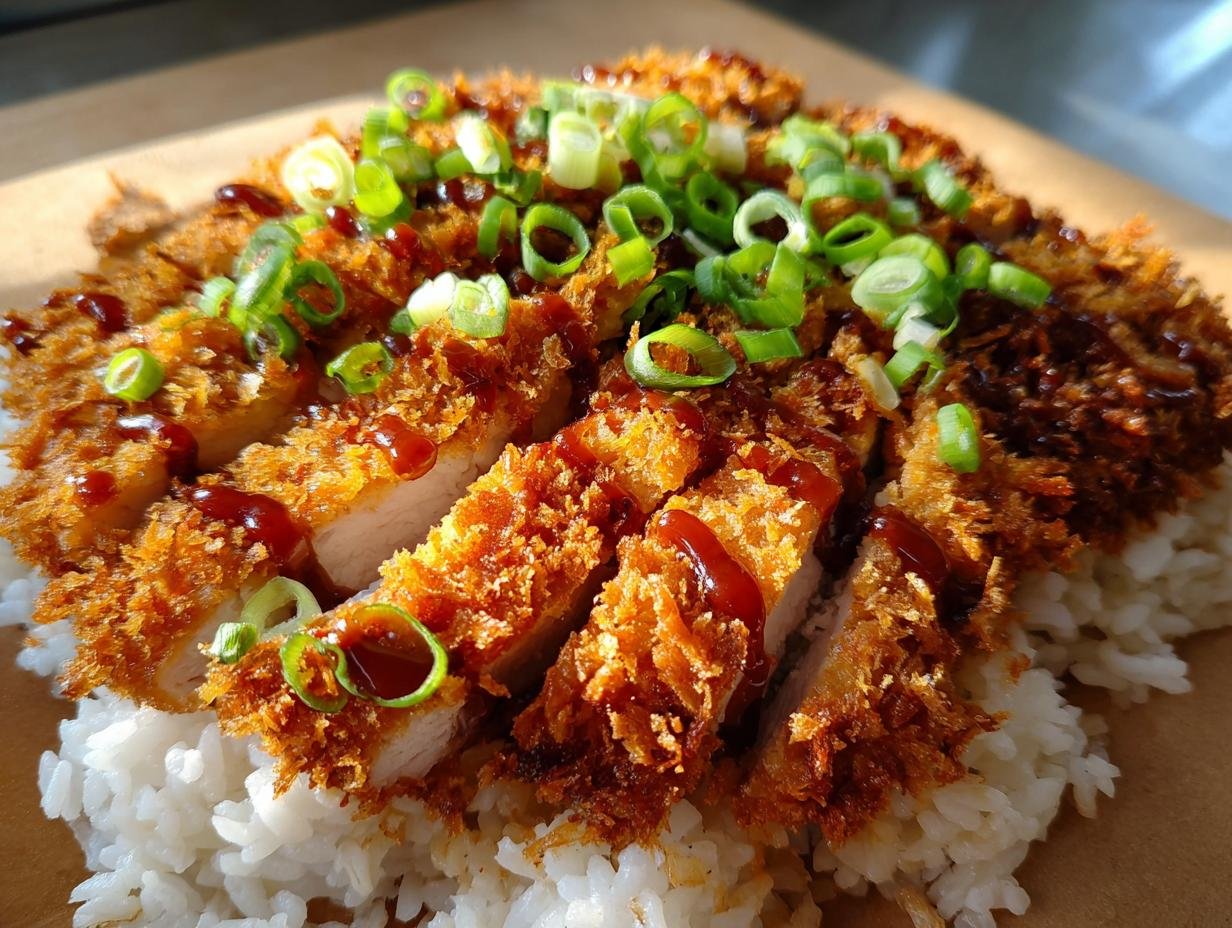
Oh my goodness, let me tell you about the best Japanese katsu bowls with crispy breaded meat! This dish has a special place in my heart, and every time I make it, I’m transported straight back to those cozy izakayas in Tokyo. The moment you bite into that perfectly crispy cutlet, it’s like a flavor explosion! The crunchy panko breadcrumbs paired with tender chicken or beef creates this delightful contrast that’s just irresistible. And let’s not forget the warm, fluffy rice soaking up the delicious tonkatsu sauce – it’s a match made in culinary heaven!
I remember the first time I tried katsu; I was completely hooked! The comforting aroma filled the air, and I couldn’t wait to dig in. It’s such a versatile dish, too! Whether I’m serving it for a quick weeknight dinner or impressing friends at a gathering, it never fails to please. Plus, it’s quick to whip up, making it a go-to in my kitchen. Trust me, once you try making these katsu bowls at home, you’ll understand why they’re a favorite in Japanese cuisine. Let’s dive into this crispy creation together!
Ingredients List
To create the best Japanese katsu bowls with crispy breaded meat, you’ll need a few simple yet essential ingredients that come together to make this dish truly delicious. Here’s what you’ll need:
- 2 cups cooked rice: This will be the fluffy base of your katsu bowl, soaking up all the flavors.
- 4 pieces of chicken or beef cutlets: Choose your favorite protein; both work beautifully and become wonderfully crispy when cooked!
- 1 cup panko breadcrumbs: These light and crispy breadcrumbs are key to achieving that perfect crunch.
- 1/2 cup all-purpose flour: This is for dredging the cutlets, helping the egg and breadcrumbs stick during frying.
- 2 eggs, beaten: The egg wash adds moisture and helps the breadcrumbs adhere to the meat.
- 1/4 cup vegetable oil: You’ll need this for frying the cutlets until they’re golden brown and crispy.
- 1/4 cup tonkatsu sauce: This sweet and tangy sauce is the perfect finishing touch to drizzle over your katsu.
- 2 green onions, sliced: These add a fresh crunch and vibrant color to your dish.
- Salt and pepper to taste: Don’t forget to season your cutlets well for maximum flavor!
Gather these ingredients, and you’re well on your way to creating a satisfying and scrumptious katsu bowl that’s sure to impress!
How to Prepare the Best Japanese Katsu Bowls With Crispy
Making the best Japanese katsu bowls with crispy breaded meat is a delightful journey, and I’m here to guide you through it step by step! It’s simpler than you might think, and I promise the end result is totally worth it. Let’s get started, shall we?
Cook the Rice
First things first, let’s get that rice cooking! If you’re using a rice cooker, simply add 2 cups of rinsed rice with the appropriate amount of water according to your cooker’s instructions—usually about 2 1/4 cups for white rice. If you’re cooking on the stovetop, bring 2 cups of water to a boil, add the rice, and then reduce the heat to low. Cover it and let it simmer for 18-20 minutes until all the water is absorbed. Once done, fluff it with a fork and let it sit covered for a few minutes. This will give you that fluffy texture that’s perfect for soaking up all the delicious flavors later!
Prepare the Cutlets
Now, let’s work on those cutlets! Start by seasoning your chicken or beef cutlets with salt and pepper on both sides. This step is essential for flavor! Then, set up a dredging station: you’ll need three shallow bowls. In the first bowl, add 1/2 cup of all-purpose flour. In the second, pour in the beaten eggs. Finally, place 1 cup of panko breadcrumbs in the third bowl. This is where the magic happens! Take each cutlet, dredge it in the flour, ensuring it’s completely coated, then dip it in the egg wash, letting any excess drip off, and finally coat it generously with the panko breadcrumbs. Press the breadcrumbs onto the cutlets to get that thick, crispy layer. Trust me, this extra effort is what makes these katsu bowls so irresistible!
Fry the Cutlets
Time to fry! Heat 1/4 cup of vegetable oil in a large pan over medium heat. You’ll know it’s hot enough when a breadcrumb sizzles upon contact. Gently place the coated cutlets in the pan, making sure not to crowd them. Fry for about 4-5 minutes on each side until they’re golden brown and cooked through. If you’re unsure, you can always cut into one to check—it should be juicy and tender inside! If the cutlets start to brown too quickly, adjust the heat down a bit; you want that perfect crispy exterior without burning. Once cooked, transfer the cutlets to a paper towel-lined plate to soak up any excess oil.
Assemble the Bowl
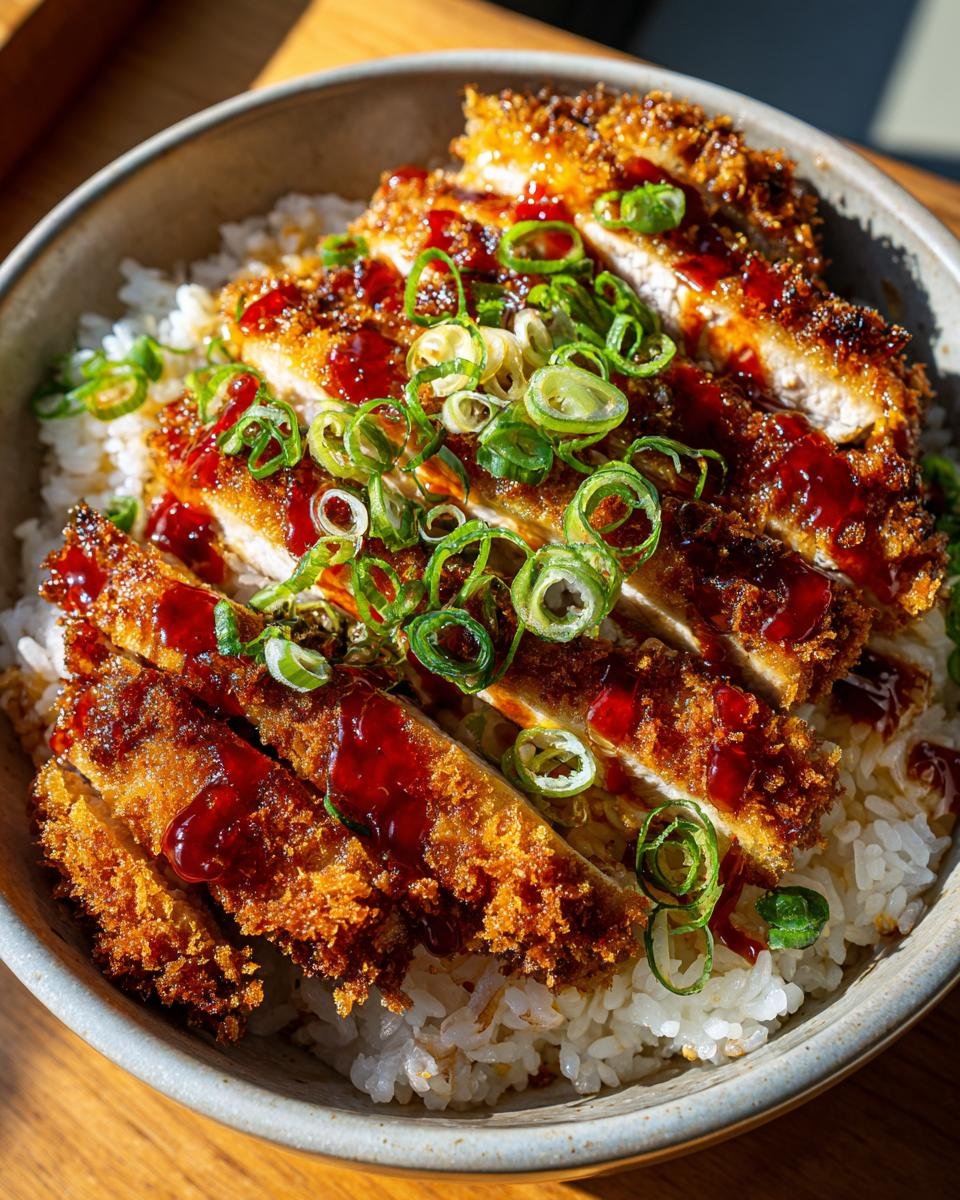
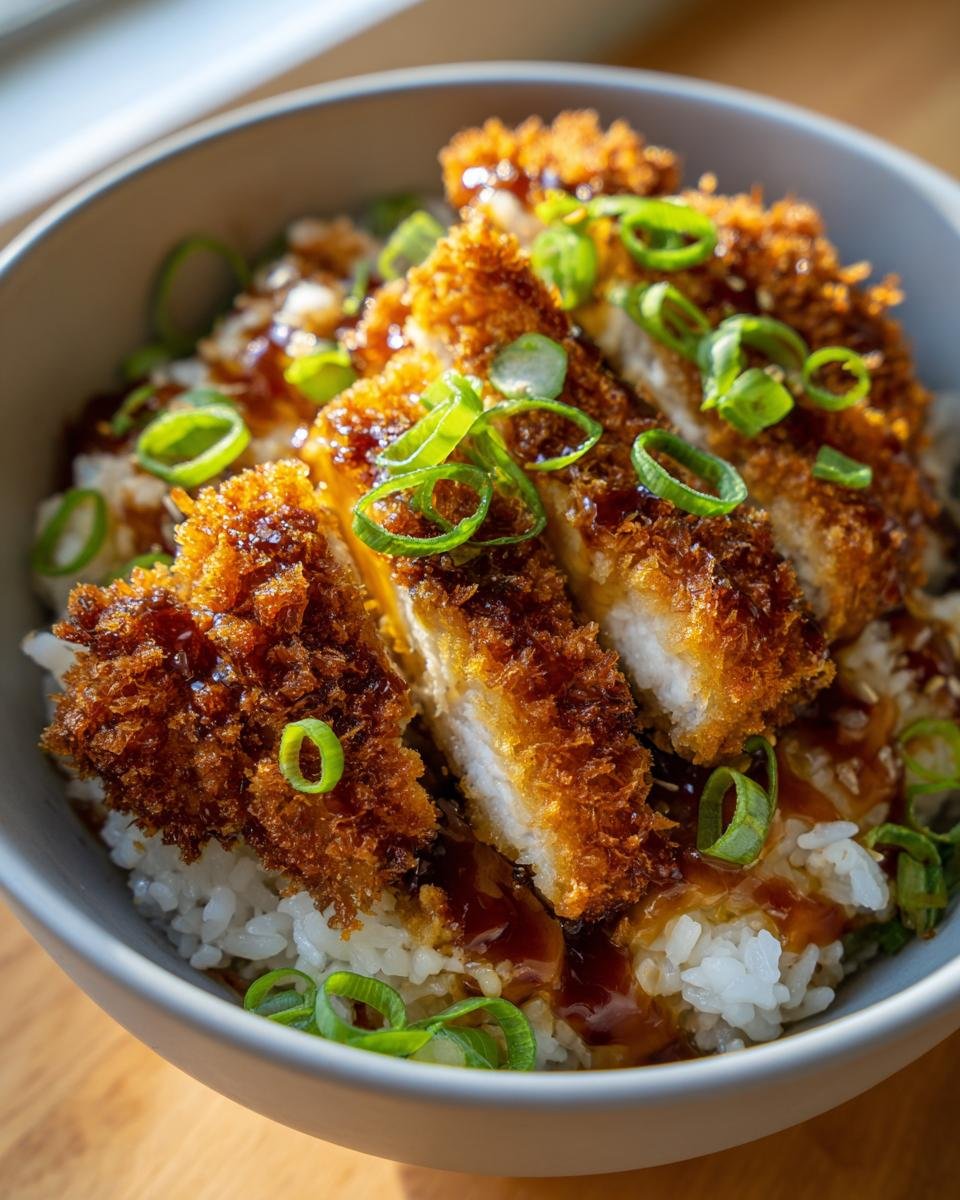
Now comes the fun part—assembling your katsu bowl! Slice the fried cutlets into strips, revealing that gorgeous crispy layer. Serve them on a generous bed of your fluffy rice and drizzle with a good amount of tonkatsu sauce. This sauce is what brings everything together, adding that sweet and tangy kick! Don’t forget to garnish with sliced green onions for a fresh crunch. And there you have it, your very own bowl of deliciousness! Enjoy every bite, and don’t be surprised if you find yourself going back for seconds!
Why You’ll Love This Recipe
There are so many reasons to fall head over heels for the best Japanese katsu bowls with crispy breaded meat! Here are just a few that keep me coming back for more:
- Quick Preparation Time: With just 30 minutes from start to finish, you can whip up this delightful dish on a busy weeknight or when unexpected guests drop by.
- Delicious Flavors: The combination of crispy cutlets, fluffy rice, and the tangy sweetness of tonkatsu sauce creates a flavor explosion that’s simply irresistible.
- Customizable: Whether you prefer chicken or beef, you can easily switch up the protein based on your cravings or dietary preferences.
- Family-Friendly: Kids and adults alike adore katsu bowls! They’re a hit with everyone, making them perfect for family dinners.
- Perfect for Meal Prep: These bowls store well and reheat beautifully, so you can enjoy delicious leftovers for lunch or dinner the next day.
- Visually Appealing: The vibrant colors of the green onions against the crispy cutlets and fluffy rice make this dish as beautiful as it is tasty!
Trust me, once you try this recipe, you’ll see why it’s a favorite in my kitchen and beyond!
Tips for Success
To ensure you create the best Japanese katsu bowls with crispy breaded meat every time, I’ve gathered some tried-and-true tips that will elevate your katsu game! Let’s dive in!
Cutlet Thickness Matters
One of the keys to achieving that perfect crispy texture is the thickness of your cutlets. I recommend keeping them around 1/2 inch thick. This thickness allows them to cook evenly and ensures a juicy interior while still getting that golden crunch on the outside. If you prefer a thinner cutlet, just adjust your frying time to avoid overcooking!
Season Well
Don’t skimp on the seasoning! Seasoning the cutlets with salt and pepper before dredging is crucial for enhancing the overall flavor. You can also get creative and add garlic powder, onion powder, or even a pinch of paprika to your flour for an extra kick. It’s those little touches that make a big difference!
Perfect Frying Technique
Maintaining the right oil temperature is essential for crispy perfection. If your oil is too hot, the cutlets may burn on the outside while remaining raw inside. Use a medium heat and keep an eye on the sizzle—if it’s too aggressive, lower the temperature. And remember, don’t overcrowd the pan! Fry in batches if necessary to ensure even cooking.
Serving Suggestions
For an authentic touch, serve your katsu bowls with pickled vegetables on the side. They add a delightful tangy contrast to the richness of the cutlets. Also, consider offering extra tonkatsu sauce for those who love a saucy finish! You can even sprinkle some sesame seeds or drizzle a bit of mayonnaise over the top for added flavor and flair.
Leftover Love
If you have leftovers (which is rare in my house), store the cutlets separately from the rice to keep them crispy. Reheat them in a hot skillet for a few minutes to regain that crunch. Trust me, there’s nothing quite like enjoying these bowls again the next day!
With these tips in your back pocket, you’ll be well on your way to mastering the art of katsu bowls. Happy cooking!
Nutritional Information
When it comes to enjoying the best Japanese katsu bowls with crispy breaded meat, it’s always nice to know what you’re putting into your body! Here’s an estimated breakdown of the nutritional values per serving (1 bowl):
- Calories: 600
- Fat: 30g
- Saturated Fat: 7g
- Unsaturated Fat: 20g
- Trans Fat: 0g
- Cholesterol: 150mg
- Sodium: 800mg
- Carbohydrates: 60g
- Fiber: 2g
- Sugar: 5g
- Protein: 25g
Keep in mind that these values are estimates and can vary based on the specific ingredients you use. For instance, different cuts of meat, cooking methods, and serving sizes might affect the overall numbers. So feel free to adjust based on your dietary needs and preferences. Enjoy your delicious katsu bowls guilt-free!
FAQ Section
Got questions about making the best Japanese katsu bowls with crispy breaded meat? Don’t worry; I’ve got you covered! Here are some common queries that I often hear, along with my answers to help you out:
Can I use chicken thighs instead of chicken breasts for katsu?
Absolutely! Chicken thighs are a fantastic option for katsu as they tend to be juicier and more flavorful. Just make sure to pound them to an even thickness for consistent cooking. You might even find that you prefer the taste!
What dipping sauce can I use besides tonkatsu sauce?
While tonkatsu sauce is the classic choice, you can certainly mix things up! A soy sauce-based dip with a splash of rice vinegar and a hint of sesame oil works wonderfully. You can also try a spicy mayo or even a sweet chili sauce for a different flavor profile!
How can I make this recipe gluten-free?
If you want to enjoy gluten-free katsu bowls, simply swap out the all-purpose flour and panko breadcrumbs for gluten-free alternatives. There are excellent gluten-free flour blends and panko options available that work just as well. Just make sure to check the labels!
Can I make katsu bowls ahead of time?
Sure! You can prepare the cutlets in advance and store them in the fridge before frying. If you want to fully prepare the bowls, just store the cutlets and rice separately to keep them fresh. When you’re ready to eat, simply reheat the cutlets in a skillet to restore their crispiness!
What sides pair well with katsu bowls?
Katsu bowls are delicious on their own, but if you want to elevate your meal, consider serving them with pickled vegetables like daikon or cucumber. A fresh salad with a tangy dressing also complements the richness of the katsu nicely. Enjoy your meal!
Storage & Reheating Instructions
Storing and reheating your best Japanese katsu bowls with crispy breaded meat is a breeze, and I’m here to make sure you get it just right! Follow these simple steps to keep your katsu delicious even after it’s been cooked.
Storing Leftovers
If you have any leftovers (which is rare in my house, but it happens!), let the cutlets cool to room temperature first. Then, store them separately from the rice to maintain that wonderful crispiness. Place the fried cutlets in an airtight container lined with paper towels to absorb any excess moisture. The rice can be stored in another container with a lid. Keep everything in the refrigerator, and they’ll be good for about 2-3 days.
Reheating Without Losing Crispiness
When you’re ready to enjoy those katsu bowls again, you want to make sure they stay crispy! Here’s how I do it:
- For the Cutlets: Preheat your oven to 375°F (190°C). Place the cutlets on a baking sheet lined with parchment paper. Bake for about 10-15 minutes, flipping them halfway through, until they’re heated through and crispy again. This method is great because it revives that crunchy texture!
- For the Rice: You can reheat the rice in the microwave or on the stovetop. If you’re using the microwave, place the rice in a bowl with a splash of water, cover it with a damp paper towel, and heat in 30-second intervals until warm. For the stovetop, add a splash of water to a saucepan, cover, and heat over low until warmed through.
Once everything is heated, assemble your katsu bowls again with some fresh tonkatsu sauce and green onions, and you’re all set to indulge in that mouthwatering goodness once more!
For more recipes follow me in page Pinterest.
Print
The Best Japanese Katsu Bowls With Crispy Pleasure
- Total Time: 30 minutes
- Yield: 4 servings 1x
- Diet: Gluten Free
Description
Delicious Japanese katsu bowls featuring crispy breaded meat served with rice and sauce.
Ingredients
- 2 cups cooked rice
- 4 pieces of chicken or beef cutlets
- 1 cup panko breadcrumbs
- 1/2 cup all-purpose flour
- 2 eggs, beaten
- 1/4 cup vegetable oil
- 1/4 cup tonkatsu sauce
- 2 green onions, sliced
- Salt and pepper to taste
Instructions
- Prepare rice according to package instructions.
- Season the cutlets with salt and pepper.
- Dredge each cutlet in flour, dip in beaten eggs, and coat with panko breadcrumbs.
- Heat oil in a pan over medium heat.
- Fry cutlets until golden brown and cooked through, about 4-5 minutes per side.
- Slice the cutlets into strips.
- Serve on top of rice and drizzle with tonkatsu sauce.
- Garnish with sliced green onions.
Notes
- Adjust the thickness of the cutlets for desired cooking time.
- For a spicier kick, add chili powder to the flour.
- Serve with pickled vegetables for added flavor.
- Prep Time: 15 minutes
- Cook Time: 15 minutes
- Category: Main Course
- Method: Frying
- Cuisine: Japanese
Nutrition
- Serving Size: 1 bowl
- Calories: 600
- Sugar: 5g
- Sodium: 800mg
- Fat: 30g
- Saturated Fat: 7g
- Unsaturated Fat: 20g
- Trans Fat: 0g
- Carbohydrates: 60g
- Fiber: 2g
- Protein: 25g
- Cholesterol: 150mg
Keywords: Japanese Katsu, Crispy Katsu Bowls, Tonkatsu, Japanese Cuisine