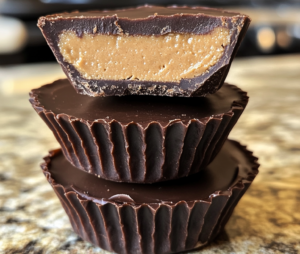
Introduction to Homemade Peanut Butter Cups
Introduction to Homemade Peanut Butter Cups
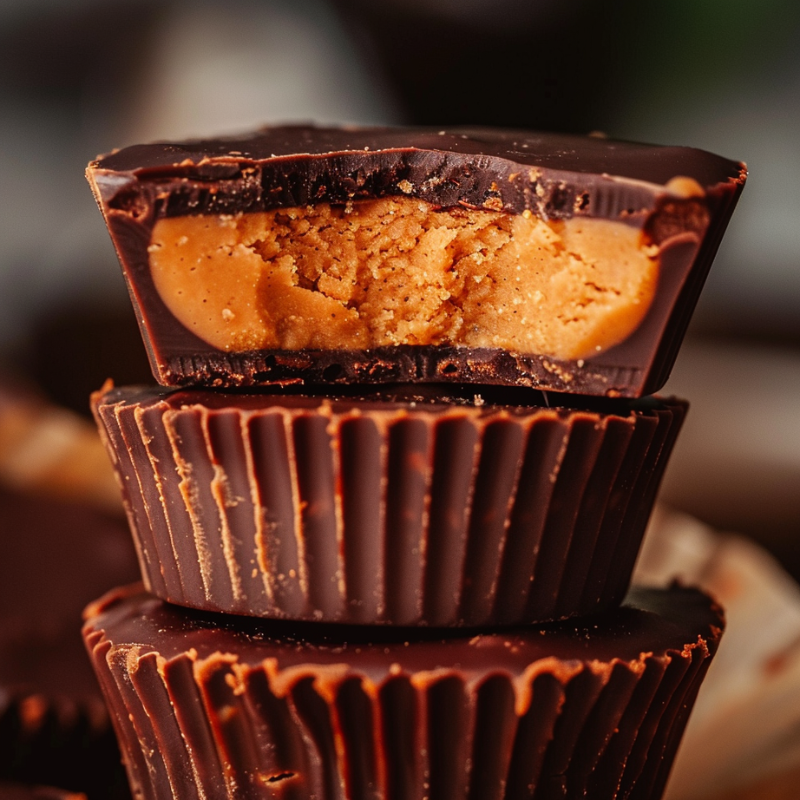
Homemade Peanut Butter Cups are a delightful treat that combines creamy peanut butter with rich, decadent chocolate. These cups are not only easy to make but also allow for a wide range of customization options. Whether you prefer dark chocolate, milk chocolate, or a combination of both, you can tailor this recipe to suit your taste.
Benefits of Making Homemade Peanut Butter Cups
Making your own peanut butter cups at home comes with numerous benefits:
- Control Over Ingredients: You can choose high-quality ingredients and avoid preservatives and artificial flavors often found in store-bought versions. This ensures a healthier treat.
- Customization: From the type of chocolate to the addition of different fillings and toppings, homemade peanut butter cups can be customized to your liking. You can even create peanut butter cups that cater to dietary restrictions, such as vegan or gluten-free options.
- Cost-Effective: Making these treats at home is often more affordable than purchasing them from the store, allowing you to enjoy a gourmet treat without breaking the bank.
- Fun and Engaging: It’s a fun activity that can be enjoyed alone or with family and friends, making it a great way to bond and create delicious memories. Plus, you get the added satisfaction of making something yourself.
Brief Mention of Recipe Simplicity and Customization
The recipe for homemade peanut butter cups is simple and straightforward, requiring only a few ingredients and basic kitchen tools. With a bit of creativity, you can experiment with various flavors and textures to create your perfect peanut butter cup. Whether you want to add a fruity twist with jam or make them extra crunchy with nuts, the possibilities are endless. You can even adjust the sweetness or use alternative nut butters to suit your preferences.
Stay tuned for the next part where we’ll dive into the ingredients and equipment needed for this delightful recipe!
Ingredients and Equipment
Ingredients Needed
To make delicious Homemade Peanut Butter Cups, you’ll need a handful of simple ingredients. Here’s what you’ll require:
- High-quality Chocolate: Use semisweet, dark, milk, or even white chocolate, depending on your preference. High-quality chocolate ensures a smooth, rich flavor.
- Creamy Peanut Butter: Opt for a creamy variety for the best texture. Natural peanut butter without added sugar or oil works well.
- Confectioners’ Sugar: This helps sweeten and stabilize the peanut butter filling.
- Butter: Adds richness and helps bind the filling together.
- Optional Toppings: Get creative with sprinkles, crushed nuts, or a drizzle of melted white chocolate for added flair.
These ingredients are readily available in most grocery stores, and you might already have them in your pantry.
Equipment Needed
Having the right equipment makes the process of making homemade peanut butter cups much smoother. Here’s a list of what you’ll need:
- Muffin Tin or Silicone Molds: A standard muffin tin works perfectly, but you can also use silicone molds for easy removal.
- Paper Liners: These help keep the chocolate from sticking to the tin and make cleanup a breeze.
- Microwave-Safe Bowls: For melting the chocolate.
- Spatula or Spoon: For spreading the chocolate and peanut butter filling.
- Hand Mixer or Whisk: Useful for blending the peanut butter filling to a smooth consistency.
These tools are essential for creating perfectly shaped and delicious peanut butter cups.
Selecting the Best Ingredients
Using high-quality ingredients is key to achieving the best flavor and texture in your homemade peanut butter cups. For chocolate, opt for brands that are known for their rich flavor and smooth melting properties. Similarly, choose a good quality peanut butter that doesn’t have too many additives.
For more on choosing the best chocolate, you can check out this resource on the best chocolate for baking.
Tips for Ingredient Substitutions
- If you prefer a different type of nut butter, such as almond or cashew, feel free to substitute it for peanut butter. Just keep in mind that the texture and flavor will vary.
- For a vegan version, use dairy-free chocolate and replace butter with a vegan alternative.
- If you want to reduce sugar, opt for sugar-free chocolate and adjust the amount of confectioners’ sugar in the filling.
These simple ingredient swaps can help cater to various dietary needs and preferences.
Using high-quality ingredients is key to achieving the best flavor and texture in your homemade peanut butter cups. For chocolate, opt for brands that are known for their rich flavor and smooth melting properties. For more on selecting the best ingredients, check out this guide on high-quality ingredients.
Step-by-Step Recipe
Step 1: Preparing the Chocolate
The first step in making Homemade Peanut Butter Cups is preparing the chocolate. This process is crucial for achieving that smooth, glossy finish that makes these treats so irresistible.
- Choose Your Chocolate: Select high-quality semisweet, dark, or milk chocolate. Using a good brand ensures a smoother melt and richer flavor.
- Melting Methods: There are two main methods to melt chocolate:
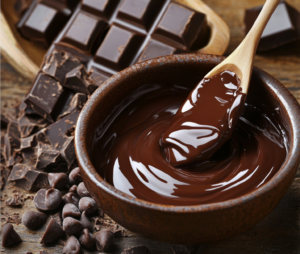
- Microwave Method: Place your chocolate chips or chopped chocolate in a microwave-safe bowl. Heat in 20-30 second intervals, stirring after each interval until the chocolate is fully melted and smooth. This prevents overheating and ensures an even melt.
- Double Boiler Method: If you prefer a more controlled melt, use a double boiler. Fill a saucepan with a few inches of water and bring it to a simmer. Place a heatproof bowl over the saucepan, ensuring the bottom of the bowl doesn’t touch the water. Add the chocolate to the bowl and stir constantly until melted.
For more detailed guidance on melting chocolate, you can refer to this guide on melting chocolate for baking.
Step 2: Making the Peanut Butter Filling
Now that your chocolate is ready, it’s time to prepare the creamy peanut butter filling.
- Combine Ingredients: In a medium bowl, mix 1/2 cup of creamy peanut butter, 2 tablespoons of softened butter, and 1/4 cup of confectioners’ sugar.
- Blend Until Smooth: Use a hand mixer or a whisk to blend the mixture until smooth and creamy. The filling should be thick but spreadable. If it’s too thick, add a bit more butter; if too thin, add a touch more confectioners’ sugar.
Step 3: Assembling the Cups
This step is where the magic happens! Layering the chocolate and peanut butter creates that classic peanut butter cup look and taste.
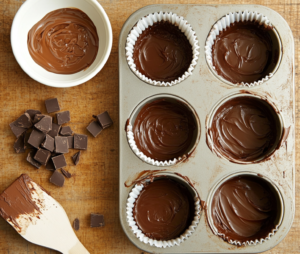
- Line the Muffin Tin: Place paper liners in each cup of a standard muffin tin.
- First Chocolate Layer: Spoon about 1 tablespoon of melted chocolate into each liner, spreading it evenly to cover the bottom.
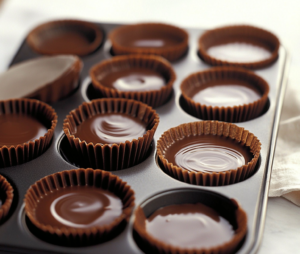
- Add Peanut Butter Filling: Scoop a heaping teaspoon of the peanut butter mixture and roll it into a ball. Flatten slightly and place it in the center of the chocolate layer in each cup.
- Top with Chocolate: Cover the peanut butter filling with another tablespoon of melted chocolate, making sure it spreads to the edges to fully encase the peanut butter.
- Smooth the Tops: Tap the muffin tin gently on the counter to smooth out the tops and remove any air bubbles.
Step 4: Chilling and Setting
To achieve that perfect texture, it’s essential to let the cups set properly.
- Refrigeration: Place the muffin tin in the refrigerator for at least 1 hour, or until the chocolate is fully set. This helps the layers bond and gives the cups their firm, bite-able texture.
- Freezing Option: If you’re in a hurry, you can place the cups in the freezer for about 20-30 minutes. Once set, remove from the molds and enjoy your Homemade Peanut Butter Cups!
Customization and Variations
Flavor Variations for Peanut Butter Cups
Once you’ve mastered the basic recipe for peanut butter cups, it’s time to get creative! There are numerous ways to customize these treats to suit every palate and occasion.
- PB&J Cups: Add a small spoonful of your favorite jam or jelly on top of the peanut butter filling before adding the final chocolate layer. This gives your cups a delightful fruity twist, reminiscent of a classic peanut butter and jelly sandwich.
- Nutella Cups: Substitute the peanut butter with Nutella for a hazelnut-flavored treat. The combination of chocolate and hazelnut is always a hit!
- Chocolate Banana Cups: Place a thin slice of banana on top of the peanut butter filling before adding the final layer of chocolate. This adds a fresh, fruity element that pairs wonderfully with the chocolate.
- Inside-Out Peanut Butter Cups: Flip the script by making the peanut butter the outer layer and the chocolate the filling. Use a mixture of powdered peanut butter, coconut oil, and a sweetener like maple syrup for the base, then fill with melted chocolate.
- Crunchy Peanut Butter Cups: Use crunchy peanut butter instead of creamy for added texture. You can also mix in crushed pretzels, nuts, or cookies into the chocolate for an extra crunch.
- White Chocolate Cups: Use white chocolate instead of milk or dark chocolate. This creates a visually appealing contrast and a unique flavor profile.
- Layered Cups: Create multi-layered cups by alternating layers of chocolate and peanut butter. This not only looks impressive but also gives each bite a mix of textures and flavors.
For more creative ideas, check out this list of fun peanut butter cup variations.
Dietary Adjustments for Peanut Butter Cups
Making homemade peanut butter cups allows you to cater to various dietary needs and preferences:
- Vegan Peanut Butter Cups: Use dairy-free chocolate and replace butter with a vegan alternative like coconut oil or a vegan margarine. Ensure that your peanut butter is also vegan-friendly.
- Sugar-Free Peanut Butter Cups: Opt for sugar-free chocolate and reduce or eliminate the confectioners’ sugar in the peanut butter filling. You can use a sugar substitute if needed.
- Nut-Free Peanut Butter Cups: If you’re allergic to nuts, try using sunflower seed butter or another nut-free spread in place of peanut butter. The texture and flavor will be slightly different, but still delicious.
- Gluten-Free Peanut Butter Cups: Ensure all ingredients are certified gluten-free. Most basic recipes for peanut butter cups are naturally gluten-free, but always check labels to be sure.
These adjustments ensure that everyone can enjoy this delightful treat, regardless of dietary restrictions.
Experimenting with Chocolate in Peanut Butter Cups
The type of chocolate you use can significantly change the flavor of your peanut butter cups:
- Dark Chocolate Cups: For a richer, slightly bitter taste, use dark chocolate. It’s a great option for those who prefer a less sweet treat.
- Milk Chocolate Cups: This is the traditional choice for a sweeter, creamier flavor that pairs perfectly with the peanut butter filling.
- White Chocolate Cups: For a sweeter and creamier option, try using white chocolate. This creates a different visual and taste experience.
- Flavored Chocolate Cups: Experiment with chocolates that have added flavors like mint, orange, or chili. These can add an unexpected twist to your peanut butter cups.
Using different types of chocolate not only changes the taste but also allows for a variety of visual presentations, making your homemade peanut butter cups even more appealing.
Storing and Serving Peanut Butter Cups
Storing Homemade Peanut Butter Cups
Proper storage is crucial to maintaining the texture and flavor of your homemade peanut butter cups. Here are some tips to ensure they stay fresh and delicious:
- Room Temperature: If you plan to eat your peanut butter cups within a day or two, you can store them at room temperature in an airtight container. This keeps the chocolate from becoming too hard and maintains a softer texture.
- Refrigeration: For longer storage, place the peanut butter cups in an airtight container and store them in the refrigerator. They will keep for up to two weeks. Before serving, allow them to sit at room temperature for about 20-30 minutes to soften.
- Freezing: To store peanut butter cups for an extended period, freeze them. Place the cups in a single layer on a baking sheet and freeze until solid. Then, transfer them to an airtight container, separating layers with parchment paper to prevent sticking. They can be stored in the freezer for up to three months. Thaw in the refrigerator or at room temperature before serving.
These methods ensure that your treats stay fresh and delicious, ready to be enjoyed at any time.
Serving Suggestions for Peanut Butter Cups
Serving homemade peanut butter cups can be as simple or as creative as you like. Here are a few ideas to enhance your presentation:
- Room Temperature: Serve the cups at room temperature to enjoy the best texture. The chocolate will be firm but not too hard, and the peanut butter filling will be perfectly creamy.
- With Coffee or Tea: Pair your peanut butter cups with a hot beverage like coffee or tea. The warmth of the drink complements the rich chocolate and peanut butter flavors.
- As a Dessert Garnish: Use mini peanut butter cups as a garnish for ice cream, cakes, or cupcakes. They add a delightful crunch and flavor boost to your desserts.
- Holiday Treats: Decorate the tops of the cups with themed sprinkles or edible decorations to match holidays and special occasions. This makes them a fun and festive addition to any celebration.
- Gift Giving: Wrap your peanut butter cups in decorative packaging and give them as gifts. They make a thoughtful and delicious homemade present for friends and family.
For more ideas on presenting and storing your peanut butter cups, refer to this guide on storing and serving homemade treats.
Tips for Perfect Peanut Butter Cups Every Time
Achieving the perfect homemade peanut butter cups can be easy with a few expert tips:
- Use High-Quality Ingredients: The better the ingredients, the better the final product. Choose good-quality chocolate and peanut butter for the best results.
- Properly Melt the Chocolate: Ensure the chocolate is melted smoothly without burning. Stirring frequently and using the right melting method can help.
- Even Layers: When assembling the cups, make sure to spread the chocolate and peanut butter layers evenly. This ensures a balanced taste in every bite.
- Chill Time: Allow enough time for the cups to chill and set properly. Rushing this step can result in uneven textures.
- Storage: Store the cups correctly to maintain their freshness and texture. Follow the storage tips provided to keep them in the best condition.
These tips will help you create perfect peanut butter cups every time, ensuring they are as delicious as they look.
Tips and Troubleshooting
Common Issues and Solutions for Homemade Peanut Butter Cups
Even with the best recipes, sometimes things can go wrong. Here are some common issues you might encounter while making homemade peanut butter cups and how to fix them:
- Grainy Chocolate: If your melted chocolate is grainy, it might have seized. This can happen if even a tiny bit of water gets into the chocolate or if it’s overheated. To fix seized chocolate, try adding a teaspoon of vegetable oil or melted butter and stir vigorously until smooth again.
- Leaking Peanut Butter: If the peanut butter filling leaks out of the chocolate, it means the chocolate layer was too thin. Make sure to spread a generous layer of chocolate on the bottom and sides of the mold before adding the peanut butter filling.
- Uneven Layers: To achieve even layers, tap the muffin tin gently on the counter after adding each layer. This helps the chocolate and peanut butter settle evenly and removes air bubbles.
- Hard Chocolate: If the chocolate is too hard to bite into after refrigerating, let the peanut butter cups sit at room temperature for about 10-15 minutes before serving.
For more troubleshooting tips, check out this guide on solving common issues in homemade candy making.
Expert Tips for Perfect Peanut Butter Cups
Creating the perfect homemade peanut butter cups involves a few expert tricks:
- Use High-Quality Ingredients: The quality of your ingredients will greatly affect the final product. Choose good-quality chocolate and peanut butter for the best taste and texture.
- Proper Tempering: For a glossy finish and perfect snap, temper your chocolate. This involves melting chocolate to a specific temperature and then cooling it to set the cocoa butter crystals. It’s a bit advanced, but worth it for a professional look.
- Avoid Overheating Chocolate: Melt chocolate gently to avoid burning it. Use a double boiler or microwave in short bursts, stirring frequently.
- Consistency of Peanut Butter Filling: The filling should be thick but spreadable. If it’s too runny, add more confectioners’ sugar; if too thick, add a bit of butter.
- Chill Properly: Allow sufficient time for the cups to chill and set. Patience is key to achieving the perfect texture.
- Creative Additions: Experiment with flavors and textures. Add a pinch of sea salt on top for contrast, or mix in crushed cookies or pretzels for crunch.
- Store Correctly: Proper storage is crucial to maintain freshness. Use airtight containers and separate layers with parchment paper if storing multiple cups.
For more detailed tips, refer to this guide on perfecting your homemade candies.
FAQs
Frequently Asked Questions about Homemade Peanut Butter Cups
Q: How do you store leftover homemade peanut butter cups?
A: To store your homemade peanut butter cups, place them in an airtight container. If keeping them at room temperature, they will last up to two days. For longer storage, refrigerate them for up to two weeks. Furthermore, if you need to store them for even longer, freeze them for up to three months. When you’re ready to enjoy, let them thaw at room temperature for about an hour for the best texture.
Q: Can you freeze homemade peanut butter cups?
A: Yes, you can freeze peanut butter cups. First, place them in a single layer on a baking sheet and freeze until solid. Then, transfer them to an airtight container, separating layers with parchment paper. They can be stored in the freezer for up to three months. Thaw them in the refrigerator or at room temperature before serving.
Using Alternative Nut Butters in Homemade Peanut Butter Cups
Q: Can you use almond butter or other nut butters instead of peanut butter?
A: Absolutely! You can use any nut butter you prefer, such as almond, cashew, or sunflower seed butter. Keep in mind that the texture and flavor will vary slightly depending on the nut butter used. Some nut butters are looser than others, so you may need to adjust the amount of confectioners’ sugar to achieve the right consistency.
Q: Can you add a layer of jam or jelly to the peanut butter cups?
A: Yes, you can add a thin layer of your favorite jam or jelly for a fruity twist. However, be mindful of the moisture content to avoid affecting the texture of the peanut butter cups. Adding a layer of jam between the peanut butter and the top layer of chocolate can create a delightful PB&J effect.
Perfecting the Appearance of Homemade Peanut Butter Cups
Q: How do you get a smooth top on the peanut butter cups?
A: To achieve a smooth top, tap the muffin tin gently on the counter after filling each cup. This helps the chocolate settle evenly and removes air bubbles. Using a spoon or a spatula to smooth the top layer of chocolate can also help achieve a clean, professional look.
Q: Can you make mini homemade peanut butter cups?
A: Absolutely! Use mini muffin tins or candy molds to create bite-sized treats. The process is the same, just on a smaller scale. Mini peanut butter cups are perfect for snacking or adding to dessert platters.
Dietary Considerations for Homemade Peanut Butter Cups
Q: Can you make these without added sugar?
A: Yes, you can use sugar-free chocolate and adjust the sweetener in the peanut butter filling to your taste. Sugar substitutes like stevia or erythritol can be used in place of confectioners’ sugar. This is a great option for those looking to reduce their sugar intake.
Q: What type of chocolate is best for homemade peanut butter cups?
A: The best chocolate is one that you enjoy eating on its own. High-quality semisweet, dark, or milk chocolate works well. For a sweeter treat, use milk chocolate; for a richer, less sweet option, dark chocolate is ideal. White chocolate can also be used for a different flavor profile.
For more on the benefits of using fresh ingredients in your cooking, check out this informative guide on the importance of fresh ingredients.

