As a passionate home cook, I find joy in the simple act of canning tomatoes. It’s like capturing summer in a jar! Canning tomatoes not only preserves their vibrant flavor but also brings a sense of accomplishment. Whether you’re a busy mom juggling schedules or a professional looking for quick meal solutions, this recipe is perfect for you. Imagine opening a jar of your homemade tomatoes in the middle of winter, and the aroma instantly transports you back to sunny days. Let’s dive into this delightful culinary adventure together!
Print
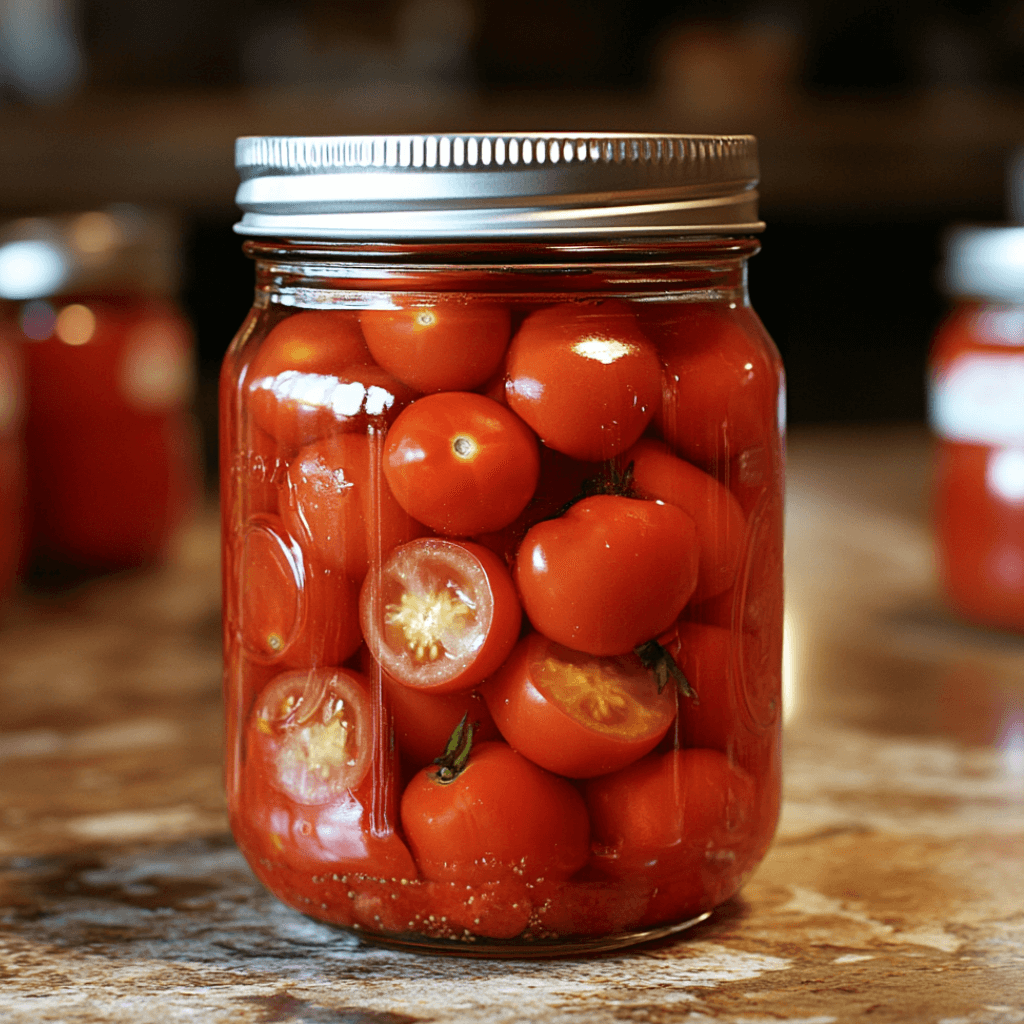
Canning tomatoes: Discover the secrets to perfection!
- Total Time: 1 hour 30 minutes
- Yield: 6-8 pint jars
- Diet: Vegetarian
Description
Learn the secrets to canning tomatoes perfectly, ensuring a delicious and preserved product for your pantry.
Ingredients
- Fresh tomatoes – 10 pounds
- Salt – 1 tablespoon
- Lemon juice – 1/4 cup
- Water – as needed
Instructions
- Wash the tomatoes thoroughly and remove any stems.
- Blanch the tomatoes in boiling water for 30-60 seconds, then transfer them to an ice bath.
- Peel the skins off the tomatoes and chop them as desired.
- In a large pot, combine the chopped tomatoes, salt, and lemon juice.
- Heat the mixture over medium heat until it starts to simmer.
- Prepare your canning jars by sterilizing them in boiling water.
- Fill the jars with the hot tomato mixture, leaving about 1/2 inch of headspace.
- Wipe the rims of the jars with a clean cloth to ensure a good seal.
- Place the lids on the jars and screw on the bands until they are fingertip-tight.
- Process the jars in a boiling water bath for 40-45 minutes.
- Remove the jars from the water bath and let them cool completely on a clean towel.
Notes
- Ensure that the tomatoes are ripe and free from blemishes for the best flavor.
- Adjust the acidity by adding more lemon juice if using low-acid tomatoes.
- Store the canned tomatoes in a cool, dark place for optimal shelf life.
- Prep Time: 30 minutes
- Cook Time: 1 hour
- Category: Preserving
- Method: Canning
- Cuisine: American
Nutrition
- Serving Size: 1 cup
- Calories: 50
- Sugar: 4g
- Sodium: 200mg
- Fat: 0g
- Saturated Fat: 0g
- Unsaturated Fat: 0g
- Trans Fat: 0g
- Carbohydrates: 10g
- Fiber: 2g
- Protein: 2g
- Cholesterol: 0mg
Keywords: canning tomatoes, preserving tomatoes, homemade tomato sauce
Table of Contents
Why You’ll Love This Canning Tomatoes
Canning tomatoes is a game-changer for busy lives. It’s quick, easy, and incredibly satisfying. You’ll love how you can transform fresh tomatoes into a pantry staple that bursts with flavor. Plus, it’s a fantastic way to save money and reduce waste. Imagine the pride of serving your family meals made with your own canned tomatoes. It’s not just about preserving food; it’s about creating memories!

Ingredients for Canning Tomatoes
Gathering the right ingredients is the first step in your canning adventure. Here’s what you’ll need:
- Fresh tomatoes: Choose ripe, blemish-free tomatoes for the best flavor. Heirloom varieties are fantastic for their rich taste.
- Salt: A tablespoon of salt enhances the flavor and acts as a preservative. You can use kosher or sea salt, but avoid iodized salt as it can affect the color and texture.
- Lemon juice: This adds acidity, which is crucial for safe canning. If you prefer, you can substitute with citric acid, but lemon juice gives a lovely flavor.
- Water: You’ll need water for blanching and possibly for adjusting the consistency of your tomato mixture.
For those who love experimenting, consider adding herbs like basil or oregano for a unique twist. You can also use different types of tomatoes, like Roma or San Marzano, depending on your taste preference. Remember, the exact quantities are listed at the bottom of the article for easy printing!
How to Make Canning Tomatoes
Step 1: Prepare the Tomatoes
Start by washing your fresh tomatoes thoroughly. This step is crucial to remove any dirt or pesticides. After washing, remove the stems. Using ripe tomatoes is key; they’re sweeter and more flavorful. Trust me, your taste buds will thank you later!
Step 2: Blanching the Tomatoes
Next, it’s time to blanch the tomatoes. Bring a large pot of water to a rolling boil. Carefully drop the tomatoes in for 30-60 seconds. This process loosens the skins, making them easier to peel. After blanching, transfer them to an ice bath to stop the cooking process. It’s like giving them a refreshing dip!
Step 3: Peeling and Chopping
Once the tomatoes are cool, the skins should slip off easily. I like to use my hands for this, but a knife works too. After peeling, chop the tomatoes to your desired size. If you’re in a hurry, a quick pulse in a food processor can save time. Just don’t overdo it; you want some texture!
Step 4: Mixing Ingredients
In a large pot, combine your chopped tomatoes, salt, and lemon juice. The salt enhances flavor, while the lemon juice adds acidity, which is vital for safe canning. Stir everything together until well mixed. This mixture is the heart of your canned tomatoes!
Step 5: Heating the Mixture
Now, heat the tomato mixture over medium heat. Keep an eye on it as it starts to simmer. You want to see small bubbles forming, which indicates it’s ready. This step helps meld the flavors together and prepares the mixture for canning.
Step 6: Preparing the Jars
While your mixture simmers, it’s time to prepare your jars. Sterilizing them is crucial for safe canning. Boil the jars in water for about 10 minutes. This kills any bacteria and ensures your canned tomatoes stay fresh. It’s a small step that makes a big difference!
Step 7: Filling the Jars
Once the jars are sterilized, carefully fill them with the hot tomato mixture. Leave about 1/2 inch of headspace at the top. This space is important for sealing. Use a funnel if you have one; it makes the process cleaner and easier!
Step 8: Sealing the Jars
To ensure a good seal, wipe the rims of the jars with a clean cloth. This removes any residue that could prevent a proper seal. Place the lids on top and screw on the bands until they’re fingertip-tight. Don’t over-tighten; the jars need to breathe during processing!
Step 9: Processing the Jars
Now, it’s time for the boiling water bath. Place the jars in a large pot of boiling water, ensuring they’re covered by at least an inch of water. Process the jars for 40-45 minutes. This step is essential for preserving your tomatoes and ensuring they’re safe to eat.
Step 10: Cooling the Jars
After processing, carefully remove the jars from the water bath. Let them cool completely on a clean towel. This cooling period is important for the jars to seal properly. Once cool, store them in a cool, dark place. Your homemade canned tomatoes are now ready to shine in your kitchen!
Tips for Success
- Always use ripe, high-quality tomatoes for the best flavor.
- Don’t skip the blanching step; it makes peeling a breeze!
- Keep your workspace clean to avoid contamination.
- Label your jars with the date to track freshness.
- Experiment with spices and herbs for unique flavors.
- Check seals after cooling; any unsealed jars should be refrigerated and used first.
Equipment Needed for Canning Tomatoes
- Large pot: A stockpot works well, but any large pot will do.
- Jar lifter: This handy tool makes it easy to lift hot jars. Tongs can be a substitute.
- Funnel: A canning funnel helps prevent spills. A regular kitchen funnel can work too.
- Clean cloth: Use it for wiping jar rims; paper towels are a good alternative.
- Measuring cups and spoons: Essential for accurate ingredient measurements.
Variations of Canning Tomatoes
- Herb-Infused Tomatoes: Add fresh herbs like basil, oregano, or thyme to the tomato mixture for a fragrant twist.
- Spicy Kick: Incorporate red pepper flakes or diced jalapeños for a zesty, spicy version that adds heat to your dishes.
- Garlic Lovers: Toss in minced garlic for a robust flavor that pairs beautifully with pasta and sauces.
- Sweet and Savory: Mix in a touch of sugar or honey to balance the acidity, perfect for those who enjoy a sweeter sauce.
- Low-Sodium Option: Omit the salt or use a salt substitute for a healthier version without sacrificing flavor.
- Chunky Style: Leave the tomatoes in larger pieces for a rustic texture, ideal for stews and soups.
Serving Suggestions for Canned Tomatoes
- Serve your canned tomatoes over pasta for a quick and delicious meal.
- Use them as a base for homemade pizza sauce, adding your favorite toppings.
- Pair with crusty bread and a fresh salad for a light lunch.
- Mix into chili or stews for added depth and flavor.
- Garnish with fresh basil or parsley for a pop of color and freshness.
For more recipes follow me in page Facebook and Pinterest
FAQs about Canning Tomatoes
Can I use any type of tomato for canning?
Yes, you can use various types of tomatoes, but I recommend using ripe, high-quality varieties like Roma or San Marzano. They have fewer seeds and thicker flesh, making them perfect for canning tomatoes.
Do I need to add lemon juice to my canned tomatoes?
Absolutely! Adding lemon juice is crucial for safe canning. It increases the acidity, which helps prevent the growth of harmful bacteria. If you’re using low-acid tomatoes, you might need to add a bit more.
How long can I store canned tomatoes?
When stored in a cool, dark place, your canned tomatoes can last for up to a year. Just make sure to check the seals and look for any signs of spoilage before using them.
What should I do if my jars don’t seal properly?
If a jar doesn’t seal, don’t panic! You can refrigerate it and use the contents within a week. Alternatively, you can reprocess the jar with a new lid, but make sure to follow the proper canning steps again.
Can I can tomatoes without a water bath?
It’s not recommended. The boiling water bath is essential for ensuring that your canned tomatoes are safe to eat. It helps eliminate bacteria and seals the jars properly, so always stick to this method for safety!
Final Thoughts
Canning tomatoes is more than just a cooking method; it’s a heartfelt tradition that connects us to the seasons and our loved ones. Each jar you fill is a little piece of summer, ready to brighten up your winter meals. I cherish the moments spent in the kitchen, the laughter shared with family, and the satisfaction of creating something truly special. As you embark on this canning adventure, remember that it’s not just about preserving food; it’s about preserving memories. So grab those tomatoes, and let’s make some delicious magic together!