
There’s something truly special about making your own soap, and when it comes to Coffee Ground Soap, the experience is even more delightful! Imagine this: you wake up in the morning, the aroma of freshly brewed coffee fills your kitchen, and then you get to turn that same coffee into a nourishing, exfoliating bar of soap. It’s like bringing a little bit of your favorite coffee ritual into your skincare routine.
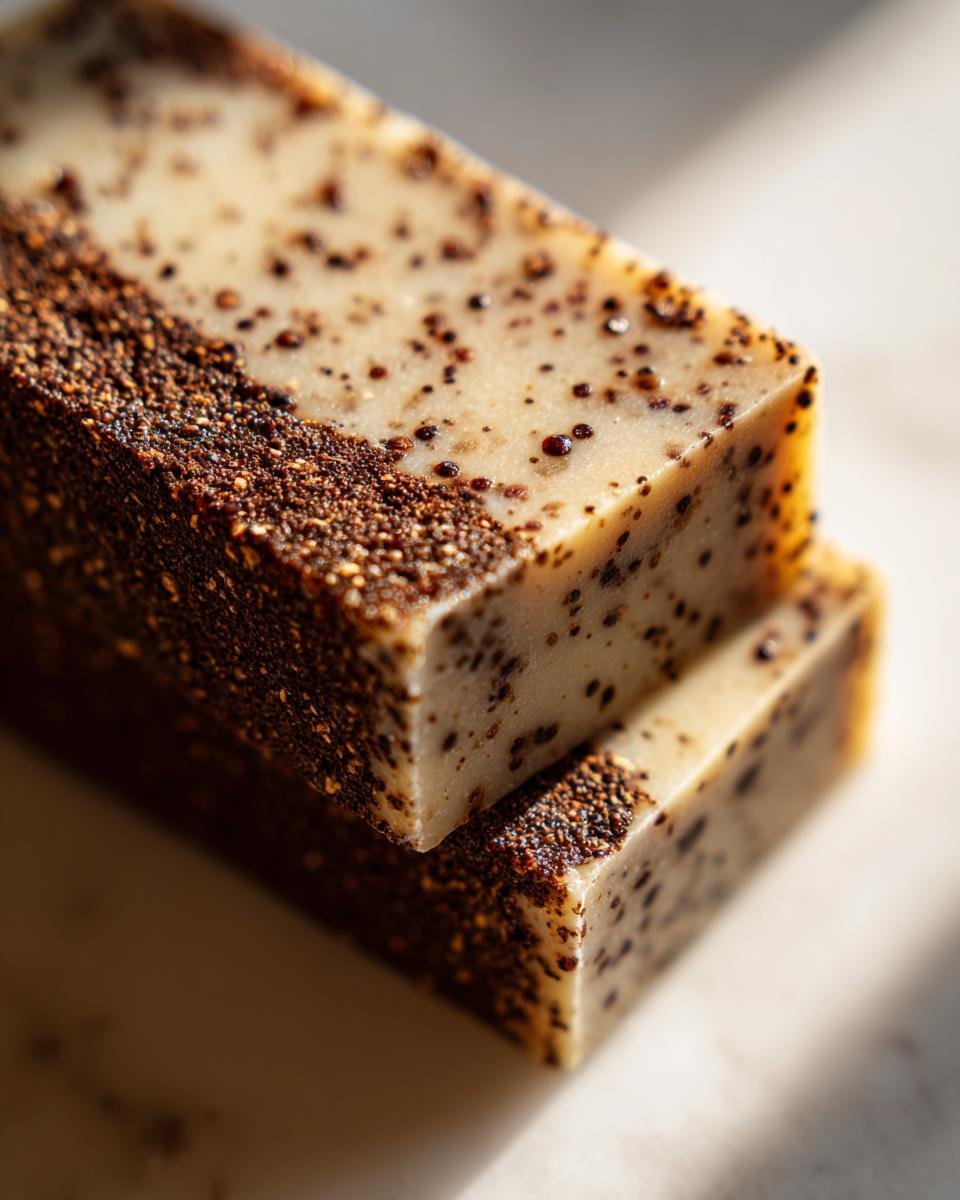
When I first tried my hand at soap making, I was both excited and a bit apprehensive. But let me tell you, the process is incredibly satisfying! Not only do you get to control all the ingredients that go into your soap, but using coffee grounds adds a wonderful texture that gently exfoliates your skin while giving you a burst of energy – who doesn’t want that? Plus, it’s a fantastic way to repurpose leftover coffee. Trust me, once you try this homemade soap, you’ll never want to go back to store-bought!
Ingredients for Coffee Ground Soap
Gathering the right ingredients is essential for crafting the perfect Coffee Ground Soap. Each component plays a vital role in making your soap not just effective, but also enjoyable to use. Here’s what you’ll need:
- 10 oz cooled brewed coffee: This is the star of the show! Using cooled coffee not only provides a rich aroma but also offers natural antioxidants for your skin.
- 4.3 oz lye: Be cautious with lye; it’s a powerful ingredient that helps turn oils into soap. Always measure it precisely, and remember to wear gloves and eye protection!
- 9 oz coconut oil: This oil adds lather and a lovely moisturizing quality to your soap.
- 9 oz olive oil: Known for its skin-loving properties, olive oil helps create a gentle, nourishing bar.
- 2 oz castor oil: This oil is a wonderful addition for generating a bubbly lather that makes washing hands a pleasure.
- 8 oz palm oil: Palm oil contributes to a firm, stable bar of soap that holds its shape well.
- 2 oz shea butter: This ingredient brings in a luxurious creaminess and deep hydration for your skin.
- 2 tablespoons ground coffee: These coffee grounds not only provide an invigorating scent but also serve as a natural exfoliant, perfect for scrubbing away dead skin cells.
With these ingredients in hand, you’re ready to dive into the soap-making process. Each one adds its unique touch, turning the simple act of washing your hands into a refreshing ritual!
How to Prepare Coffee Ground Soap
Now that you’ve gathered all your ingredients, it’s time to dive into the delightful process of making your Coffee Ground Soap! Don’t worry; I’ll guide you through each step, so you feel confident and ready to create something amazing.
Step 1: Prepare the Lye Solution
First things first, let’s get that lye solution ready! Measure out 4.3 oz of lye and 10 oz of cooled brewed coffee separately using a digital scale. It’s super important to add the lye to the coffee, not the other way around, to avoid any dangerous reactions. Stir gently but thoroughly until the lye is completely dissolved. You’ll notice a strong smell—don’t worry; it’ll fade as the soap cures! Just remember to wear gloves and eye protection during this step, safety first!
Step 2: Melt the Oils and Butter
Next up, let’s melt the oils! In a large pot, combine 9 oz of coconut oil, 9 oz of olive oil, 2 oz of castor oil, 8 oz of palm oil, and 2 oz of shea butter. Heat over medium-low until everything is melted together. This usually takes about 10-15 minutes. Once melted, remove from heat and let it cool down a bit. You want the oils to be warm but not hot before combining them with the lye solution.
Step 3: Blend to Trace
Once both the lye solution and melted oils have cooled to around 100–115°F, it’s time to blend! Carefully pour the lye solution into the oils. Grab your stick blender and mix until the soap reaches what we call “trace.” This means when you drizzle some of the mixture on top, it should leave a trail that hangs around for a second or two. It’s a fun moment, so don’t rush!
Step 4: Add Coffee Grounds
Now comes the exciting part—adding those coffee grounds! Stir in 2 tablespoons of ground coffee until they’re evenly distributed throughout the mixture. If you’d like to enhance the scent, this is the perfect time to add optional fragrances like espresso, chocolate, or mint. The aroma will be absolutely divine!
Step 5: Mold and Cure
Finally, pour your beautiful soap mixture into molds of your choice. Let it sit for about 24–48 hours until it firms up. Once it’s solid, carefully remove the soap from the molds and slice it into bars. Place these bars in a well-ventilated area to cure for at least 3 weeks before using. This curing process is crucial, as it allows the soap to harden and become gentle on your skin. Patience is key, but trust me, it’s worth the wait!
Tips for Success
Making your own Coffee Ground Soap is such a rewarding experience, but a few tips can help ensure everything goes smoothly. Here are some of my favorite tricks to make your soap-making adventure a success!
- Measure Accurately: Precision is key, especially when working with lye. Use a digital scale for all ingredients to ensure your ratios are spot on.
- Stay Safe: Always wear gloves and protective eyewear when handling lye. It’s caustic and can cause burns, so treat it with respect. Make sure to work in a well-ventilated area too.
- Monitor Temperatures: Keep an eye on the temperatures of both your lye solution and oils. They should be around 100–115°F when mixed. Too hot or too cold can affect the soap’s texture.
- Don’t Rush the Mixing: When blending to trace, take your time. If you rush, you might miss that perfect moment when the mixture thickens just right.
- Use Quality Ingredients: The better the ingredients, the better your soap will be! Opt for high-quality oils and fresh coffee grounds for the best results.
- Experiment with Scents: Feel free to customize your soap with different fragrance oils or essential oils! Just be cautious with the amounts, as some scents can be quite strong.
- Patience is Key: Allow your soap to cure for at least 3 weeks. It might be tempting to use it sooner, but curing allows the soap to harden and become gentler on your skin.
- Keep Notes: Document your process and any changes you make. This way, you can replicate your successes or tweak areas that need improvement next time!
With these tips in your back pocket, you’re all set to create some fabulous Coffee Ground Soap! Happy soaping!
Nutritional Information Section
Now, you might be wondering about the nutritional values of your Coffee Ground Soap. While soap is primarily for cleansing, it’s fun to know what goes into it! However, keep in mind that these values are just estimates, as the soap isn’t something you consume, but rather something you use to pamper your skin. Here’s a breakdown of typical nutritional values for one bar of soap:
- Serving Size: 1 bar
- Calories: 0
- Sugar: 0g
- Sodium: 0mg
- Fat: 0g
- Saturated Fat: 0g
- Unsaturated Fat: 0g
- Trans Fat: 0g
- Carbohydrates: 0g
- Fiber: 0g
- Protein: 0g
- Cholesterol: 0mg
Remember, while this soap is filled with nourishing oils and ingredients, it’s designed for external use only. Always do a patch test if you’re trying a new soap to avoid any skin sensitivities. Enjoy the benefits of your homemade soap without worrying about the calories!
FAQ about Coffee Ground Soap
As you embark on your Coffee Ground Soap journey, you might have a few questions swirling around in your mind. Don’t worry; I’ve got you covered! Here are some common queries and answers to help you navigate the soap-making process and fully enjoy the benefits of your creation.
Can I use other types of oils?
Absolutely! While the recipe calls for specific oils, you can definitely customize it based on what you have or prefer. For instance, if you’re out of palm oil, you can substitute it with more coconut oil or even sweet almond oil. Just keep in mind that each oil has its own properties—like olive oil being super moisturizing or grapeseed oil being lightweight. So, feel free to mix and match, but try to stick to oils that are liquid at room temperature for the best results!
How long does the soap last?
Once your Coffee Ground Soap has fully cured, it should last quite a while—typically around 6 months to a year if stored properly! To extend its shelf life, keep it in a cool, dry place and away from direct sunlight. If you notice any unusual smells or changes in texture, it’s best to toss it. And remember, using a soap dish that drains well can help keep your bars nice and solid for longer!
Is this soap suitable for all skin types?
This soap is generally gentle and suitable for most skin types, thanks to the nourishing oils and shea butter. The coffee grounds provide exfoliation, which can be particularly beneficial for removing dead skin cells. However, if you have sensitive skin or allergies, it’s a good idea to do a patch test first. Just apply a little bit of the soap on a small area and check for any reactions. If everything goes smoothly, you’re all set to enjoy the invigorating benefits of your homemade soap!
Why You’ll Love This Recipe
- Exfoliating Properties: The ground coffee in this soap acts as a natural exfoliant, helping to slough away dead skin cells and leaving your skin feeling smooth and refreshed.
- Energizing Scent: The rich aroma of coffee will wake up your senses every time you use this soap. It’s like having a little burst of energy in your shower!
- Customizable: You can easily tweak the recipe by adding your favorite essential oils or fragrance oils to match your personal scent preference. Think espresso, chocolate, or mint for a delightful twist!
- Eco-Friendly: This recipe is a great way to repurpose leftover coffee grounds, reducing waste while creating something wonderful for your skin.
- Simple Ingredients: With just a handful of natural ingredients, you can feel good about what you’re putting on your skin. No harsh chemicals here!
- Perfect for Gifting: Handmade soaps make fantastic gifts! Wrap them up nicely, and you’ve got a thoughtful present that friends and family will love.
Storage & Reheating Instructions
Once your Coffee Ground Soap has finished curing, it’s essential to store it properly to maintain its quality and longevity. Here’s how to keep your bars fresh and fabulous!
Storing Your Soap: Keep your soap in a cool, dry place away from direct sunlight. A well-ventilated area is ideal, as it helps prevent moisture buildup. You can store the bars in a cardboard box or a linen bag to allow them to breathe while protecting them from dust. If you want to keep them extra fresh, wrapping them in wax paper or parchment can add an additional layer of protection.
Reheating Instructions: If you ever find that your soap has softened or become a bit too squishy, don’t worry! You can gently reheat it to firm it back up. Just be careful not to overdo it. Place the soap in a warm area, or if you need to microwave it, do so in short intervals of 10-15 seconds, checking frequently. This will help maintain its shape without causing any damage.
With the right storage and a little bit of care, your Coffee Ground Soap will stay delightful for months to come. Enjoy your homemade creation, and don’t forget to share it with friends and family—they’ll love it just as much as you do!
Final Thoughts
So there you have it! Making your own Coffee Ground Soap is not just a fun project; it’s a chance to infuse your daily routine with a bit of joy and creativity. I truly encourage you to give it a try—there’s something incredibly satisfying about crafting your own soap from scratch. Plus, the invigorating scent of coffee wafting through your home is just the cherry on top!
As you embark on this soap-making adventure, don’t forget to take notes on what you love about your bars and any tweaks you decide to make. I’d absolutely love to hear about your experiences, so feel free to share your thoughts in the comments below! Did you try a different scent? How did your friends and family react to your homemade soap? Let’s create a little community around our love for soap making!
And if you enjoyed this recipe, please consider sharing it on social media! The more, the merrier when it comes to spreading the joy of homemade goodies. For more recipes follow me in page Pinterest and Facebook. Happy soaping, my friends!
Print
Coffee Ground Soap: 7 Steps to Refreshing Bliss
- Total Time: 3 weeks and 1.5 hours
- Yield: 10 bars 1x
- Diet: Vegan
Description
Homemade coffee ground soap that exfoliates and energizes your skin.
Ingredients
- 10 oz cooled brewed coffee (room temperature)
- 4.3 oz lye
- 9 oz coconut oil
- 9 oz olive oil
- 2 oz castor oil
- 8 oz palm oil
- 2 oz shea butter
- 2 tablespoons ground coffee
Instructions
- Prepare the lye solution: Measure the lye and cooled coffee separately using a digital scale. Slowly add the lye to the coffee and stir until fully dissolved.
- Melt the oils and butter: In a large pot, combine coconut oil, olive oil, castor oil, palm oil, and shea butter. Heat over medium-low until fully melted. Remove from heat and allow to cool.
- Blend to trace: When both the lye solution and oils have cooled to about 100–115°F, pour the lye mixture into the oils. Use a stick blender to mix until the soap reaches trace.
- Add coffee grounds: Stir in the ground coffee. Add any optional fragrance if desired.
- Mold and cure: Pour the mixture into soap molds. Let sit for 24–48 hours until firm. Remove from molds, slice into bars, and place in a well-ventilated area to cure for at least 3 weeks before use.
Notes
- The strong coffee smell during mixing will fade as the soap cures.
- Optional scents that pair well: espresso, chocolate, or mint.
- Always wear gloves and eye protection when working with lye.
- Prep Time: 30 minutes
- Cook Time: 1 hour
- Category: Soap Making
- Method: Cold Process
- Cuisine: N/A
Nutrition
- Serving Size: 1 bar
- Calories: 0
- Sugar: 0g
- Sodium: 0mg
- Fat: 0g
- Saturated Fat: 0g
- Unsaturated Fat: 0g
- Trans Fat: 0g
- Carbohydrates: 0g
- Fiber: 0g
- Protein: 0g
- Cholesterol: 0mg
Keywords: Coffee Ground Soap, Homemade Soap, Exfoliating Soap