
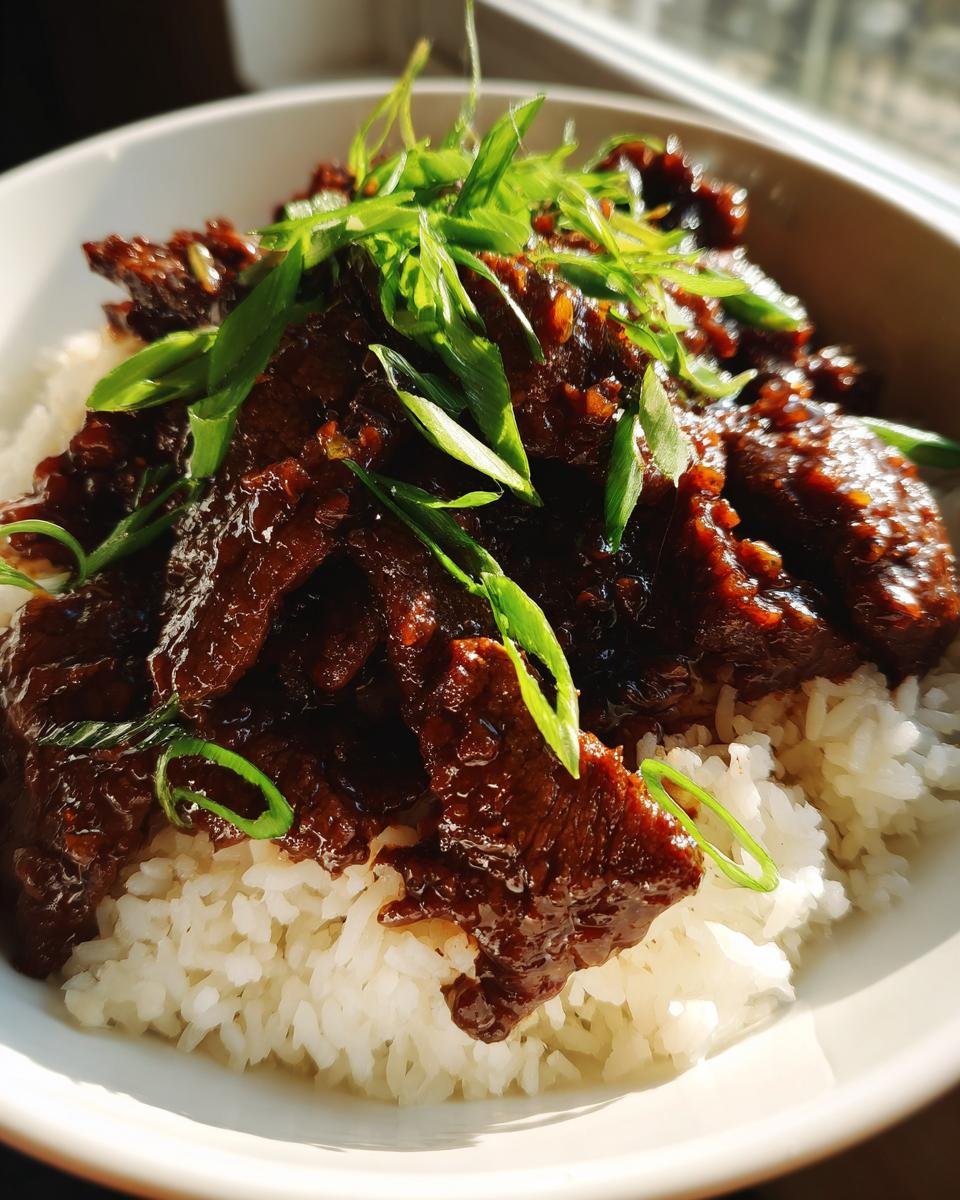
Oh boy, let me tell you about my love for Mongolian Beef! This dish is an absolute favorite in my house, and it’s not hard to see why. Picture tender strips of beef coated in a savory, sweet sauce that dances on your taste buds. It’s the kind of meal that comes together in just 30 minutes, making it perfect for those busy weeknights when you still want something delicious and comforting. The aroma of ginger and garlic fills the kitchen, and trust me, it’s enough to make anyone’s mouth water! Plus, it pairs wonderfully with fluffy rice, which soaks up that incredible sauce. I often find myself whipping this up on a whim because it’s just that easy and satisfying. So grab your apron, and let’s dive into making the best Mongolian Beef you’ve ever tasted!
Ingredients List
Here’s what you’ll need to whip up this mouthwatering Mongolian Beef. I promise, the ingredients are simple, but they come together to create something truly special!
- 1 lb flank steak, sliced very thinly across the grain
- ⅓ cup cornstarch, for that perfect crispy coating
- 2–4 tbsp vegetable or canola oil, just enough for frying
- ½ cup low-sodium soy sauce, to keep it savory
- ¼ cup water, to balance the sauce
- ½ cup packed light brown sugar, which adds that delightful sweetness
- 2 tsp cornstarch + 2 tsp water, mixed to make a slurry for thickening
- 1 tsp freshly grated ginger, for a lovely warmth
- 4 cloves garlic, minced, because garlic makes everything better!
- 1 bunch green onions, chopped, for that fresh crunch
- 2–3 cups hot cooked rice, for serving and soaking up all the sauce
Make sure to gather everything before you start – it makes the cooking process smoother and more enjoyable! Happy cooking!
How to Prepare Mongolian Beef
Now that you have your ingredients ready, let’s dive into the step-by-step magic of preparing Mongolian Beef! Don’t worry; I’ll guide you through each part to make it super easy and fun!
Preparing the Beef
First things first, let’s get that beef prepped! Take your flank steak and slice it into ¼-inch (or thinner) slices. Make sure to cut across the grain for tender bites; it really makes a difference in texture! Once you’ve got those slices, lay them on a large baking sheet or cutting board and sprinkle the ⅓ cup of cornstarch over them. Now, this is the fun part—toss the beef around to coat it evenly. You want each piece to be well-covered, so the cornstarch creates that beautiful crispy texture when cooked!
Cooking the Beef
Alright, it’s time to cook! Heat a large pan or wok over medium-high heat. You’ll want to add 1–2 tablespoons of vegetable or canola oil—just enough to coat the bottom. Once the oil is shimmering, it’s showtime! Cook the beef in small batches, making sure not to overcrowd the pan. This is key to getting that perfect sear. Each batch should only take about 30 seconds per side. Flip them just once for that gorgeous browning. Once they’re done, transfer them to a plate and keep going until all your beef is beautifully browned!
Making the Sauce
Now, let’s whip up that tasty sauce! In a small bowl, whisk together the low-sodium soy sauce, water, packed light brown sugar, and the cornstarch slurry you prepared earlier. This mixture is where the magic happens as it thickens up beautifully! Make sure everything is well combined—no lumps allowed! Once that’s done, reduce the heat on your pan to medium, and add the freshly grated ginger and minced garlic. Sauté them together for about 20 seconds until the kitchen smells heavenly!
Combining Ingredients
Next up, it’s time to bring it all together! Pour the sauce mixture into the same pan and let it simmer for about 2 minutes, stirring occasionally until it thickens slightly. Then, return your beautifully browned beef to the pan and toss it with the sauce, ensuring every piece is coated in that sweet and savory goodness. Cook for another 1–2 minutes just to warm everything through. Finally, stir in those chopped green onions for a fresh crunch, and you’re ready to serve!
Tips for Success
Alright, let’s make sure your Mongolian Beef turns out amazing every time! I’ve gathered some of my best tips to help you nail this dish, so you can impress friends and family with your cooking skills.
Use Flank Steak for Tenderness
Flank steak is the star of this dish, and trust me, it’s worth seeking out! Its lean texture makes it perfect for quick cooking, and slicing it thinly across the grain ensures it’s tender. If flank steak isn’t available, you can also use sirloin or skirt steak, but make sure to slice them thinly just like the flank.
Don’t Skip the Cornstarch Coating
This step is crucial for that crispy exterior! Make sure to coat the beef evenly in cornstarch—it really locks in moisture and gives it that restaurant-style crunch. If you want a bit of a twist, you can also mix in some garlic powder or five-spice powder with the cornstarch for extra flavor.
Cooking in Batches is Key
Cooking the beef in small batches prevents steaming and helps achieve that gorgeous golden-brown color. It may take a little longer, but trust me, it’s worth it! You want each piece to have enough space to sear properly. Don’t rush this step; patience pays off!
Adjust the Sweetness to Your Taste
If you love a sweeter sauce, feel free to add a bit more brown sugar. On the flip side, if you prefer a more savory flavor, you can reduce the sugar slightly. The beauty of this recipe is that you can customize it to your liking!
Pairing with Rice
Serving over hot cooked rice is non-negotiable! It soaks up that delicious sauce, creating a perfect balance. If you’re feeling adventurous, try serving it over fried rice or even quinoa for a unique twist!
Make-Ahead Tips
If you’re prepping for a busy week, consider making the sauce in advance! Just store it in the fridge, and it’ll be ready to go when you need it. You can also slice the beef ahead of time; just be sure to keep it refrigerated until you’re ready to cook.
With these tips, you’re all set to create delicious Mongolian Beef that will wow everyone at your dinner table! Enjoy the process and don’t forget to have fun in the kitchen!
Nutritional Information
Now, let’s talk about the nutritional side of this delicious Mongolian Beef! Keep in mind that these values are estimates and can vary based on the specific brands or ingredients you use. But here’s a general idea of what you can expect per serving:
- Serving Size: 1 serving
- Calories: 391 kcal
- Sugar: 27 g
- Sodium: 1219 mg
- Fat: 13 g
- Saturated Fat: 3 g
- Carbohydrates: 41 g
- Fiber: 1 g
- Protein: 28 g
This dish packs a good punch of protein thanks to the beef, along with a nice balance of carbs from the rice. Just be mindful of the sodium content if you’re watching your salt intake. Overall, it’s a satisfying meal that hits the mark for flavor and nutrition!
FAQ Section
Got questions about making the perfect Mongolian Beef? I’ve got you covered! Here are some common queries I often hear, along with my answers to help you out.
Can I use a different cut of beef?
Absolutely! While flank steak is my go-to for its tenderness and flavor, you can also use sirloin or skirt steak. Just remember, whichever cut you choose, slice it thinly against the grain to ensure it stays tender after cooking. Trust me, it makes a big difference!
What if I don’t have cornstarch?
No worries! If you’re out of cornstarch, you can substitute it with all-purpose flour, though it won’t give quite the same crispiness. Use about the same amount, but keep in mind that the texture might be a bit different. Just make sure to coat the beef well for the best results!
Can I make this dish gluten-free?
Yes, you can! Just swap out the regular soy sauce for gluten-free soy sauce, and you’re all set! This simple change allows you to enjoy all that delicious flavor without the gluten. It’s great how adaptable this recipe can be!
How spicy is Mongolian Beef?
Mongolian Beef is typically not spicy at all; it’s more about that sweet and savory flavor profile. But if you like a kick, feel free to add some red pepper flakes or even a dash of sriracha to the sauce. You can customize the spice level to suit your taste!
Can I freeze leftovers?
Yes, you can freeze Mongolian Beef! Just let it cool completely, then store it in an airtight container. It’ll keep well for up to three months. When you’re ready to eat, thaw it in the fridge overnight and reheat on the stove for the best results. Just be sure to add a splash of water to help revive that delicious sauce!
Why You’ll Love This Recipe
Let me just say, there’s a lot to love about this Mongolian Beef recipe! First off, it’s quick to make—seriously, you can have dinner on the table in just 30 minutes. Perfect for those frantic weeknights when you’re juggling a million things, right?
Next, it’s incredibly easy! Even if you’re a kitchen novice, the step-by-step instructions I’ve laid out will guide you through it without a hitch. No need for fancy techniques or exotic ingredients—just straightforward cooking that yields amazing results!
The flavor is where it really shines. You get that beautiful balance of sweet and savory that makes your taste buds sing. The tender beef coated in that rich sauce is simply irresistible! And the smell? Oh wow, it fills your kitchen with the comforting aroma of ginger and garlic, making everyone eager to dig in.
Plus, this recipe is super adaptable. Want to make it gluten-free? Just switch to gluten-free soy sauce. Need it to be a little spicier? Toss in some red pepper flakes! You can easily tweak the ingredients to suit your dietary needs or personal preferences.
So whether you’re cooking for the family or just treating yourself, this Mongolian Beef is a winner. It’s quick, easy, flavorful, and totally customizable—what’s not to love? Give it a try, and I promise you won’t regret it!
Storage & Reheating Instructions
Got some delicious Mongolian Beef leftovers? Lucky you! Properly storing and reheating this dish will keep those flavors intact and your meal just as tasty as the first time around.
First things first, let the Mongolian Beef cool completely before storing it. Once it’s cool, transfer it to an airtight container. I love using glass containers because they’re easy to clean and don’t retain odors. It should keep well in the fridge for about 3-4 days. If you want to keep it longer, you can freeze it! Just make sure to use a freezer-safe container, and it should last up to three months.
When it’s time to reheat, I recommend using the stove for the best results. Just add a splash of water or a little extra soy sauce to the pan to help revive the sauce and prevent it from drying out. Heat it over medium-low heat, stirring occasionally until it’s heated through. This usually takes about 5-10 minutes, depending on how much you’re reheating.
If you’re in a hurry, you can also use the microwave. Just place the Mongolian Beef in a microwave-safe dish, cover it with a lid or microwave-safe wrap, and heat on medium power for about 1-2 minutes. Stir halfway through to ensure even heating.
And there you have it! With these simple storage and reheating tips, your Mongolian Beef will taste just as incredible as when it was first cooked. Enjoy every last bite!
For more recipes follow me in page Pinterest.
Print
Mongolian Beef: 7 Irresistible Secrets for Deliciousness
- Total Time: 30 minutes
- Yield: 4 servings 1x
- Diet: Gluten Free
Description
A savory dish featuring tender beef in a sweet and salty sauce.
Ingredients
- 1 lb flank steak, sliced very thinly across the grain
- ⅓ cup cornstarch
- 2–4 tbsp vegetable or canola oil
- ½ cup low-sodium soy sauce
- ¼ cup water
- ½ cup packed light brown sugar
- 2 tsp cornstarch + 2 tsp water, mixed to make a slurry
- 1 tsp freshly grated ginger
- 4 cloves garlic, minced
- 1 bunch green onions, chopped
- 2–3 cups hot cooked rice, for serving
Instructions
- Slice the flank steak into ¼-inch (or thinner) slices across the grain.
- Lay the slices on a large baking sheet or cutting board and toss with ⅓ cup cornstarch to coat evenly.
- Heat a large pan or wok over medium-high heat.
- Add 1–2 tbsp oil and cook beef in small batches for ~30 seconds per side, just until browned. Flip only once.
- Remove cooked beef to a plate and repeat with remaining batches.
- In a small bowl, whisk together soy sauce, water, brown sugar, and the cornstarch slurry.
- In the same pan used for the beef, reduce heat to medium, add ginger and garlic, and sauté for ~20 seconds.
- Add the sauce mixture and simmer, stirring, until slightly thickened (~2 minutes).
- Return the beef to the pan and toss with the sauce. Cook 1–2 more minutes until warmed through.
- Stir in chopped green onions.
- Serve immediately over hot cooked rice.
Notes
- Make Ahead: Sauce can be prepared in advance and stored in the refrigerator. Meat can also be sliced ahead of time.
- Gluten-Free Option: Use gluten-free soy sauce.
- Prep Time: 15 minutes
- Cook Time: 15 minutes
- Category: Main Dish
- Method: Stir-fry
- Cuisine: Mongolian
Nutrition
- Serving Size: 1 serving
- Calories: 391 kcal
- Sugar: 27 g
- Sodium: 1219 mg
- Fat: 13 g
- Saturated Fat: 3 g
- Carbohydrates: 41 g
- Fiber: 1 g
- Protein: 28 g
Keywords: Mongolian Beef, Beef Stir-fry, Asian Cuisine