
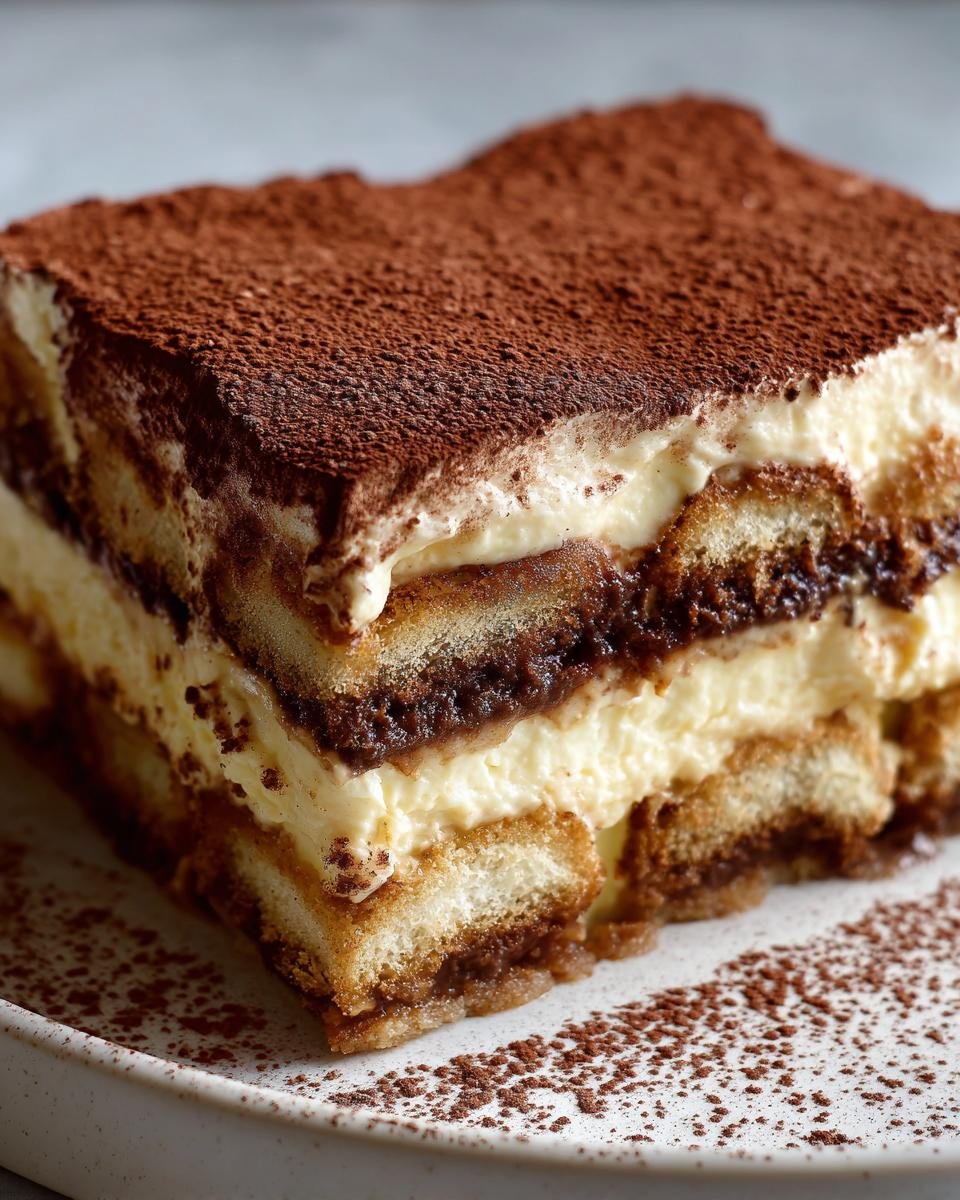
If you’re looking for a dessert that’s as easy as it is delicious, let me introduce you to my No-Bake Easy Tiramisu Recipe! This classic Italian treat is a total showstopper but comes together without ever turning on the oven. I mean, who doesn’t love a dessert that requires minimal effort yet delivers maximum flavor? It’s rich, creamy, and has that delightful coffee kick that makes every bite feel like a sweet little indulgence.

My first experience with tiramisu was at a cozy Italian restaurant on a rainy evening. The moment I took a bite, I was in dessert heaven! Fast forward to today, and I’ve perfected this no-bake version that captures all that same magic in just 20 minutes of prep time. Seriously, it’s that simple! Plus, it’s perfect for gatherings or a cozy night in when you want to impress without the fuss. Trust me, once you try it, you’ll wonder why you ever bothered with baked desserts! So grab your mixing bowls and let’s dive into this delightful recipe.
Ingredients List
Gather up these simple yet essential ingredients for my No-Bake Easy Tiramisu Recipe. You’ll be amazed at how these come together to create a creamy, coffee-infused delight!
- 1 ½ cups heavy cream, whipped until stiff peaks form
- 8 oz mascarpone cheese, at room temperature (this is key for a smooth filling!)
- ⅓ cup granulated sugar, to add just the right amount of sweetness
- 2 teaspoons vanilla extract, for that lovely aromatic touch
- 1 ½ cups strong espresso, cooled (you can use coffee if you prefer, but espresso adds that authentic kick)
- 1 package ladyfingers, which soak up all that delicious coffee flavor
- Cocoa powder, for dusting on top (don’t skimp on this; it’s the finishing touch!)
Make sure your mascarpone is at room temperature; this helps avoid any lumps in your creamy mixture, ensuring a silky-smooth tiramisu that everyone will love. Let’s get ready to whip this up!
How to Prepare the No-Bake Easy Tiramisu Recipe
Get ready to whip up a dessert that’s not only indulgent but also incredibly easy to make! Follow these straightforward steps, and you’ll have a scrumptious no-bake tiramisu ready to chill in no time.
Step-by-Step Instructions
Start by gathering all your ingredients and tools. You’ll need a stand mixer or a large bowl and a whisk if you’re feeling adventurous! Once you’re all set, let’s dive in:
- Whip the cream: In the bowl of your stand mixer, add 1 ½ cups of heavy cream, ⅓ cup of granulated sugar, and 2 teaspoons of vanilla extract. Whip these together until stiff peaks form. You want that cream to be thick and fluffy, so don’t rush this step! It’ll take a few minutes, but it’s worth it.
- Incorporate mascarpone: Now, gently fold in 8 oz of mascarpone cheese. This is where you need to be careful! You don’t want to overmix; just combine until it’s smooth and creamy. If you overmix, you risk losing that lovely light texture, and we definitely don’t want that.
- Prepare the espresso: Time to grab your coffee! Pour 1 ½ cups of cooled strong espresso into a shallow bowl. This is where the ladyfingers will soak up all that delicious coffee goodness. If you prefer, you can use coffee, but trust me, espresso really gives it that authentic flavor!
- Dip the ladyfingers: Quickly dip each ladyfinger into the espresso, making sure not to soak them too long—just a second or two will do. You want them to be flavorful but still hold their shape. Arrange the dipped ladyfingers in a single layer in an 8×8-inch baking dish, covering the bottom completely.
- Add the first layer: Spread half of your mascarpone mixture evenly over the layer of ladyfingers. Don’t worry about making it perfect; just get it nice and even!
- Repeat the process: Now it’s time for another layer! Dip more ladyfingers in the espresso and place them on top of the mascarpone layer. Then, spread the remaining mascarpone mixture over this second layer. You’re almost there!
- Dust with cocoa: Here comes the finishing touch! Generously dust the top with cocoa powder. This adds a delightful touch that just screams tiramisu.
- Chill: Cover your dish with plastic wrap and refrigerate for at least 3 hours, but if you can wait, let it chill overnight. This helps all those wonderful flavors meld together and makes for a creamier texture.
And voila! You’ve prepared a lovely no-bake tiramisu that’s sure to impress. Just remember, the waiting game is key—allowing it to chill overnight elevates the flavors to a whole new level. Enjoy every creamy, coffee-infused bite!
Why You’ll Love This Recipe
Let me tell you why my No-Bake Easy Tiramisu Recipe is a must-try for any dessert lover! Here are some of the fantastic benefits that make this dessert a standout:
- Quick Preparation: You can whip this up in just 20 minutes! Perfect for those last-minute dessert needs.
- No Baking Required: Forget about preheating the oven or worrying about baking times. This dessert is all about simplicity!
- Rich Flavor: The combination of creamy mascarpone, luscious whipped cream, and bold espresso creates a flavor explosion that’s simply irresistible.
- Perfect for Special Occasions: Whether you’re hosting a dinner party or celebrating a special event, this tiramisu is sure to impress your guests and elevate any gathering.
- Make-Ahead Convenience: It’s even better when made a day in advance! Letting it chill overnight allows those flavors to meld beautifully.
- Customizable: Feel free to play around with flavors! You can add a splash of coffee liqueur or even some chocolate shavings for an extra twist.
Seriously, once you taste this no-bake tiramisu, you’ll be hooked! It’s the perfect balance of ease and indulgence, making it a go-to recipe in my kitchen.
Tips for Success
To ensure your No-Bake Easy Tiramisu Recipe turns out absolutely perfect, I’ve got some essential tips that’ll help you nail every step. Trust me, these little tricks can make all the difference!
- Use Room Temperature Mascarpone: Make sure your mascarpone cheese is at room temperature before you start mixing. This helps create that smooth, creamy filling without any lumps. Cold mascarpone can be a real pain!
- Whip the Cream Properly: When whipping the heavy cream, be patient and make sure to whip it until stiff peaks form. This is crucial for giving your tiramisu that light and airy texture. If you don’t whip it enough, your dessert may end up too dense.
- Don’t Soak the Ladyfingers Too Long: When dipping the ladyfingers in espresso, be quick! A second or two is perfect—any longer and they can become too soggy. You want them to soak in just the right amount of coffee without falling apart.
- Layer Evenly: As you spread the mascarpone mixture over the ladyfingers, try to keep it as even as possible. It helps each bite have that perfect balance of flavors and textures. Don’t stress too much about perfection—just aim for even coverage!
- Chill, Chill, Chill: Patience is key! Allow your tiramisu to chill for at least 3 hours, but overnight is even better. This not only enhances the flavors but also allows the dessert to set properly, making it easier to slice and serve.
- Dust with Cocoa Right Before Serving: For that picture-perfect finish, dust the cocoa powder on top just before you serve it. This keeps it looking fresh and prevents it from absorbing moisture from the tiramisu.
With these tips in your back pocket, you’ll be well on your way to creating a stunning no-bake tiramisu that’ll impress anyone lucky enough to have a slice. Happy baking!
Nutritional Information Disclaimer
Please note that the nutritional information provided for my No-Bake Easy Tiramisu Recipe is an estimate and can vary based on the specific ingredients and brands used. Factors like portion sizes and preparation methods can also affect the final values. Typical values you might find include approximately 300 calories, 20g of fat, 4g of protein, and 30g of carbohydrates per slice, but these can fluctuate.
For the most accurate nutritional information, I recommend calculating based on the exact products you choose. Enjoy this delicious dessert, but always keep in mind that moderation is key when indulging in sweet treats like tiramisu!
FAQ Section
Can I make this recipe ahead of time?
Absolutely! In fact, making my No-Bake Easy Tiramisu Recipe ahead of time is one of the best ways to enhance its flavor. I recommend preparing it a day in advance if you can. This allows all those delicious layers of mascarpone and espresso to meld together beautifully, resulting in a richer taste and creamier texture. Just cover it tightly with plastic wrap after dusting with cocoa powder, and let it chill in the fridge overnight. Your future self will thank you!
Can I substitute ingredients?
Definitely! If you can’t find mascarpone cheese, a good substitute is a blend of cream cheese and heavy cream. Just mix equal parts until smooth, and you’ll get a nice creamy texture. For ladyfingers, you could use sponge cake cut into strips or even homemade biscotti in a pinch, though the texture might be a bit different. Just remember, the key to this dessert is that lovely coffee soak, so whatever you choose, make sure it can absorb that espresso goodness!
How long does the tiramisu last in the fridge?
Your No-Bake Easy Tiramisu will last about 3 to 4 days in the fridge. Just be sure to keep it covered to prevent it from drying out or absorbing any odors from the fridge. As it sits, the flavors will continue to deepen, making it even more delicious as the days go by! However, I recommend enjoying it within the first couple of days for the best texture and taste. If it’s still around after a few days, I’d be surprised—it’s so good, you’ll probably want to devour it all at once!
Storage & Reheating Instructions
Storing your No-Bake Easy Tiramisu properly is key to enjoying its deliciousness for a few days! Here’s how to keep it fresh:
After you’ve made your tiramisu and it’s chilled to perfection, cover the dish tightly with plastic wrap or aluminum foil. This helps prevent it from drying out and keeps those amazing flavors intact. You can also transfer individual slices into airtight containers if you want to store them separately. Just make sure to place a piece of parchment paper between layers to avoid sticking!
Your tiramisu will stay fresh in the fridge for about 3 to 4 days. The flavors actually develop more as it sits, which is a lovely bonus! However, I recommend enjoying it within the first couple of days for the best texture and taste. If you find yourself with any leftovers after that, just make sure to check for any changes in texture or smell before indulging.
Now, as for reheating—here’s the good news: there’s no need! This is a no-bake dessert, and it’s best served chilled. Just slice and serve straight from the fridge for that refreshing, creamy experience. If you prefer it a bit softer, let it sit at room temperature for about 15 minutes before serving. That way, you can enjoy every velvety bite just as it was meant to be savored!
For more recipes follow me in page Pinterest.
Print
No-Bake Easy Tiramisu Recipe: 20 Minutes to Dessert Perfection
- Total Time: 3 hours 20 minutes
- Yield: 8 servings 1x
- Diet: Vegetarian
Description
A simple and delicious no-bake tiramisu dessert.
Ingredients
- 1 ½ cups heavy cream
- 8 oz mascarpone cheese, at room temperature
- ⅓ cup granulated sugar
- 2 teaspoons vanilla extract
- 1 ½ cups strong espresso, cooled
- 1 package ladyfingers
- Cocoa powder, for dusting
Instructions
- In a stand mixer bowl, add the heavy cream, sugar, and vanilla extract. Whip until stiff peaks form.
- Add the mascarpone cheese and mix gently just until incorporated. Do not overmix. Set aside.
- Pour the cooled espresso into a shallow bowl. Quickly dip each ladyfinger into the espresso and arrange them in a single layer in an 8×8-inch baking dish.
- Spread half of the mascarpone mixture evenly over the ladyfingers.
- Repeat with another layer of espresso-dipped ladyfingers, then spread the remaining mascarpone mixture on top.
- Dust generously with cocoa powder.
- Refrigerate for at least 3 hours or overnight before serving.
Notes
- Mascarpone must be at room temperature to ensure a smooth, creamy filling. Cold mascarpone can cause lumps.
- For best texture and flavor, allow the tiramisu to chill overnight.
- Prep Time: 20 minutes
- Cook Time: 0 minutes
- Category: Dessert
- Method: No-Bake
- Cuisine: Italian
Nutrition
- Serving Size: 1 slice
- Calories: 300
- Sugar: 15g
- Sodium: 50mg
- Fat: 20g
- Saturated Fat: 10g
- Unsaturated Fat: 5g
- Trans Fat: 0g
- Carbohydrates: 30g
- Fiber: 1g
- Protein: 4g
- Cholesterol: 60mg
Keywords: No-Bake Easy Tiramisu Recipe